
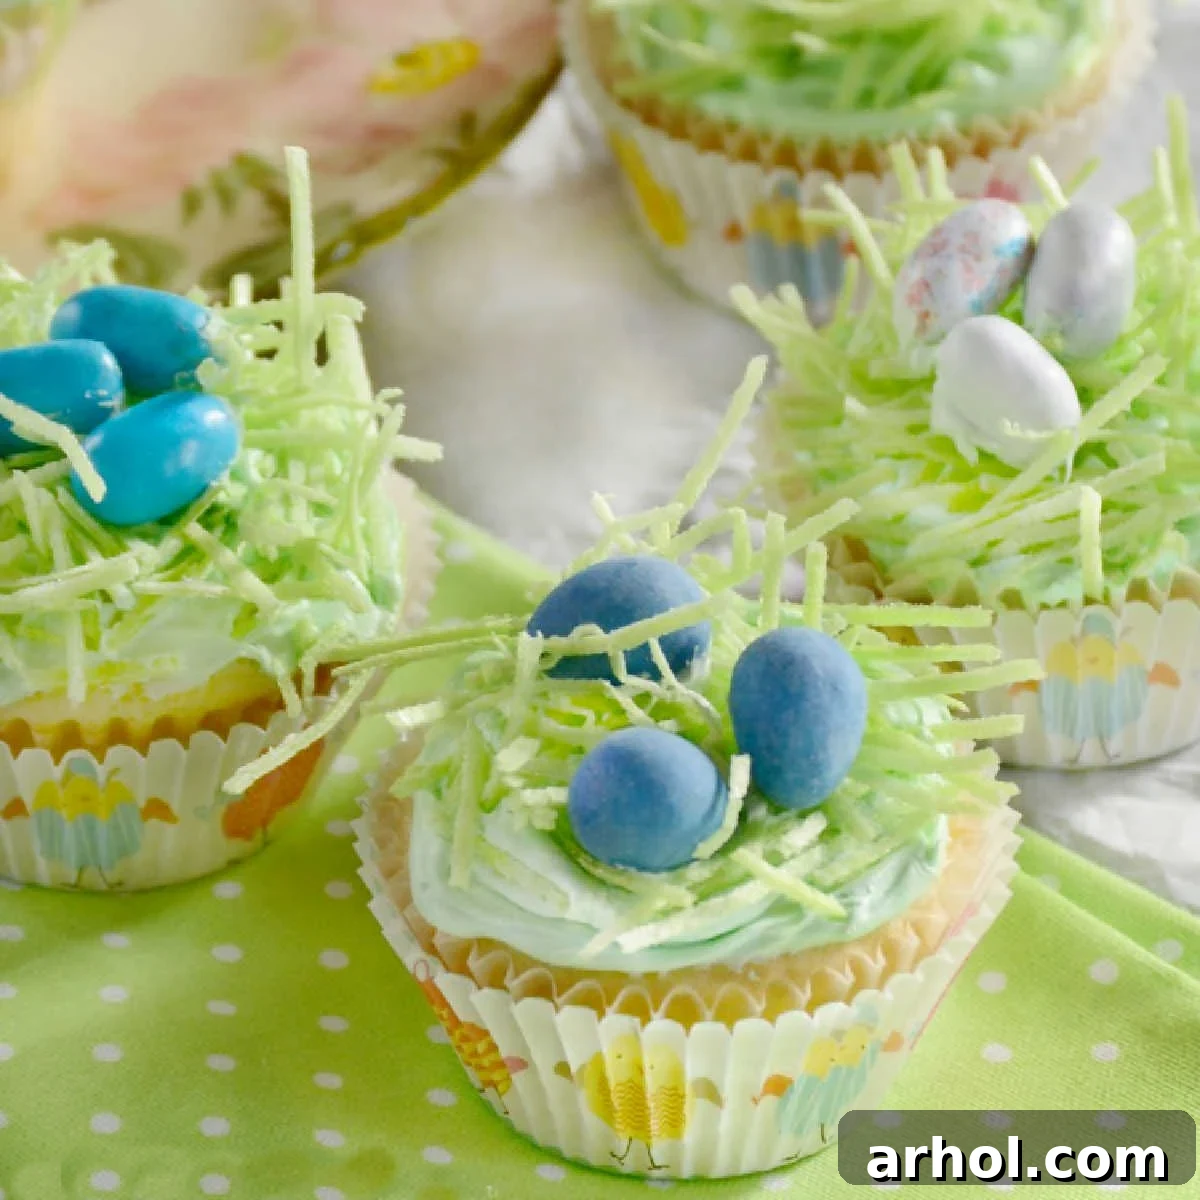
Celebrate Easter with adorable Bird’s Nest Cupcakes, a truly charming addition to any spring festivity. These delightful treats, beautifully adorned with vibrant edible Easter grass and colorful mini chocolate eggs, are not just incredibly sweet but also remarkably easy to prepare. They are the perfect dessert to cap off your Easter dinner, a wonderful centerpiece for a spring celebration, or a fun, family-friendly baking project that kids of all ages will love getting involved with. Get ready to impress with minimal effort!
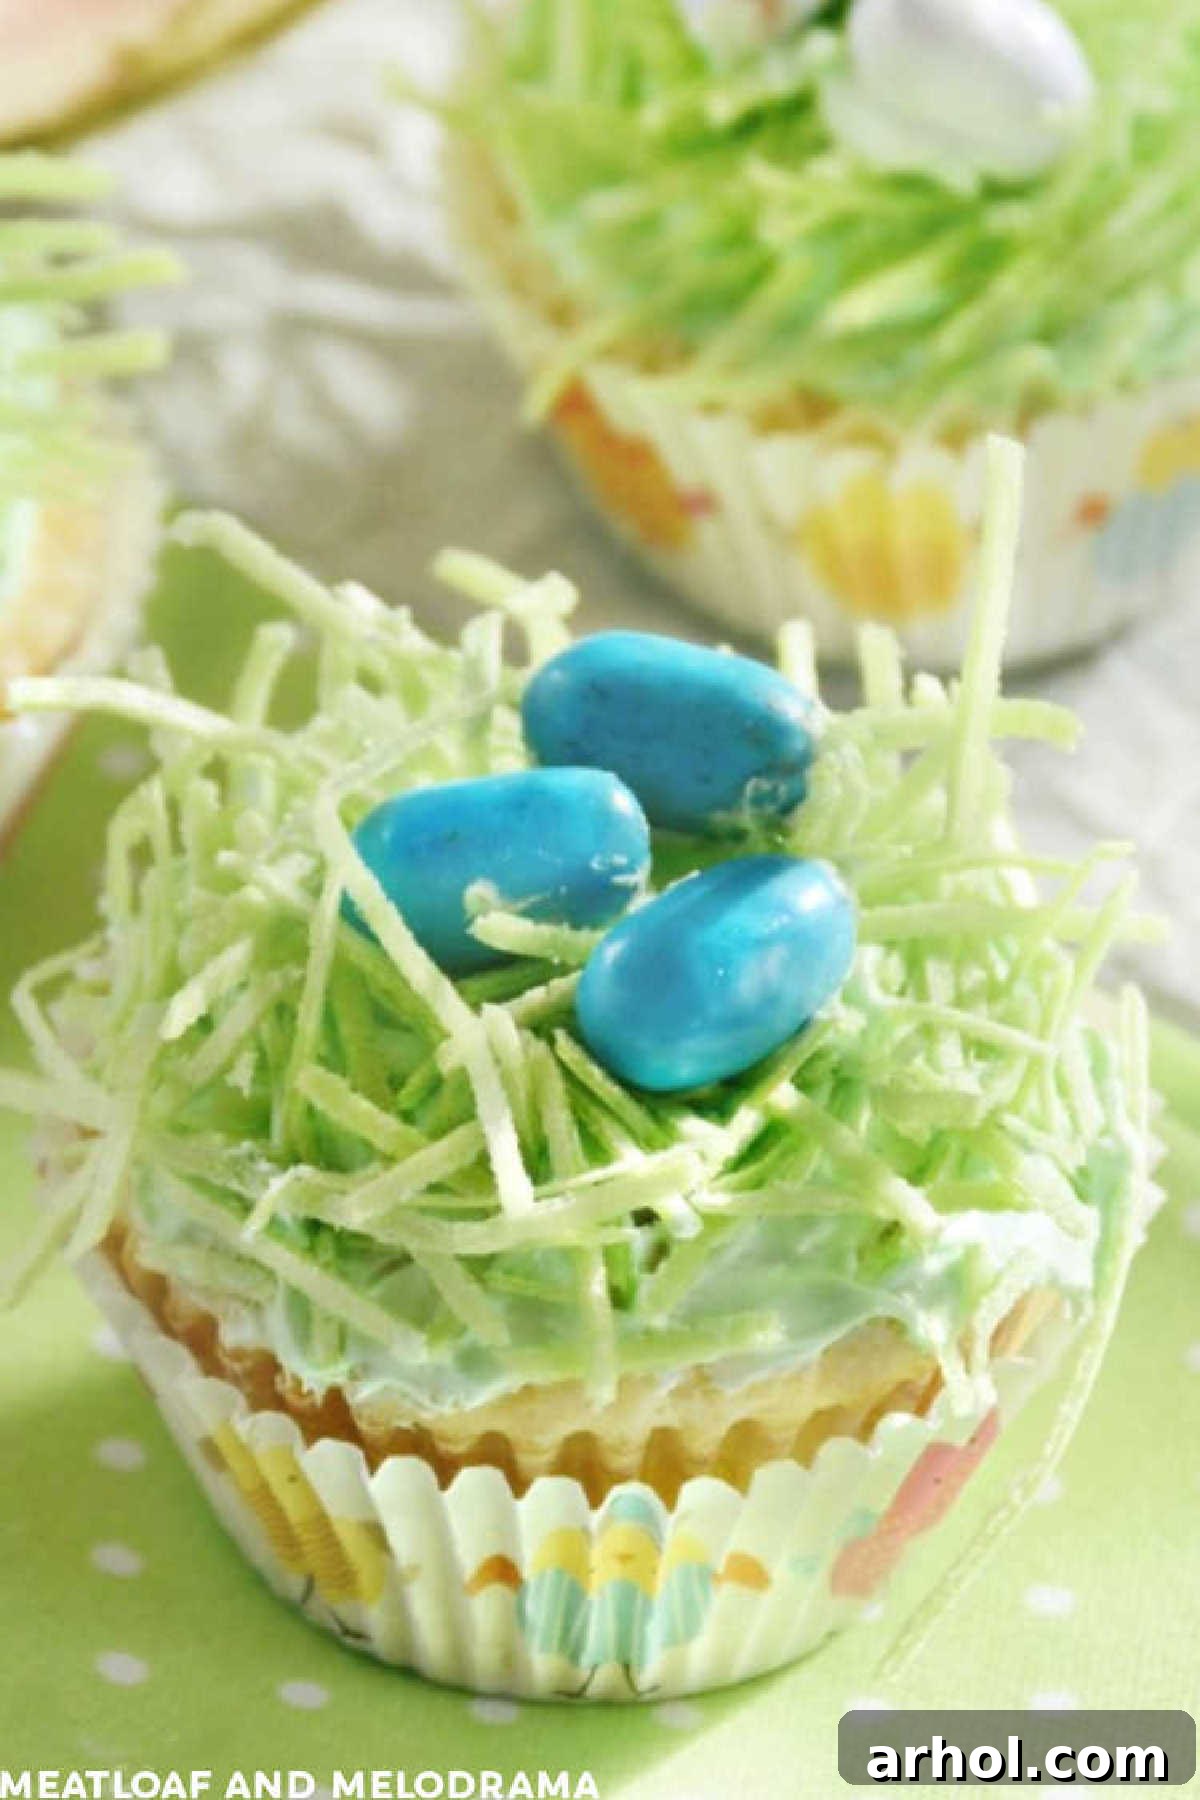
Table of Contents: Your Quick Guide to Festive Cupcakes
- The Easiest Easter Cupcake Recipe for Stress-Free Baking
- Gather Your Essential Ingredients for Bird’s Nest Cupcakes
- What is Edible Easter Grass? A Sweet Detail Explained
- Step-by-Step: Crafting Your Adorable Bird’s Nest Cupcakes
- Storage Tips: Keep Your Adorable Easter Cupcakes Fresh
- Creative Substitutions & Delicious Variations for Your Bird’s Nest Cupcakes
- Tips for Perfect Cupcakes Every Time
- Making Bird’s Nest Cupcakes a Family Tradition
- Bird’s Nest Easter Cupcakes Recipe Card
The Easiest Easter Cupcake Recipe for Stress-Free Baking
If you’re searching for an Easter dessert that’s both visually impressive and incredibly simple to execute, look no further! These charming Bird’s Nest Cupcakes are the perfect solution. Designed with ease in mind, this recipe beautifully transforms a standard box of cake mix into a festive, homemade-looking treat. Our goal is to make your holiday baking experience joyful and stress-free, allowing you more time to spend with loved ones and less time fussing over complicated steps.
We are firm believers that the best recipes often involve clever shortcuts, and this is certainly one of them. By starting with a quality box cake mix and convenient canned frosting, we’re able to streamline the baking process without sacrificing flavor or fun. When these cupcakes are crowned with vibrant edible Easter grass and delightful candy eggs, the whimsical decoration undeniably becomes the star of the show. Children, in particular, are captivated by the playful toppings, often focusing more on the imaginative design than whether the cupcake base was entirely from scratch. This approach ensures a delicious outcome with minimal effort, making it a win-win for busy bakers.
Let’s face it: during the bustling holiday season, you’re probably already preparing an elaborate Easter meal from scratch. An easy Easter dessert, therefore, isn’t just a convenience – it’s a welcomed necessity. These fun cupcakes offer the ideal balance of charming homemade appeal and effortless preparation, positioning them as the quintessential Easter treat that everyone, from the youngest guests to the oldest, will adore. Their quick assembly and delightful appearance guarantee smiles and satisfaction around the table.
For those eager to expand their collection of simple yet festive Easter desserts, we invite you to explore more of our cherished, easy-to-follow recipes. Consider our classic Easter Lamb Cake for a traditional and elegant centerpiece, our wonderfully rich Easter Brownies, or our ever-popular Mini Egg Cookies. You can also browse an extensive collection of our family’s favorite Easter Recipes, all crafted to make your holiday entertaining as enjoyable and seamless as possible.
Gather Your Essential Ingredients for Bird’s Nest Cupcakes
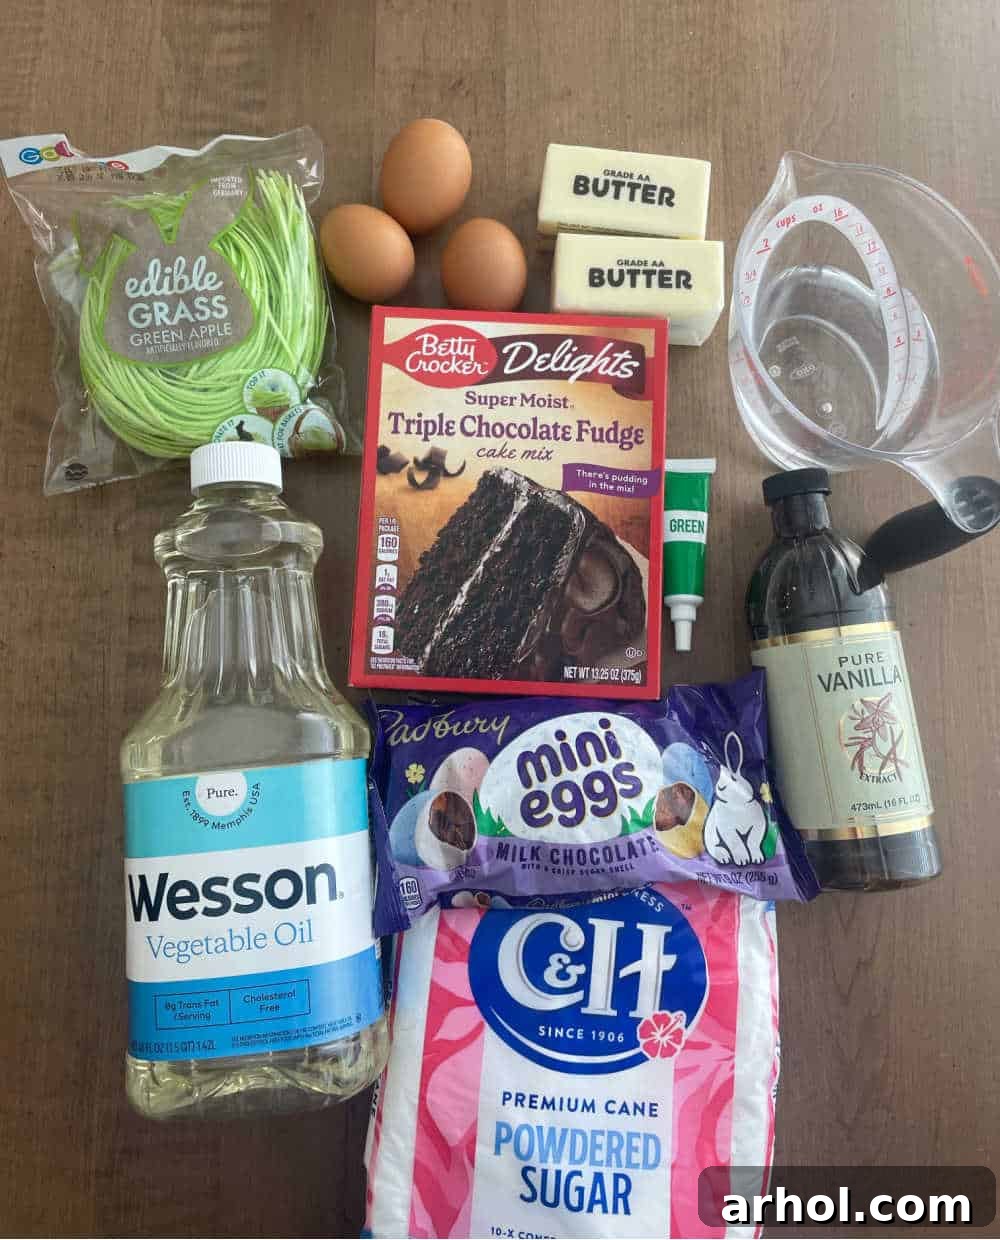
Crafting these delightful Bird’s Nest Cupcakes requires only a handful of readily available ingredients, ensuring a convenient and enjoyable baking experience. You’ll find everything you need at your local grocery store, making this an ideal last-minute baking project or a well-planned family activity. The full, precise amounts for each ingredient are thoughtfully detailed in the comprehensive printable recipe card located further down this page.
- Cake Mix: The cornerstone of our easy recipe! Any standard boxed cake mix will work beautifully as the base. For a bright, quintessential spring feel, we typically opt for a classic vanilla cake mix or a rich yellow cake mix. However, don’t hesitate to experiment with other flavors like a zesty lemon for an extra pop, or even a decadent chocolate for a different take on the bird’s nest theme. The versatility is part of the fun!
- Milk: While many box mixes simply call for water, substituting milk makes a significant difference. It adds a richer flavor profile and contributes to a more tender, moist crumb in your finished cupcakes. Whole milk offers the richest results, but 2% or even a suitable dairy-free alternative can be used successfully.
- Eggs: Fresh, large eggs are essential binders in this recipe, providing crucial structure and adding richness to your cupcakes. For optimal incorporation and a smoother batter, it’s always a good idea to ensure your eggs are at room temperature before you begin mixing.
- Coconut Oil, Vegetable Oil, or Melted Butter: This fat component plays a vital role in contributing to the cupcakes’ moisture and texture. Coconut oil lends a subtle hint of its unique flavor, while vegetable oil is a more neutral choice. Melted butter, though not always explicitly specified on box mix instructions, can impart a wonderfully delicious, buttery taste that truly elevates the base. Choose the option that best suits your preference!
- Vanilla Extract: A generous splash of pure vanilla extract is our little secret for enhancing and elevating the flavor of any yellow or white cake mix. It subtly boosts the overall sweetness, adds a warm, inviting aroma, and gives your baked goods a more “homemade” taste. This simple addition makes a noticeable improvement, so don’t skip it!
- Frosting: For ultimate convenience and ease, we highly recommend using a good quality can of vanilla frosting. It’s perfectly sweet, readily available, and creates a smooth, ideal base for your edible nests. However, if you have a preference for homemade, a classic buttercream frosting or a tangy cream cheese frosting would also be absolutely delightful.
- Green Food Dye: Just a few drops of green food coloring are all it takes to transform your white vanilla frosting into the perfect, vibrant “grass” for your bird’s nests. Gel food coloring often provides a more intense and consistent hue with less liquid, which is ideal for maintaining frosting consistency.
- Edible Easter Grass: This is the charming, iconic element that makes these cupcakes truly special and instantly recognizable! You can often find edible Easter grass in the seasonal aisle of major retailers like Target, Walmart, or specialty candy stores during the Easter season. It’s also widely available online for easy ordering.
- Mini Candy Eggs: These adorable “eggs” are the final, irresistible touch that completes your whimsical nests! Cadbury Mini Eggs are a classic favorite, known for their crunchy shell and rich chocolatey center. However, any small, egg-shaped chocolate candies or even robin’s egg candies will work wonderfully to fill your edible nests.
What is Edible Easter Grass? A Sweet Detail Explained
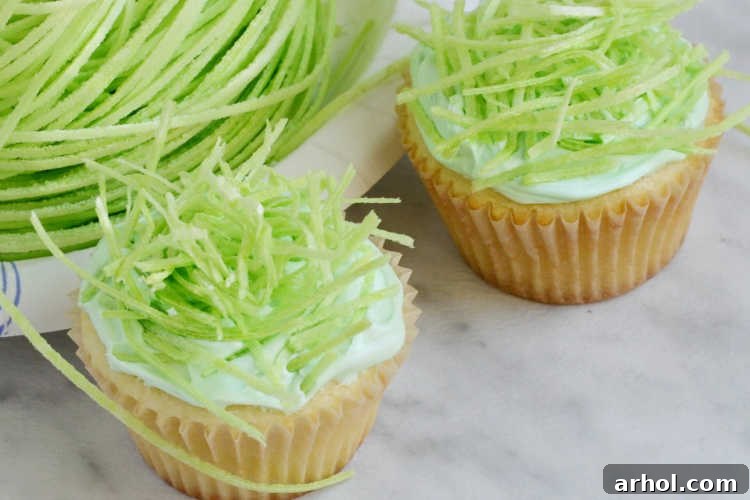
Edible Easter grass is a whimsical and utterly fun confectionery product specifically designed to mimic the appearance of real grass, making it an ideal decoration for spring and Easter-themed treats. Unlike its plastic counterpart, this version is completely safe and enjoyable to eat, adding an extra layer of delight to your desserts.
Typically, edible Easter grass is crafted primarily from potato starch, which gives it a distinctively chewy yet pliable texture. It’s then infused with various artificial colorings, most commonly a vibrant green, and sweeteners to ensure it has a pleasant taste. This combination results in a visually appealing and tasty component for your baked goods.
You’ll usually find edible Easter grass readily available in many grocery stores and large retail chains such as Walmart or Target, especially during the festive Easter season. Look for it in the baking aisle alongside other holiday sprinkles and cake decorations, or sometimes in the seasonal candy section. For those who prefer the convenience of online shopping, a quick search will reveal numerous options from various brands, allowing you to easily stock up for your spring baking projects. When purchasing, it’s always a good practice to check the ingredients list if you have any specific dietary concerns or allergies.
While edible Easter grass is a popular and delightful choice for these Bird’s Nest Cupcakes, don’t worry if you find it elusive or simply prefer an alternative. We understand that availability can vary, or you might be looking for a different texture or flavor profile. That’s why we’ve dedicated a section to several creative substitutions in our “Recipe Substitutions and Variations” guide. Options like homemade tinted shredded coconut or even crunchy chow mein noodles can bring your bird’s nest cupcakes to life with similar charm and delicious results!
Step-by-Step: Crafting Your Adorable Bird’s Nest Cupcakes
Making these Bird’s Nest Cupcakes is a truly delightful and incredibly straightforward process, making it perfect even for beginner bakers or for involving little helpers in the kitchen. While we cleverly start with a convenient box cake mix, we’ve incorporated a few simple yet impactful adjustments. These tweaks are designed to ensure your easy cupcakes taste even better, offering that desirable moist texture and a hint of homemade touch that everyone will appreciate. For instance, we recommend using milk instead of water for a richer batter, and incorporating a touch of coconut oil (or your preferred oil/melted butter) along with a dash of vanilla extract to significantly enhance the flavor profile. Our family has thoroughly tested and enthusiastically approves of these subtle but powerful modifications!
Of course, if you happen to have a cherished, tried-and-true homemade cupcake recipe that you swear by, you should absolutely feel free to use that as your base. The true magic and immense fun of this recipe lie primarily in the creative decorating phase, so choose the cupcake foundation that best suits your comfort level, baking style, and available time. Whether from a box or from scratch, the end result will be a charming, festive dessert.
Baking the Cupcakes:
- Prepare the Batter: Begin by preheating your oven to 350°F (175°C). In a large mixing bowl, combine the cake mix, milk, eggs, coconut oil (or your chosen fat), and vanilla extract. Using an electric mixer on medium speed, beat all the ingredients together for approximately 2 minutes, or until the batter appears smooth and thoroughly well-combined. Ensure there are no dry pockets of cake mix remaining at the bottom or sides of the bowl.
- Fill the Muffin Tin: Line a standard 12-cup muffin tin with paper cupcake liners. If you anticipate transferring the baked cupcakes into fancier decorative paper liners for presentation later, consider using parchment paper cups for the initial baking process. Fill each cupcake liner about two-thirds full with the prepared batter. This crucial step ensures that the cupcakes bake evenly and rise beautifully without overflowing their cups.
- Bake to Perfection: Carefully place the filled muffin tin into your preheated oven and bake for approximately 15 to 18 minutes. Please note that actual baking times can vary slightly depending on the specifics of your oven, so it’s always best to keep a close eye on them. The cupcakes are perfectly baked when a clean toothpick inserted gently into the center of a cupcake comes out clean.
- Cool Completely: Once baked, promptly remove the cupcakes from the oven. Allow them to cool within the muffin tin for a few minutes before carefully transferring them to a wire rack to finish cooling completely. This step is absolutely crucial: attempting to frost warm cupcakes will inevitably lead to melted frosting and a messy, unappealing result! Patience here ensures a beautiful final product.
Decorating the Bird’s Nests:
This is where the real fun and creativity begin! The decorating phase is a fantastic opportunity to personalize these treats and create wonderful, lasting memories with family and friends. It’s particularly ideal for involving children, as they can contribute significantly and enjoy the hands-on process.
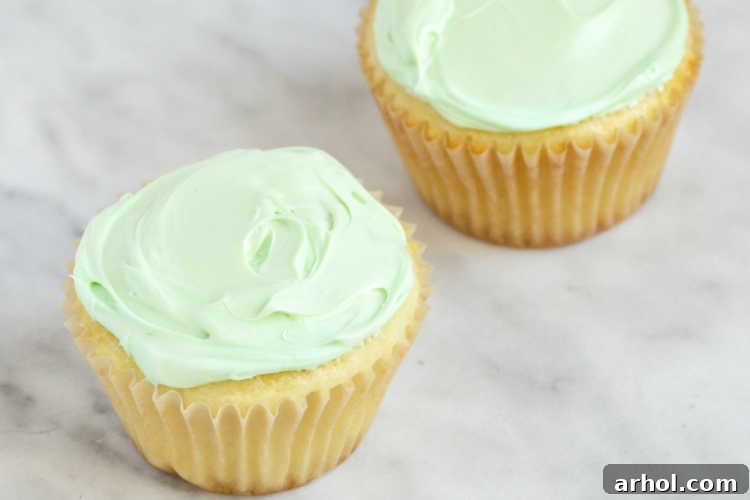
- Tint the Frosting: Take your can of vanilla frosting and spoon it into a medium-sized mixing bowl. Add approximately 2 to 3 drops of green food coloring. You can adjust the quantity until you achieve your desired shade of “grass” green. Mix the frosting thoroughly with a spoon or spatula until the color is evenly distributed and no streaks remain.
- Frost the Cupcakes: Using a butter knife, a small offset spatula, or even a basic spoon, spread a thin, even layer of the tinted green frosting over the top of each completely cooled cupcake. This verdant green base will serve as the “ground” for your edible nests and will help the Easter grass adhere securely. Don’t worry too much about achieving absolute perfection here; a slightly rustic or handmade look is often part of the charm!
- Create the Edible Nests: Now for the signature bird’s nests! Take a small, manageable amount of edible Easter grass and gently form it into a loose, circular nest shape directly on top of the frosted cupcake. We’ve found that it’s often easier to achieve a more natural-looking nest by chopping the edible grass into smaller, more manageable pieces beforehand. You can do this quickly and safely using kitchen scissors or a sharp knife. Arrange these smaller pieces in different directions to create a textured, organic, and realistic appearance. Remember, genuine bird’s nests in nature are rarely perfectly uniform, so embrace their charmingly imperfect appeal!
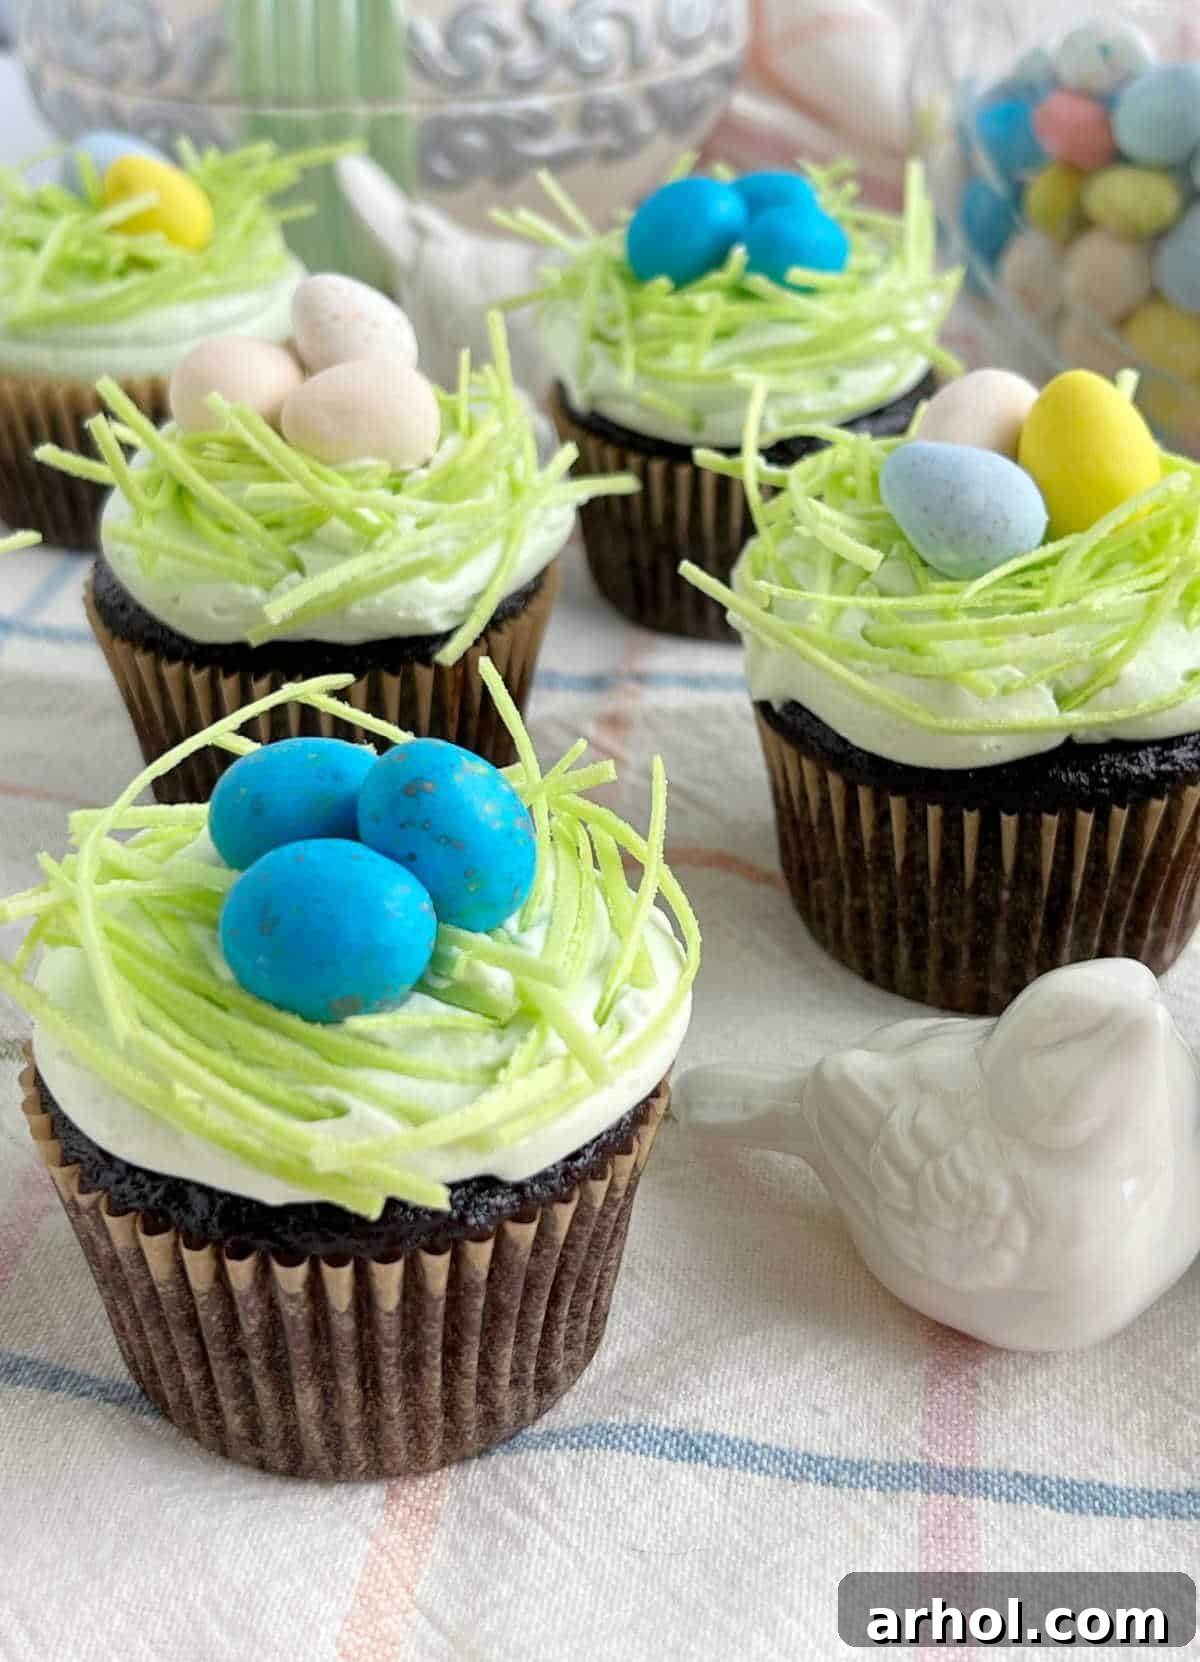
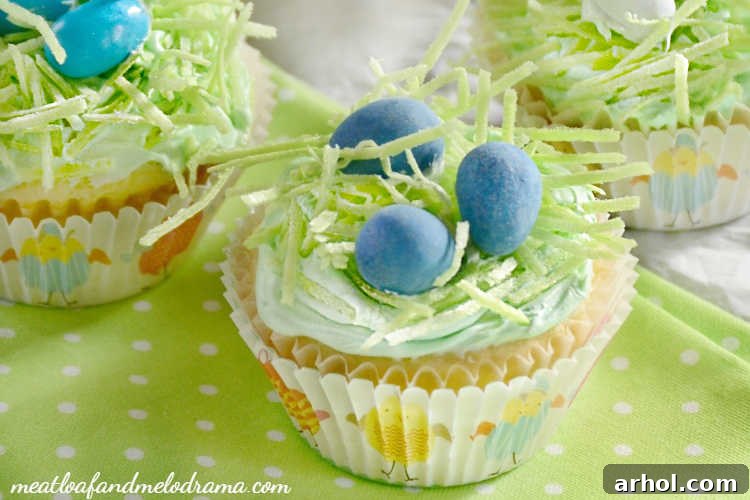
- Add the Mini Eggs: The final, most delightful touch! Carefully place 2 to 3 mini chocolate candy eggs into the very center of each edible nest. This is an especially fantastic step for children to assist with, as they typically adore arranging the colorful eggs and seeing their creations come to life. You might playfully discover that not all of the chocolate candy eggs make it directly onto the cupcakes – some may mysteriously disappear into eager little hands – but you’ll undoubtedly have more than enough for a beautiful and complete display.
Storage Tips: Keep Your Adorable Easter Cupcakes Fresh
Ensuring proper storage is paramount to keeping your festive Bird’s Nest Cupcakes tasting delightful and looking their absolute best for several days after baking. Follow these guidelines to maintain their freshness and charm:
- Room Temperature Storage for Standard Frosting: For cupcakes that are frosted with canned vanilla frosting (or any homemade buttercream made with shortening or a combination of powdered sugar and butter), these adorable treats can be safely stored in an airtight container at room temperature. Choose a cool, dry place, keeping them away from direct sunlight or any sources of heat. When stored correctly, they should remain fresh and wonderfully delicious for 3 to 4 days, making them perfect for enjoying throughout the Easter weekend.
- Refrigeration for Dairy-Based Frostings: It is critically important to note that if you choose to use a cream cheese frosting, a whipped cream frosting, or any frosting that contains fresh dairy ingredients, these cupcakes *must* be stored in the refrigerator. This is to prevent any spoilage and ensure food safety. To enjoy them at their optimal flavor and texture, allow them to come to room temperature for about 15-20 minutes before serving.
- Smart Make-Ahead Tips for Holiday Planning: To make your holiday preparations even smoother and minimize last-minute stress, you can certainly prepare components of these Easter cupcakes ahead of time:
- Bake and Freeze Plain Cupcakes: Unfrosted cupcakes are excellent candidates for freezing. Once they have completely cooled, wrap each cupcake individually and securely in plastic wrap, then place them in an airtight freezer-safe bag or container. They can be stored in the freezer for up to 3 months. When you’re ready to decorate, simply thaw them at room temperature for a few hours before proceeding with frosting.
- Decorate the Day Before Serving: The entire batch of cupcakes can be decorated completely the day before you plan to serve them. This allows you to tackle the fun and creative decorating phase without the pressure of rushing on Easter Sunday itself! Just remember to store them according to the type of frosting you’ve used (either at room temperature or in the refrigerator, as advised above).
Creative Substitutions & Delicious Variations for Your Bird’s Nest Cupcakes
These Bird’s Nest Cupcakes have been a cherished tradition in our family for many years, and during that time, we’ve delighted in discovering countless ways to customize and adapt the basic recipe. This allows you to effortlessly suit different tastes, accommodate dietary needs, or simply work with whatever ingredients you have on hand. Feel empowered to get creative and make these festive treats uniquely your own!
- Edible Grass Alternatives: If you find edible Easter grass elusive, or if you simply wish to explore other textures and flavors, here are some fantastic substitutes for your charming nests:
- Tinted Shredded Coconut: This is a superb and readily available alternative. To make it, place shredded coconut (sweetened or unsweetened) in a resealable plastic bag, add a few drops of green food coloring, and shake vigorously until the color is evenly distributed throughout the coconut. Allow it to air dry for a few minutes on parchment paper before arranging it on your cupcakes. It adds a lovely textural element and a delicious coconut flavor.
- Toasted Coconut: For a slightly deeper flavor and a more “earthy,” rustic nest appearance, gently toast shredded coconut in a dry skillet over medium heat, stirring frequently, until it turns a beautiful golden brown. This creates a wonderfully aromatic and natural-looking nest.
- Chow Mein Noodles: Believe it or not, crispy chow mein noodles offer an unexpectedly delightful, savory-sweet “nest”! They provide a unique crunch and an interesting twist. You can lightly toss them with a tiny bit of melted butter and green food coloring if you desire to mimic the grass look, or leave them plain for a more organic, twig-like nest appearance.
- Piped Frosting Nests: For those who enjoy a bit of piping work, you can use green-tinted frosting to pipe the nests directly onto your cupcakes. Fit a piping bag with a small star tip (such as Wilton 1M or 21), or simply snip a small hole in the corner of a sturdy resealable food-storage bag. Pipe concentric circles to build up a charming nest shape.
- Green Candy Sprinkles: While not quite forming a “nest,” green candy sprinkles can effectively give a simple grassy effect if you’re truly in a pinch or short on time for more elaborate decorating.
- Frosting Freedom: While a can of vanilla frosting provides ultimate simplicity and a sweet base, feel absolutely free to use your favorite frosting recipe:
- Homemade Buttercream Frosting: A classic homemade buttercream offers a richer, more luxurious taste and can be effortlessly tinted green to your desired shade.
- Cream Cheese Frosting: For a delightful tangy contrast to the sweet cake, cream cheese frosting is always a crowd-pleaser. Just remember that cupcakes with cream cheese frosting will need to be stored in the refrigerator.
- Chocolate Frosting: If you’re opting for chocolate cupcakes as your base, a rich chocolate buttercream or a smooth chocolate ganache would create a decadent, dark, and earthy nest.
- Cupcake Base Variations: Customize the very foundation of your nests with different cake flavors:
- Chocolate Cupcakes: Simply swap out the white or yellow cake mix for a chocolate cake mix to create deeply rich, chocolatey nests that are sure to satisfy any cocoa lover.
- Lemon or Carrot Cake: Embrace other vibrant spring flavors! A lemon cake mix with lemon-tinted frosting would offer a wonderfully zesty and refreshing take, while a carrot cake recipe could provide a more sophisticated and spiced base.
- Homemade Cupcake Recipe: For those who prefer the satisfaction of baking entirely from scratch, use your absolute favorite vanilla, chocolate, or even a spiced cupcake recipe as the foundational base for these festive treats.
- Egg-cellent Candy Choices: Don’t feel limited to just Cadbury Mini Eggs! The world of candy offers many wonderful “egg” options:
- Jelly Beans: Colorful, egg-shaped jelly beans are a classic Easter candy and work perfectly as vibrant, chewy eggs in your nests.
- M&M’s Easter Eggs: These come in lovely pastel shades and offer a satisfying crunch, making them a fun and popular alternative.
- Chocolate-Covered Almonds: For a more refined or gourmet touch, small, egg-shaped chocolate-covered almonds or other nuts can be used.
- Gummy Eggs: If you’re looking for a softer, chewy, and fruity option, keep an eye out for gummy candies specifically shaped like eggs.
- Seasonal Adaptations: While these cupcakes are undeniably perfect for Easter, their charming theme can easily be adapted for other spring occasions. Consider changing the color scheme of the “grass” or the type of “eggs” (e.g., small edible flowers for Mother’s Day, pastel candies for baby showers, or colorful sprinkles for garden parties) to suit any spring celebration.
Tips for Perfect Cupcakes Every Time
Even when taking the convenient route with a box mix, a few simple yet essential baking tips can significantly elevate your Bird’s Nest Cupcakes, transforming them from merely good to absolutely fantastic. These small adjustments ensure a consistent texture, optimal flavor, and a professional-looking finish.
- Ensure Room Temperature Ingredients: For a smoother, more homogeneously emulsified batter, it’s always best to ensure your eggs and milk (if you’re using it instead of water) are brought to room temperature before you begin mixing. Ingredients at a similar temperature combine more evenly, leading to a lighter, fluffier cupcake texture.
- Avoid Overmixing the Batter: When combining your cupcake batter, mix it just until the ingredients are fully incorporated and smooth. It’s crucial not to overmix, as this can overdevelop the gluten in the flour, which leads to tough, dry, and less tender cupcakes. Stop mixing as soon as no dry streaks of flour remain.
- Use an Ice Cream Scoop for Uniformity: To achieve perfectly uniform cupcakes that bake evenly and look professional, utilize an ice cream scoop to portion out the batter into your lined muffin tin. This simple trick ensures that each cupcake is roughly the same size, promoting consistent baking times and consistent appearance.
- Do Not Overfill Cupcake Liners: Always fill your cupcake liners approximately two-thirds full. This allows ample room for the cupcakes to rise beautifully in the oven without the risk of overflowing their cups, which can lead to messy baking and uneven tops. A perfectly filled liner results in a lovely, slightly domed cupcake.
- Rotate Your Pan for Even Baking: If you notice that your oven tends to have hot spots, a great tip is to rotate your cupcake pan 180 degrees halfway through the baking time. This simple action helps to ensure more even baking across all the cupcakes, preventing some from browning too quickly while others remain undercooked.
- Crucial: Cool Completely Before Frosting: As emphasized in the instructions, this step is absolutely non-negotiable! Attempting to apply frosting to cupcakes that are still warm, even slightly, will inevitably result in the frosting melting, sliding off, and creating a very messy and unappealing situation. Patience is truly a virtue when it comes to cooling your cupcakes fully on a wire rack.
- Invest in Quality Decorations: While using a cake mix is a fantastic shortcut for the cake base, investing in good quality edible Easter grass and mini candy eggs is highly recommended. The visual appeal and the charming aesthetic are a huge part of this dessert’s overall charm and festive impact, so choose your toppings wisely for the best results.
Making Bird’s Nest Cupcakes a Family Tradition
Beyond simply being a delicious and visually appealing dessert, the process of baking and decorating these Bird’s Nest Cupcakes holds the potential to become a truly cherished and heartwarming Easter family tradition. The inherent simplicity of this recipe makes it uniquely ideal for involving children of all ages, transforming a kitchen activity into a memorable, shared experience.
Little ones can enthusiastically assist with various steps: carefully stirring ingredients (always under adult supervision, of course), enthusiastically tinting the vanilla frosting with green food coloring, delicately placing the strands of edible grass to form the nests, and most excitingly, arranging the colorful mini chocolate eggs into their newly formed homes. Older children can take on more responsibility, helping with measuring, mixing, and even guiding their younger siblings through the decorating process.
This hands-on activity does more than just produce delightful treats; it actively fosters creativity, introduces and teaches fundamental kitchen skills in a fun environment, and most importantly, creates wonderful, lasting family memories. Imagine the genuine delight and pride on their faces as they see their own culinary creations come to life, transforming simple cupcakes into edible works of art that are as charming as they are tasty. These shared moments in the kitchen, filled with laughter, learning, and the sweet aroma of baking, are often the ones we look back on with the fondest memories, seamlessly connecting generations through the pure joy of shared baking and festive celebration. So, gather your family, perhaps put on some festive spring music, and embark on creating some sweet Easter magic together that will be remembered for years to come!
Print Recipe
Bird’s Nest Easter Cupcakes
Dee
5 minutes
15 minutes
1 hour
1 hour 20 minutes
24 cupcakes
Ingredients
- 1 box of white cake mix
- 2 large eggs
- 1 ¼ cups milk
- ⅓ cup coconut oil or vegetable oil or melted butter
- 1 teaspoon vanilla extract
- 1 can vanilla frosting
- 3 drops green food coloring
- Edible Easter grass
- Miniature candy eggs
Instructions
- Preheat oven to 350℉ (175°C).
- Combine the cake mix, milk, eggs, coconut oil, and vanilla extract in a large bowl, and mix well until smooth.
- Line a muffin tin with paper liners and pour batter into each cup, filling about two-thirds full.
- Bake for 15 to 18 minutes or until a toothpick inserted into the center of a cupcake comes out clean.
- Let cupcakes cool completely on a wire rack.
- Add green food coloring to the vanilla frosting and mix well until desired color is achieved.
- Spread a thin layer of the green frosting on each cooled cupcake.
- Gently form edible Easter grass into a nest shape on top of the frosted cupcakes and place 2-3 mini candy eggs in the center of each nest.
- Enjoy your festive Bird’s Nest Easter Cupcakes!
Video Tutorial (Optional)
A video tutorial demonstrating the steps for these Bird’s Nest Cupcakes can be found here: Watch the Bird’s Nest Cupcakes Video
Notes
Feel free to use any flavor of cake mix you prefer, or substitute with your favorite homemade cupcake recipe and buttercream frosting for a more from-scratch approach.
Nutrition
Calories: 118kcal
Carbohydrates: 18g
Protein: 2g
Fat: 4g
Saturated Fat: 3g
Cholesterol: 15mg
Sodium: 160mg
Potassium: 36mg
Fiber: 1g
Sugar: 10g
Vitamin A: 32IU
Calcium: 64mg
Iron: 1mg
Nutrition information is automatically calculated and should only be used as an approximation. It can vary based on specific brands and ingredient choices.
Additional Info
Dessert
American
Like this festive recipe? We’d love to hear from you! Please consider leaving a star rating and a comment below to share your experience. Your feedback helps us grow and inspires other bakers!
We sincerely hope you and your loved ones immensely enjoy making and devouring these adorable Bird’s Nest Cupcakes as much as our family does. These sweet treats are truly perfect to serve after your traditional Easter dinner, for a cheerful Mother’s Day brunch, as a delightful addition to a spring birthday party, or any gathering that calls for a touch of seasonal whimsy. They’re guaranteed to bring a smile to every face and a burst of joy to any occasion!
For more incredibly easy Easter desserts, a plethora of simple everyday recipes, and fuss-free desserts that anyone can master regardless of their baking experience, be sure to sign up for our weekly newsletter. You’ll receive fresh ideas, handy tips, and seasonal recipes delivered straight to your inbox! And don’t forget to follow us on social media for daily inspiration, behind-the-scenes glimpses, and to join our vibrant community of home bakers. Happy baking!

This beloved recipe was originally published in 2016 and meticulously updated in 2024 to provide even more helpful tips, detailed instructions, and creative variations for your baking pleasure, ensuring it remains a timeless favorite.