
Have you been admiring those stylish, industrial-chic metal letters that are trending in home decor right now? They’re everywhere from boutique stores to high-end interior designs, adding a touch of rustic elegance or modern edge to any space. While undeniably beautiful, the price tag often keeps them out of reach for many budget-conscious decorators. But what if I told you that you could achieve that sought-after metallic look for a fraction of the cost, right in your own home?
That’s exactly what I set out to do when I wanted to add some personalized charm to my son’s airplane-themed bedroom. Rather than splurging on expensive store-bought versions, I discovered a creative and incredibly easy way to craft my own **DIY faux metal letters** using simple craft supplies and a clever painting technique. This project is not only affordable but also immensely satisfying, allowing you to customize your decor to perfection.
Crafting Your Own Faux Metal Letters: An Affordable & Stylish DIY Guide
The beauty of DIY projects lies in their ability to transform ordinary materials into extraordinary decor. This faux metal letter tutorial is a prime example, turning humble chipwood letters into eye-catching statement pieces that perfectly mimic the appearance of real metal. Whether you’re decorating a child’s room, adding a personal touch to your living space, or searching for a unique gift, these customizable letters are a fantastic solution.
Why Choose DIY for Metal Letters?
The decision to go the DIY route for decorative metal letters offers numerous advantages over purchasing them pre-made:
- Cost-Effectiveness: This is arguably the biggest benefit. Real metal letters, especially larger ones, can be quite expensive. By using inexpensive chipwood letters and basic craft paint, you can achieve a similar high-end look for less than $10, often saving you hundreds of dollars.
- Unmatched Customization: When you craft your own letters, you have complete control over every detail. Choose any word, phrase, or initial that holds special meaning to you. Experiment with different font styles (though pre-cut chipwood letters offer a great starting point) and adjust the finish to match your specific decor style, whether you prefer a subtle sheen or a heavily distressed, aged look.
- Personal Satisfaction: There’s immense joy and pride in creating something beautiful with your own hands. These DIY projects add a unique, personal touch to your home that store-bought items simply can’t replicate. It’s a conversation starter and a testament to your creativity.
- Accessibility: This project requires minimal specialized skills or tools, making it accessible even for novice crafters. If you can paint, you can create these letters!
Planning Your Personalized Project
Before diving into the paint, a little planning goes a long way. Consider the purpose and placement of your letters.
Selecting Your Word or Phrase
For my son’s aviation-themed room, the word “SOAR” felt incredibly fitting. It evokes images of airplanes in flight and adds an inspirational message. Think about the recipient or the room’s theme. Common choices include names, initials, inspirational words like “HOME,” “LOVE,” “DREAM,” or “EXPLORE.” The word should resonate with the space and its inhabitants.
Choosing the Right Letters
Inexpensive chipwood letters are the perfect foundation for this project. You can find them at most craft stores in various sizes and fonts. They are lightweight, porous, and take paint beautifully. Look for sales or use coupons to maximize your savings. Other options include MDF letters or even thick cardboard letters, but chipwood generally offers the best balance of cost and durability for this technique.
Preparing the Canvas: The Background Board
Initially, I envisioned the letters mounted on a background board to give them more presence. My husband cut some pine boards and glued them together to create a solid backing. Since my little guy’s bedroom wall is a dark blue, he thought it would be fun to paint the background white, resembling a cloud. This idea is still a work in progress, as we’re aiming for a cloud-like aesthetic that truly captures his approval!
A background board isn’t strictly necessary, but it can elevate the display, adding depth and visual interest. Consider these background options:
- Painted Wood: As I’m doing, painted wood can complement your room’s color scheme. Distressed wood can also enhance the rustic faux metal look.
- Fabric or Wallpaper: A board covered in a coordinating fabric or a bold wallpaper can create a striking contrast.
- Gallery Wall Integration: The letters can be part of a larger gallery wall, surrounded by framed photos or other artwork.
If you opt for a background, ensure it’s smooth and clean. Light sanding and a coat of primer can help the paint adhere better, especially if you’re using fresh wood.
Essential Materials for Your Faux Metal Finish
Gathering your materials is the first concrete step in bringing your vision to life. Luckily, the supply list is short and sweet:
- Chipwood Letters: As mentioned, these are your affordable starting point. Choose the size and font that best fits your design.
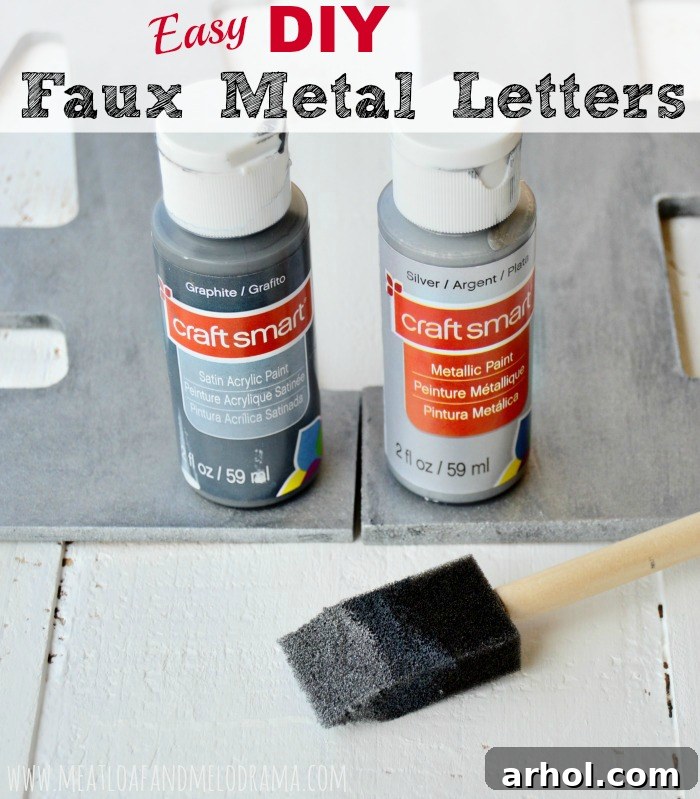
- Craft Paint in Graphite or Dark Grey: This will serve as your base coat, providing the crucial dark undertone that makes the metallic silver pop. While black paint works, I personally prefer graphite for its slightly softer, more authentic “aged metal” feel.
- Metallic Silver Craft Paint: The star of the show! A good quality metallic silver paint will give you that realistic sheen.
- Foam Brush: Essential for applying the paint. A slightly dry foam brush is key to achieving that distressed, textured metal look. You might want a few on hand.
- Paper Plate or Paint Palette: For dispensing paint.
- Drop Cloth or Newspaper: To protect your work surface.
- Optional: Clear sealant (matte or glossy, depending on your desired final look) for added durability, particularly if the letters will be in a high-traffic area.
Step-by-Step Guide to Your Faux Metal Masterpiece
Now, let’s get to the fun part – the painting! This process is straightforward, but paying attention to the details will ensure a stunning result.
Step 1: Apply the Base Coat (Graphite/Dark Grey)
Begin by giving each chipwood letter a light, even coat of your chosen dark grey or graphite paint. This layer is fundamental, as it mimics the dark oxidation or primer often found beneath worn metal. Ensure full coverage, getting into all the edges and crevices. Don’t worry if it’s not perfectly uniform; minor imperfections here can actually enhance the weathered look later on.
Allow this first coat to dry completely. Drying times can vary depending on the paint brand and humidity, so check the manufacturer’s instructions, but usually, 30 minutes to an hour is sufficient for craft acrylics.
Step 2: Achieving the Metallic Sheen (Silver Top Coat)
Once your graphite base coat is dry, it’s time to introduce the metallic magic. Apply two thin coats of metallic silver paint over the dark base. Here’s where the technique really shines:
- Thin Coats are Key: Avoid thick, gloopy layers. Thin coats build up the metallic effect gradually and allow the underlying dark color to peek through subtly, creating depth.
- The Dry Brush Technique: This is crucial for a realistic faux metal texture. I used the same foam brush for both colors. After applying the first metallic silver coat, if the brush is slightly dry for the second coat, it’s perfect. A slightly dry brush won’t lay down a completely opaque layer, but rather a more textured, streaky finish. This allows hints of the darker graphite to show through, mimicking the way light reflects off worn, brushed, or slightly rusted metal.
- Building Texture: With each thin, slightly dry pass of the metallic silver, you’ll notice a rougher, more authentic texture emerging. This isn’t about perfect smoothness; it’s about creating the illusion of aged metal. Focus on brushing lightly over the raised areas and edges, letting the darker base naturally recess in the grooves.
Allow each silver coat to dry thoroughly before applying the next. This ensures proper adhesion and prevents smudging.
Step 3: Drying and Optional Sealing
After your final coat of metallic silver, allow the letters to dry completely for at least 24 hours to ensure the paint has fully cured. For added protection and durability, especially if the letters might be handled frequently, you can apply a clear acrylic sealant. A matte sealant will maintain the rustic look, while a glossy one will enhance the metallic shine even further. Always apply sealants in thin, even coats in a well-ventilated area.
The Stunning Transformation: Revealing Your DIY Creation
The finished faux metal letters are truly impressive. It’s often hard to capture the full metallic shimmer and textured depth in photographs, but in person, the finish appears much shinier and more authentic than you might expect. Both my son and I were absolutely thrilled with how they turned out!
As for the background, you can catch a glimpse of the white board in some of the photos. While it’s still awaiting its final “cloud” transformation to perfectly complement his airplane room, the letters themselves are ready for display. Once the background is fully perfected and installed on his wall, I’ll be sure to share the complete look!
Beyond the “SOAR”: Other Inspiring Ideas
This faux metal technique isn’t limited to just one word or theme. The possibilities for personalization are endless:
The Versatility of Faux Metal
- Family Names or Initials: Create a personalized display for your living room, entryway, or mantelpiece.
- Inspirational Quotes: Longer phrases can be created using smaller letters and arranged artfully.
- Nursery Decor: Spell out a baby’s name or a sweet sentiment for a charming and custom nursery touch.
- Seasonal Decor: Craft words like “FALL,” “JOY,” or “GATHER” for festive seasonal displays.
Exploring Other Faux Finishes
Don’t stop at silver! This same layering technique can be adapted to mimic other metals:
- Faux Copper: Use a dark brown or black base with metallic copper paint.
- Aged Bronze: A dark brown or green base with metallic bronze paint can create a beautiful antique look.
- Distressed Gold: A dark brown base with metallic gold paint offers a rich, opulent, yet aged finish.
Experiment with different base colors and metallic topcoats to achieve unique effects that perfectly suit your home’s aesthetic.
Unbeatable Value: The Cost-Saving Advantage of DIY
One of the most rewarding aspects of this project is the incredible cost savings. Making these faux metal letters cost me less than $10! The chipboard letters were on sale, and I even had a coupon that covered the entire purchase, including the paint. This is an astounding saving when you consider how much real metal letters can cost at most retail stores, often ranging from $30-$100+ per letter depending on size and material. It’s a testament to the power of DIY – not only do you save money, but you also get a custom piece that’s made with love and perfectly tailored to your space.
Conclusion: Embrace the Joy of DIY!
Creating these **DIY faux metal letters** was an incredibly simple and rewarding experience. It demonstrates that you don’t need a huge budget or advanced crafting skills to achieve stunning, high-end decor. With a bit of creativity and some basic supplies, you can transform ordinary items into personalized masterpieces that truly reflect your style.
I encourage you to give this project a try! It’s a fantastic way to add character to any room, personalize gifts, and discover the immense satisfaction that comes from making something beautiful with your own hands. Happy crafting!
Thanks so much for stopping by and reading about this fun project.