
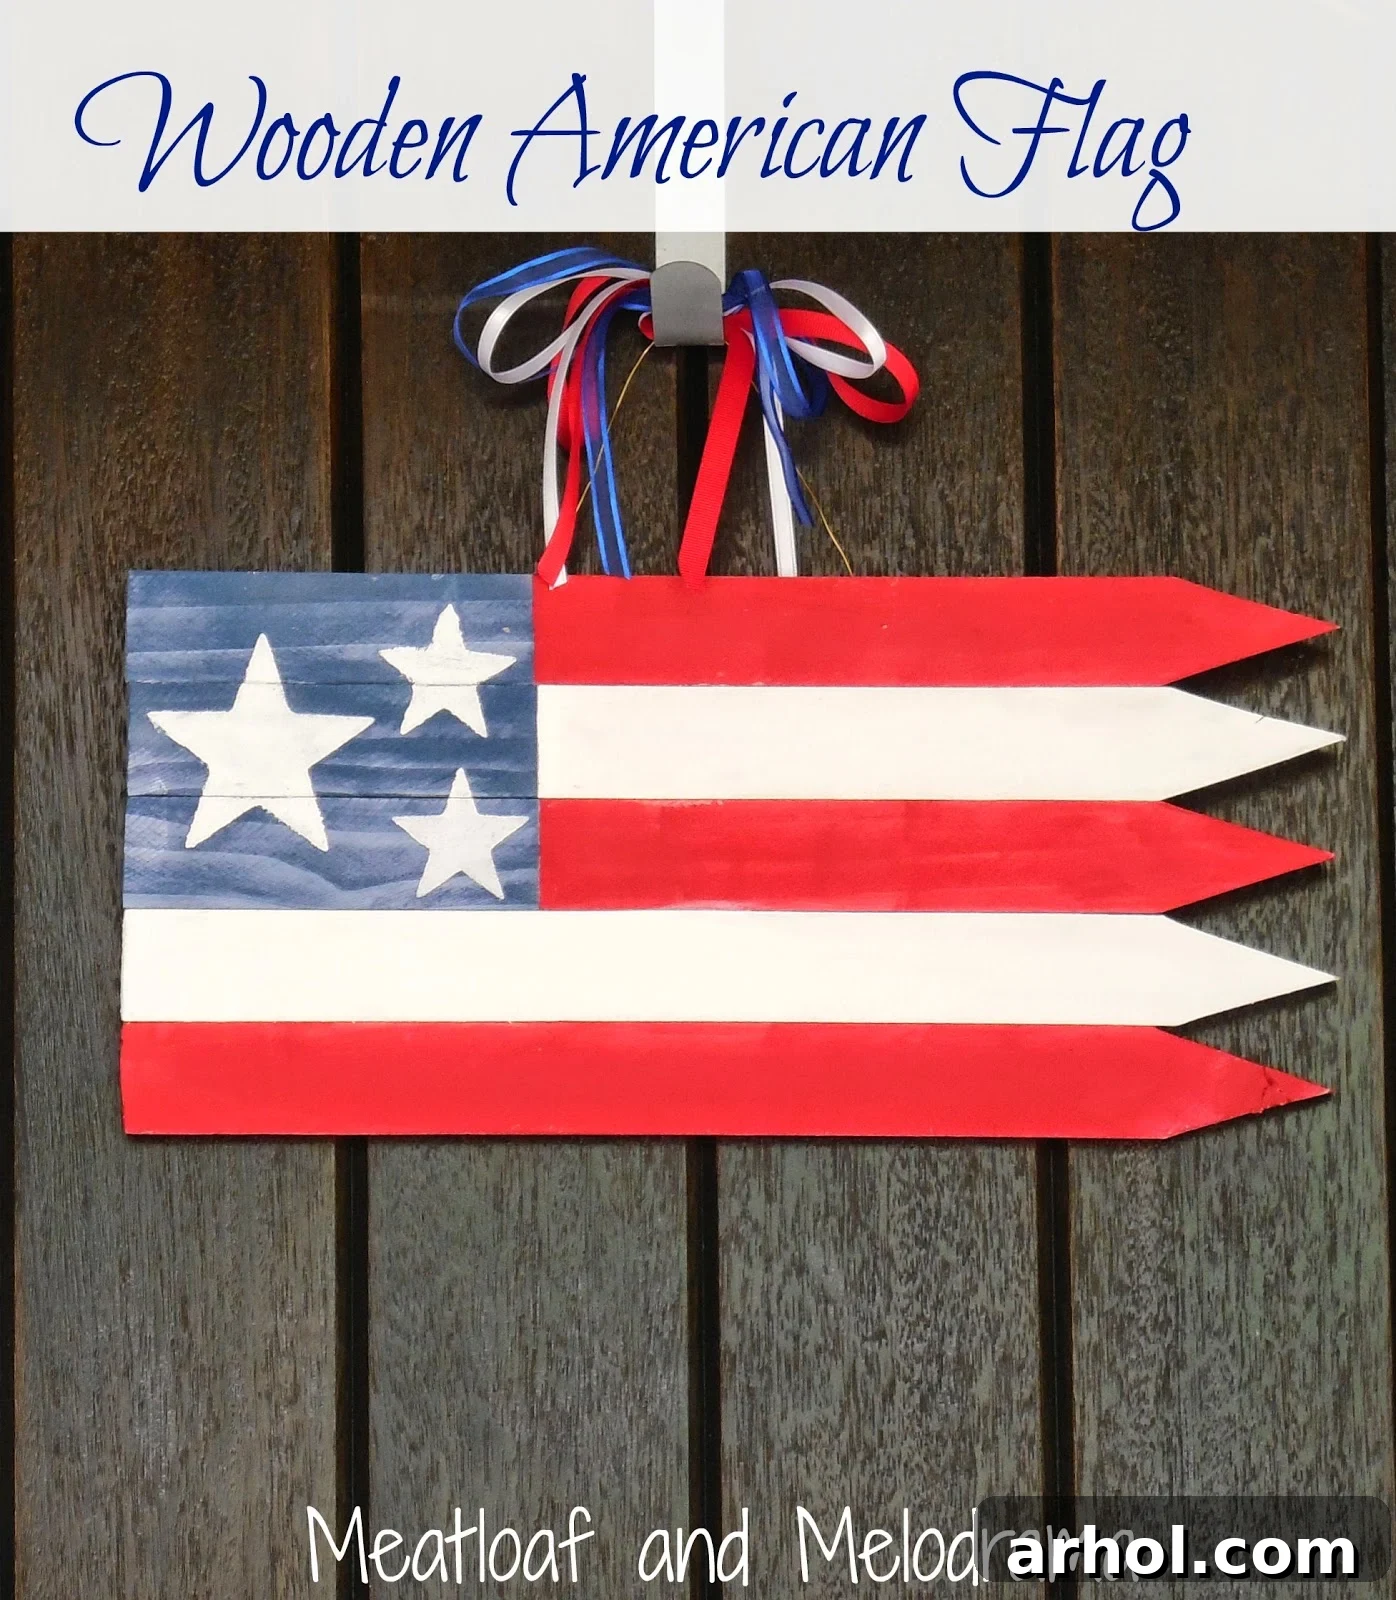
DIY Rustic Wooden American Flag: A Step-by-Step Guide to Patriotic Decor
Hello fellow DIY enthusiasts and patriotic decorators!
Can you believe the summer holidays are just around the corner? With Memorial Day, Flag Day, and the Fourth of July rapidly approaching, it’s the perfect time to infuse our homes and outdoor spaces with a touch of patriotic charm. If you’ve been following my creative journey, you know my passion for crafting unique wooden signs and decor pieces. So, it comes as no surprise that I simply had to create my very own wooden American flag! This project is not only incredibly rewarding but also offers a wonderful opportunity to add a personalized touch to your festive decorations.
Why Choose a DIY Wooden Flag for Your Patriotic Celebrations?
There’s something uniquely satisfying about creating your own holiday decor. Beyond the personal fulfillment, a DIY wooden flag offers numerous advantages. It allows for complete customization, enabling you to match your existing home aesthetics, whether you prefer a distressed farmhouse look, a crisp modern finish, or a vibrant traditional style. Plus, it’s an excellent way to upcycle materials you might already have, making it a budget-friendly and environmentally conscious craft. This particular project is a fantastic example of transforming simple garden stakes into a beautiful, meaningful piece of art for your home.
Project Overview: Your Own Rustic American Flag
This project is remarkably straightforward, requiring minimal tools and a dash of creativity. For me, it was practically a zero-cost endeavor because I had all the necessary supplies on hand. Remember those wooden garden stakes left over from my rustic mantel fence project? They were practically begging to be repurposed from their cozy corner in the garage! If you’re a fellow DIY enthusiast, you’ll undoubtedly understand that urge to give forgotten materials a new lease on life.
Transforming these humble stakes into a symbol of national pride is not just a craft; it’s an experience. It’s a chance to engage your hands and mind, resulting in a unique piece that holds a story and a special place in your home. This flag isn’t just decor; it’s a testament to your creativity and spirit.
Materials You’ll Need for Your Wooden Flag Project
Gathering your supplies is the first exciting step. Here’s what you’ll need to embark on your wooden flag-making journey:
- Wooden Garden Stakes: The star of our project! You can purchase new ones or repurpose old ones like I did. The number will depend on your desired flag size. My husband graciously helped cut mine to uniform size, ensuring a cohesive look.
- Paint: You’ll need red, white, and blue paint. Acrylic craft paints work wonderfully, offering a wide range of colors and easy cleanup. Consider exterior paint if your flag will be displayed outdoors for enhanced durability.
- Wood Glue: A strong wood adhesive or construction adhesive will be essential to securely bind your stakes together, ensuring your flag lasts for many seasons.
- Star Stencils: To create those iconic stars. You can find these at most craft stores, or even cut your own from cardstock if you’re feeling extra crafty.
- Screws: Two small screws will be needed for attaching the hanger to the back of your flag.
- Thin Wire: Durable yet flexible wire for creating a robust hanging mechanism.
- Ribbon: Red, white, and blue ribbons will add a beautiful decorative touch to your hanger, elevating the overall presentation.
Having all your materials organized before you begin will make the crafting process much smoother and more enjoyable!
Step-by-Step Guide: Crafting Your Patriotic Wooden Flag
Step 1: Preparing Your Wooden Stakes
Once you have your garden stakes, the first order of business is preparing them. My wonderful husband cut the stakes to my desired length, ensuring they were uniform. The key here is consistency, as this will lay the foundation for a professional-looking flag. After the cutting, I meticulously sanded each piece until they were reasonably smooth to the touch. Sanding isn’t just about aesthetics; it helps the paint adhere better and provides a safer surface, free from splinters. This initial preparation ensures a smooth canvas for your artistic endeavors.
Step 2: Laying the Foundation – The Blue Union
With your stakes prepped, it’s time for the vibrant colors to come to life! I started by laying out three of the stakes side-by-side, taping them together temporarily with painter’s tape or duct tape to keep them aligned. Then, I spray-painted a crisp blue square onto the upper left portion of these three stakes – this will become the “union” where our stars will reside. I opted for spray paint in this initial step purely because I loved the specific shade of blue it provided. However, a word to the wise: spray painting outdoors can sometimes be a battle against the elements! The wind often decides to make an appearance, adding a bit of an unpredictable flair. For the remainder of the flag, to ensure more control and precision, I switched to traditional craft paint.
When painting, remember that you only need to paint the surfaces that will be visible. Don’t forget to paint the sides and ends of your stakes as well, as this creates a polished, finished look, especially important for a rustic piece where imperfections add character, but unpainted edges can detract. This step is crucial for establishing the iconic design of the American flag.
Step 3: Stripes of Glory – Painting the Red and White
Now for the stripes! This part of the painting process moves quite quickly, especially since you’re focused on the visible surfaces. A valuable tip I learned: it’s much easier to paint the red and white stripes on individual stakes before you glue them all together. This method allows for cleaner lines and makes it significantly simpler to keep your stripes perfectly even and distinct. Imagine trying to paint straight lines on an already assembled, slightly uneven surface – it’s a challenge! By painting them separately, you gain precision and avoid accidental color bleeding.
Alternate painting your stakes red and white. If your design requires some stakes to be partially red/white and partially blue (within the union area), simply mask off the blue section once it’s dry before applying the stripe colors. This careful attention to detail will ensure your flag looks sharp and professional.
Step 4: Assembling Your Flag
Once all your painted stakes are completely dry – and I mean completely, to avoid smudges or sticking – it’s time to bring your flag together. Carefully apply wood glue along the sides of each stake and press them firmly together. Work methodically, ensuring each stake aligns perfectly with its neighbors. Clamps can be incredibly useful here to hold everything tightly in place while the glue sets. Allow ample drying time, as specified by your glue manufacturer, to ensure a strong and lasting bond. A well-assembled flag will withstand the elements and proudly display its colors for years to come.
Step 5: Adding the Stars
With the structure of your flag complete and the glue fully cured, it’s time for the stars! Position your star stencils on the blue union field. You can choose to stencil 50 stars, or a symbolic number, depending on the size of your blue section and your aesthetic preference. I had my enthusiastic little helper demonstrate this step, making it a fun activity for the whole family! We used the same star stencil that I previously used to create the flag table in my son’s room, which adds a lovely continuity to our home decor themes. Apply white paint carefully with a sponge or a stencil brush, dabbing gently to prevent paint from seeping under the stencil. Remove the stencil promptly for clean, crisp stars.
Step 6: Ready for Display – Creating a Hanger
If you plan to display your beautiful wooden flag on a door or wall, adding a secure hanger is essential. Flip your flag over to its backside. Measure and mark two spots, typically towards the top corners, where you’ll attach your hanger. Insert two small screws partway into these marked spots, leaving enough of the screw head exposed to wrap wire around. Then, take a length of thin, strong wire and wrap each end securely around one of the exposed screw heads, forming a sturdy loop for hanging. To add an extra touch of festive flair, I tied a charming bow made from red, white, and blue ribbons around the wire hanger. This not only enhances its visual appeal but also makes it truly ready for presentation.
Displaying Your Handcrafted Flag
And there you have it! That’s all it takes to create a stunning, personalized patriotic flag for your front door or any other prominent spot. The beauty of this wooden flag is its versatility. It makes a grand statement adorning your front door, welcoming guests with a burst of patriotic spirit.
Three cheers for the red, white, and blue! This rustic wooden flag is perfect for all patriotic holidays – Memorial Day, Flag Day, and Independence Day. Its timeless appeal also means it would look absolutely fantastic as year-round decor inside your home, perhaps above a mantel, in an entryway, or even as part of a gallery wall. It blends seamlessly with various decor styles, from farmhouse to traditional, bringing a touch of heartfelt Americana wherever it’s placed. Consider adding a protective sealant if you plan to keep it outdoors for extended periods to guard against the elements.
Tips for Success and Customization
- Weatherproofing: If your flag will be exposed to the elements, apply a few coats of clear, exterior-grade sealant or varnish to protect the wood and paint from moisture and UV damage.
- Distressed Look: For a more rustic or farmhouse feel, lightly sand the painted surfaces after they’ve dried to create a distressed effect, allowing some of the natural wood grain to show through.
- Alternative Materials: Don’t have garden stakes? Consider using pallet wood, scrap lumber, or even popsicle sticks for smaller versions!
- Star Variations: Instead of stenciling, you could use vinyl star decals, adhesive felt stars, or even hand-paint stars if you have a steady hand.
- Size Matters: Adjust the number and length of your stakes to create a flag that perfectly fits your desired display area.
Crafting this wooden American flag is more than just a DIY project; it’s an act of celebrating patriotism and personal creativity. It’s a statement piece that not only decorates your home but also embodies a sense of national pride and the satisfaction of making something beautiful with your own hands. This project is accessible to crafters of all skill levels and offers a truly rewarding experience, culminating in a cherished piece of decor.
Thanks for visiting me today, folks! I hope this tutorial inspires you to create your own unique patriotic decor. Have a wonderful week filled with creativity and celebration!
Sharing this inspiring project at:
- Share Your Style