
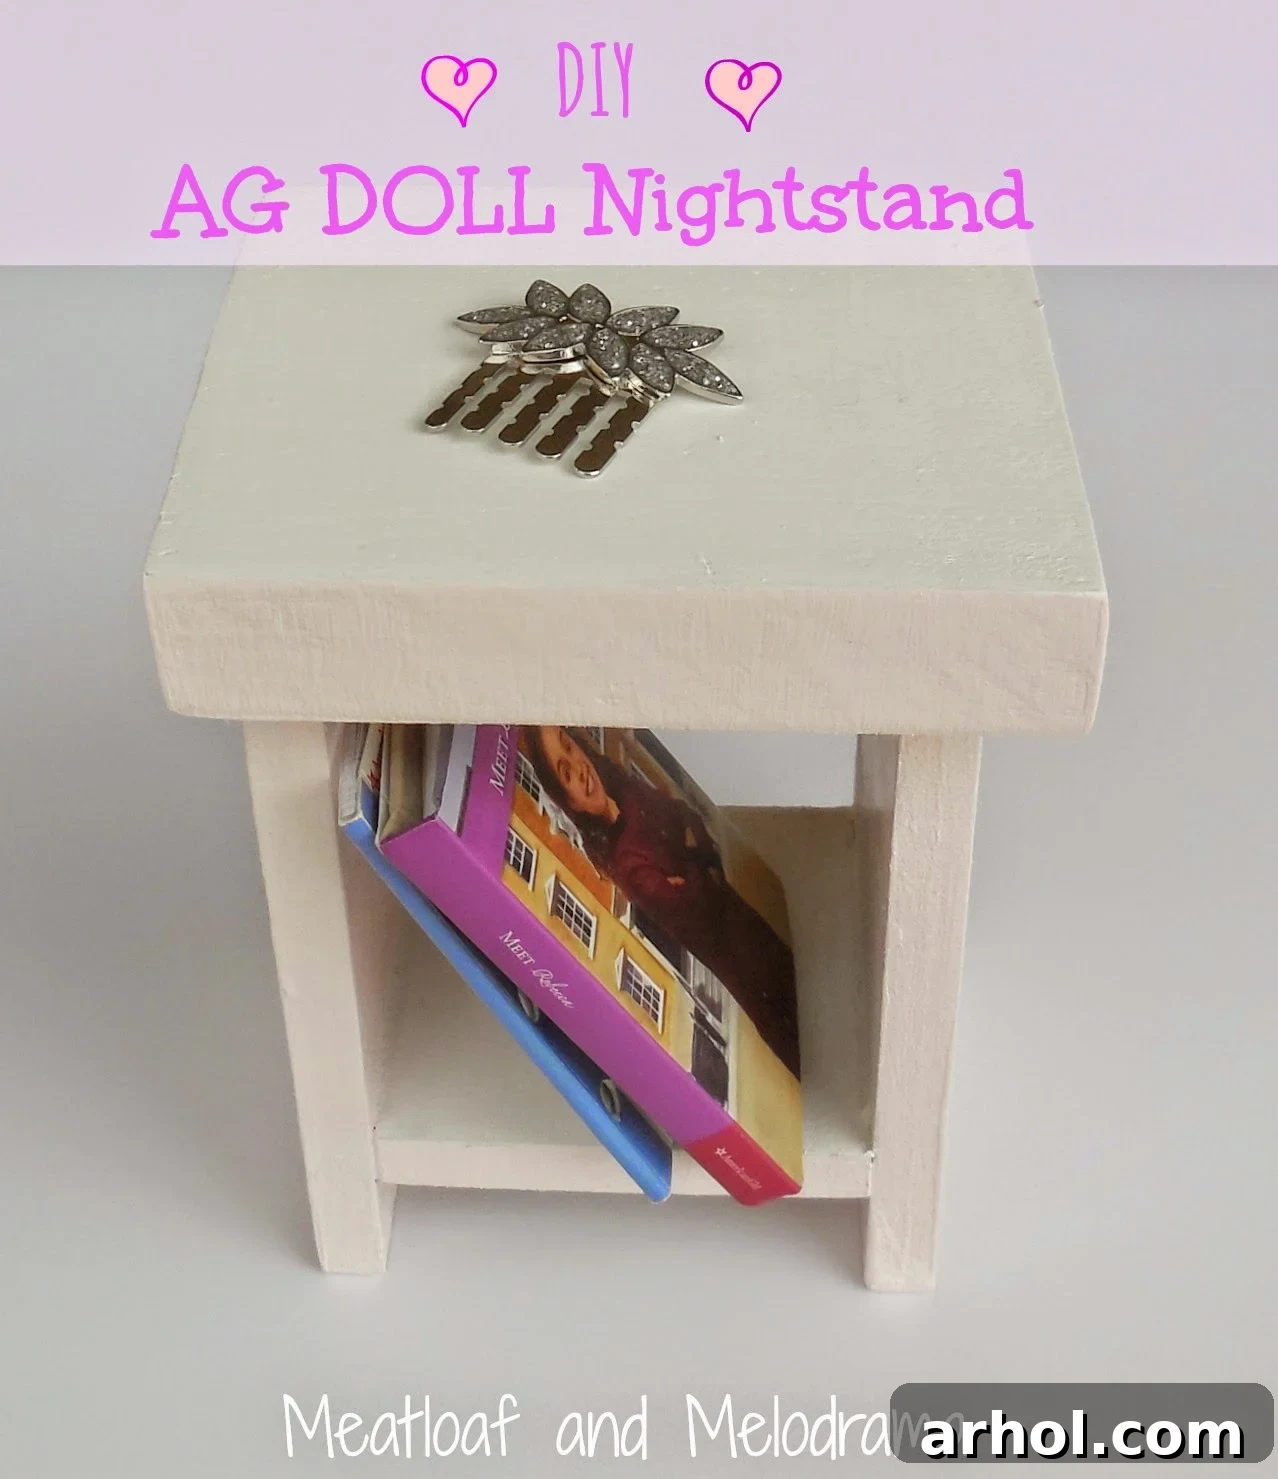
DIY American Girl Doll Nightstand: Crafting a Miniature Masterpiece for Your 18-inch Doll
Welcome, fellow crafters and doll enthusiasts! There’s a special joy that comes from creating something with your own hands, especially when it sparks imagination and brings a smile to a child’s face. Today, we’re diving into another exciting DIY project that promises to do just that: building a custom nightstand for an American Girl Doll. After transforming an ordinary side table into a girly nightstand for my daughter’s room, it wasn’t long before her beloved American Girl Doll expressed a desire for a matching piece to complement her newly acquired bed. This delightful request set us on a new crafting adventure, proving once again that the world of doll furniture offers endless possibilities for creativity and personalization.
Why Embrace DIY American Girl Doll Furniture?
It’s fascinating how quickly doll furniture can accumulate, but when you embark on the DIY path, it becomes not just an acquisition, but a labor of love. Crafting your own American Girl Doll furniture offers a multitude of benefits, far beyond the sheer enjoyment of the creative process:
Cost-Effectiveness
One of the most compelling reasons to build your own doll furniture is the significant cost savings. Officially licensed American Girl Doll accessories can be quite pricey, often ranging from $50 to well over $100 for a single piece. By utilizing scrap wood, repurposing materials, and investing a little time, you can create high-quality, durable furniture for a fraction of the retail cost. This means more resources for other doll accessories or even more DIY projects!
Unmatched Customization and Personalization
When you DIY, you’re not limited by store inventory or color schemes. You have complete creative control to design a piece that perfectly matches your doll’s room aesthetic, your child’s favorite colors, or a specific theme. Want a light pink and white nightstand? Done. Prefer a rustic barn wood look? Absolutely achievable. This level of personalization makes each piece truly unique and special, reflecting the individual style of your child and their doll.
Sustainability and Upcycling
Our nightstand project, for example, started with humble beginnings: leftover wood fencing and a piece of particle board from our scrap pile. Embracing DIY doll furniture is an excellent way to practice sustainability by upcycling materials that might otherwise end up in a landfill. It teaches children the value of repurposing and resourcefulness, turning forgotten bits into beloved treasures.
Educational Value and Family Bonding
Involving children in the DIY process offers invaluable educational opportunities. From measuring and sanding to painting and decorating, kids can learn practical skills, develop problem-solving abilities, and foster their creativity. It’s also a fantastic way to spend quality time together as a family, working collaboratively towards a shared goal and creating lasting memories.
Gathering Your Materials and Crafting Your Design
Before diving into construction, thoughtful planning and material selection are key. For our American Girl Doll nightstand, we kept things simple and resource-efficient. The beauty of DIY lies in its adaptability; feel free to adjust materials based on what you have available or can easily source.
Essential Materials and Tools:
- Wood: For this project, we used leftover wood fencing for the top and sides, and a piece of particle board for the bottom shelf. Other suitable options include plywood, MDF, pine, or even reclaimed wood from old drawers or crates.
- Wood Glue: A strong, reliable wood glue is crucial for securing the pieces.
- Clamps: Essential for holding glued pieces together while they dry, ensuring a strong bond.
- Saw: Depending on your wood type, a hand saw, jigsaw, or miter saw will be needed for cutting pieces to size. Always prioritize safety when operating tools.
- Sandpaper: Various grits (e.g., 80-grit for shaping, 120-grit for smoothing, 220-grit for fine finish) to prepare surfaces for painting.
- Measuring Tape and Pencil: For accurate marking and cutting.
- Paint and Brushes: Choose child-safe, non-toxic paints. Primer is highly recommended, especially on particle board or raw wood, to ensure even color application and durability.
- Optional: Small nails or screws for added reinforcement, wood filler for any gaps, clear sealant for protection.
Designing for Your 18-inch Doll
When designing an American Girl Doll nightstand, scale is important. For 18-inch dolls, consider dimensions that feel proportionate. A good starting point for a nightstand might be around 6-8 inches tall, 4-6 inches wide, and 3-5 inches deep. Our design was simple yet effective: a top, two side panels, and a bottom shelf, creating a sturdy and functional piece that perfectly fits the doll’s needs. Think about stability; the base should be wide enough to prevent tipping.
Step-by-Step Construction Guide for Your Doll Nightstand
With your design in mind and materials at hand, it’s time to bring your miniature furniture to life. My husband, always keen to help with creative projects, took the lead on the construction, expertly transforming our scrap wood into a charming American Girl Doll nightstand.
Step 1: Measure and Cut Your Wood Pieces
Precision is key in woodworking, even for small projects. Carefully measure and mark the dimensions for each component: the top panel, the two side panels, and the bottom shelf. Using a suitable saw, cut each piece to your desired specifications. Remember to wear appropriate safety gear, such as safety glasses, during this step. If using reclaimed wood, ensure all nails are removed and edges are free of splinters.
Step 2: Assemble the Nightstand Structure
Once all pieces are cut, it’s time for assembly. We primarily used strong wood glue for attachment. Apply a thin, even layer of wood glue to the edges that will be joined. Start by attaching the side panels to the bottom shelf. Use clamps to hold the pieces firmly in place while the glue sets. This ensures a strong, lasting bond. For added durability, especially if the doll furniture will see a lot of play, consider using small nails or screws (pre-drill pilot holes to prevent splitting the wood) to reinforce the joints. After the side panels and bottom shelf are secure, attach the top panel in the same manner, clamping it down until the glue is completely dry.
Step 3: Sanding for a Smooth Finish
After the glue has thoroughly dried (refer to glue manufacturer’s instructions for drying times, typically several hours or overnight), it’s crucial to sand all surfaces. Start with a coarser grit sandpaper (e.g., 80 or 120-grit) to smooth out any rough edges, splinters, or imperfections. Then, move to a finer grit (e.g., 220-grit) to achieve a silky-smooth finish, perfect for painting. This step is not only for aesthetics but also for safety, ensuring no sharp edges for little hands or delicate doll clothing.
Personalizing Your Doll’s Nightstand with Paint
Once the construction is complete and the wood is smooth, the real fun begins: painting and personalization! This is where your child’s creativity can truly shine. My daughter was eager to get involved, and together, we transformed the plain wooden structure into a vibrant piece of doll furniture.
Preparing for Paint and Primer
Before applying color, a thin coat of primer is highly recommended, especially when working with particle board or raw, untreated wood. Primer helps seal the wood, prevents the paint from soaking in unevenly, and ensures a more vibrant, consistent color. Let the primer dry completely according to the manufacturer’s instructions.
Choosing Colors and Painting Techniques
My little Diva had a very clear vision for her American Girl Doll’s nightstand: the top and bottom shelf were to be pristine white, while the rest would be a very light, delicate shade of pink. We took turns painting, and I must say, she did an excellent job! To achieve a smooth finish, apply paint in thin, even coats, allowing each coat to dry thoroughly before applying the next. This prevents drips and provides better coverage. For small details or edges, a smaller brush can be very helpful.
Involving Your Child in the Process
Allowing your child to participate in the painting process makes the project even more special and instills a sense of ownership. Depending on their age, they can help choose colors, tape off sections, or even do a majority of the painting themselves (with supervision, of course!). It’s a wonderful way to encourage their artistic expression and fine motor skills.
Creating a Complete Doll Dream Room
The true magic of DIY doll furniture lies in how each piece contributes to a larger, imaginative world. Once the paint was dry, we placed the new American Girl Doll nightstand next to the DIY doll bed we had previously crafted. The combination instantly transformed the doll’s sleeping area into a cozy and complete miniature bedroom.
It was immediately clear that the nightstand, much like my daughter’s own, was destined to be a home for all sorts of odds and ends. Miniature books, tiny decorative lamps, a small alarm clock, or even a tiny photo frame can instantly bring the nightstand to life, making the doll’s space feel lived-in and loved. Even though the pink chosen by my little Diva was incredibly light – almost subtle – it perfectly captured her vision and added a soft, gentle touch to the overall aesthetic. Letting her pick the colors was important; after all, it was for her doll’s room, and her preferences mattered most.
The Joy of a Handcrafted Creation
Seeing the finished American Girl Doll nightstand, with its carefully chosen colors and miniature accessories, is incredibly rewarding. Don’t you agree it’s just adorable? It’s a testament to the fact that creating your own doll furniture doesn’t just save money on expensive store-bought items; it builds character, fosters creativity, and creates lasting memories. Each handmade piece becomes imbued with a unique story and a personal touch that no mass-produced item can replicate.
Beyond the cost savings and the personalized touch, there’s also the sheer enjoyment of the crafting process itself. My husband, who initially just helped out, has truly embraced his new “hobby” of making doll furniture. He finds great satisfaction in transforming simple pieces of wood into functional and delightful items for the dolls, demonstrating that DIY projects can be fulfilling for everyone involved.
Whether you’re looking to save money, unleash your creativity, or spend quality time with your family, making your own American Girl Doll furniture is an incredibly worthwhile endeavor. It’s an accessible project that yields fantastic results and brings so much joy. So gather your supplies, ignite your imagination, and start crafting that perfect miniature world for your favorite 18-inch doll today!
Have a wonderful and creative day!