Embark on a culinary journey this Easter with Paska bread, a truly heartwarming and symbolic staple of Ukrainian and Slovak Easter celebrations. Much like its Polish counterpart, Babka, this rich, slightly sweet, and incredibly tender yeast bread, often studded with plump golden raisins, embodies generations of family tradition and the spirit of the holiday. Serving Paska on Easter morning isn’t just about enjoying a delicious meal; it’s about connecting with a vibrant Eastern European heritage.
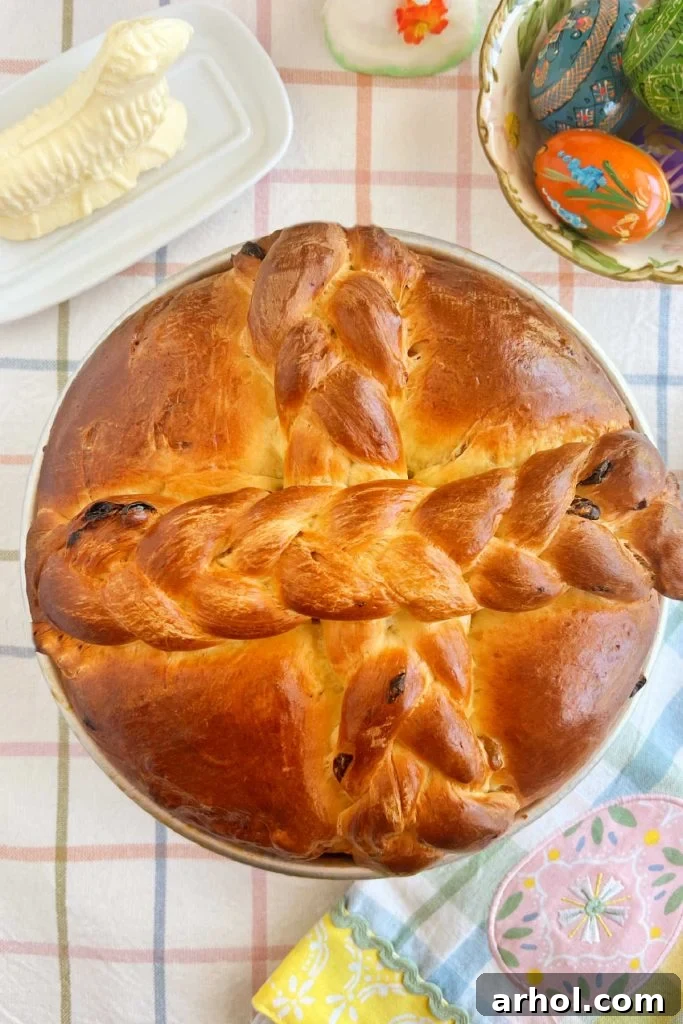
Grandma’s Cherished Paska: A Family Legacy
For countless families across Eastern Europe and beyond, Paska bread is more than just a recipe; it’s a living piece of history, woven into the fabric of Easter celebrations for generations. This delightful, slightly sweet bread, distinguished by its high egg content, yields a dense, almost cake-like texture that makes every bite a pure indulgence. Reflecting the rich tapestry of cultures, this beloved loaf is known by various names, including Ukrainian Easter bread, traditional Slovak Easter bread, and even Polish Easter bread, each region adding its unique nuance.
My own Baba, a true culinary matriarch, would begin her annual Paska baking ritual early on Good Friday. With deep reverence, she would press the ancient symbol of a cross into the soft dough before carefully baking it in large coffee cans, a testament to resourcefulness and tradition. Once cooled, this sweet yeast bread became the centerpiece of our Easter basket, alongside other essential Eastern European delicacies like savory kobassi (kielbasa), pungent horseradish, a delicate butter lamb, the unique Easter cheese (cirak), and the beloved nut roll. This basket, brimming with blessed foods, would then be taken to church on Holy Saturday to receive a sacred blessing, symbolizing hope and renewal for the Easter feast.
Today, while some traditions evolve, the essence of our Easter Sunday celebration remains. Paska takes pride of place on our table, served alongside a succulent Easter ham, authentic kielbasa sourced from our local Polish delicatessen, creamy deviled eggs, comforting potato salad, and a charming Easter lamb cake. These dishes, along with other cherished Easter Recipes, create a spread that honors our heritage and brings joy to every gathering.
While I’ve lovingly simplified my grandma’s original recipe to make it more accessible for modern home bakers – using fewer eggs and a convenient stand mixer – the spirit of her Paska lives on. Baking it in a 9-inch cake pan (a springform pan also works beautifully) ensures a gorgeous rise and a stunning, perfectly golden loaf of homemade bread. It may be a slightly modernized approach, but the resulting bread still carries the heartwarming flavor and beautiful presentation that defines our family’s Easter tradition.
Table of Contents
- Grandma’s Cherished Paska: A Family Legacy
- Essential Ingredients for Perfect Paska
- How to Master Paska for Easter: A Detailed Guide
- Baking Your Beautiful Paska Bread
- Storing Paska: Keeping Your Easter Bread Fresh
- Paska Recipe Variations: Customize Your Loaf
- Expert Tips for Paska Baking Success
- Frequently Asked Questions About Paska Bread
- Paska Bread (Easter Bread Recipe)
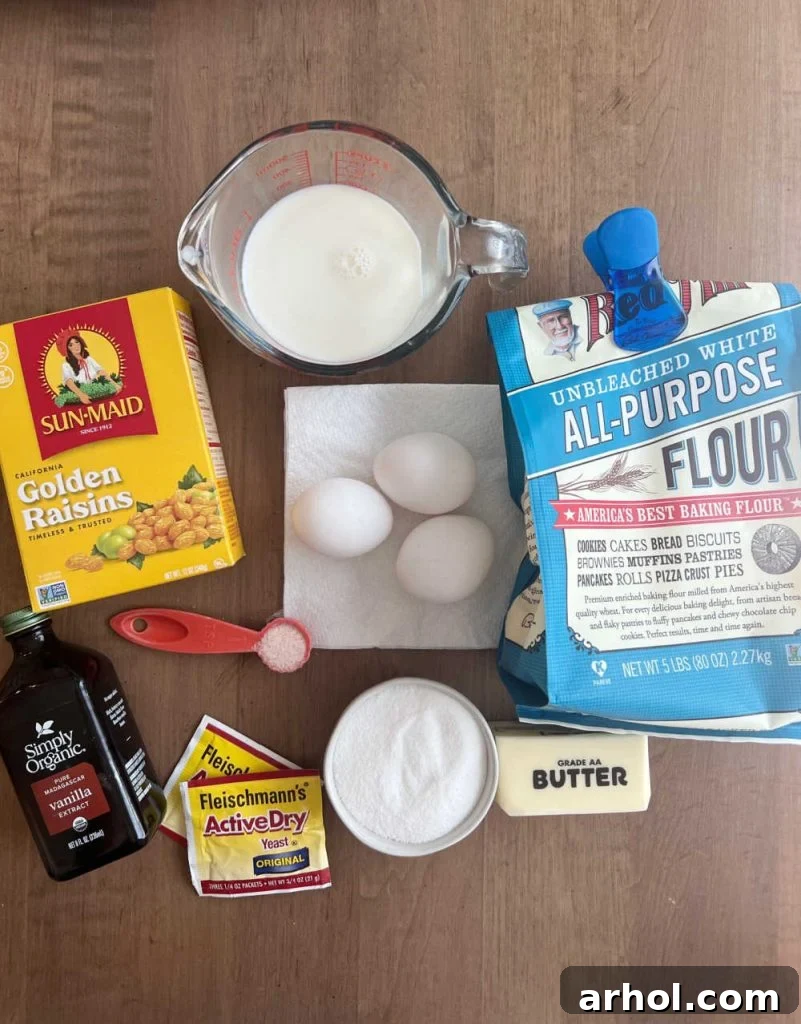
Essential Ingredients for Perfect Paska
Crafting the perfect Paska begins with understanding the role of each high-quality ingredient. This quick overview highlights the components that contribute to its distinctive flavor and texture. Full, precise measurements are conveniently listed in the printable recipe card below.
- Flour: All-purpose flour is the backbone of this bread, providing the essential structure. I typically opt for reliable brands like Bob’s Red Mill for consistent results.
- Eggs: Large eggs are crucial for Paska’s rich, dense texture and beautiful golden hue. They are incorporated into the dough and also used to create an egg wash, which gives the baked bread its irresistible shine.
- Yeast: Active dry yeast is key to achieving that impressive rise and airy crumb. It’s important to distinguish it from instant yeast, as this recipe is specifically tested with active dry for optimal activation.
- Milk: Warm whole milk or 2% milk is used to bloom the yeast, providing a nurturing environment for it to activate. It also adds richness and moisture to the dough, contributing to its tender texture.
- Sugar: Granulated sugar serves a dual purpose: it acts as food for the yeast, helping it to activate vigorously, and it imparts a delicate sweetness that defines Paska’s flavor profile.
- Butter: Softened, room-temperature butter, whether salted or unsalted, adds incredible richness, tenderness, and flavor to the bread. Its softness is essential for easy incorporation into the dough.
- Vanilla Extract: A splash of vanilla extract elevates the overall flavor, adding a warm and inviting aromatic note that complements the sweetness and richness of the bread.
- Salt: A small amount of salt is vital not only for enhancing the flavor of the bread but also for regulating the yeast activity and strengthening the gluten structure, contributing to a better texture.
- Golden Raisins: These sweet, sun-dried grapes are a traditional addition, infusing each slice with bursts of natural sweetness and a delightful chewiness. They are a signature element of classic Paska.
How to Master Paska for Easter: A Detailed Guide
Creating this traditional Easter bread is a rewarding experience, blending simple steps with a touch of patience. Follow these detailed instructions to bake a beautiful and delicious Paska loaf.
Phase 1: Activating the Yeast and Preparing the Dough
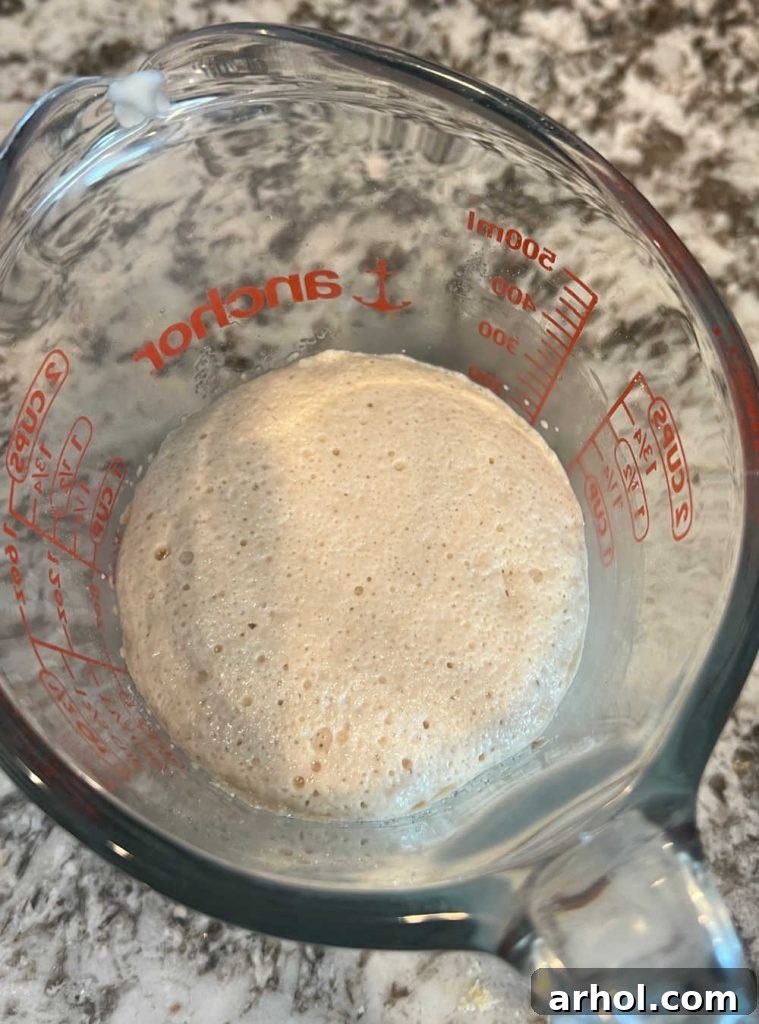
First, we begin by activating the yeast, a crucial step for ensuring a light and airy loaf. Gently warm about 1/2 cup of milk in the microwave for approximately 30 seconds, or until it reaches a temperature of 105-115 degrees Fahrenheit (40-46 degrees Celsius). This lukewarm temperature is ideal for yeast activation. Stir in 2 teaspoons of granulated sugar along with the active dry yeast, then set the mixture aside for 5-10 minutes. You’ll know your yeast is active and thriving when it becomes wonderfully foamy and bubbly.
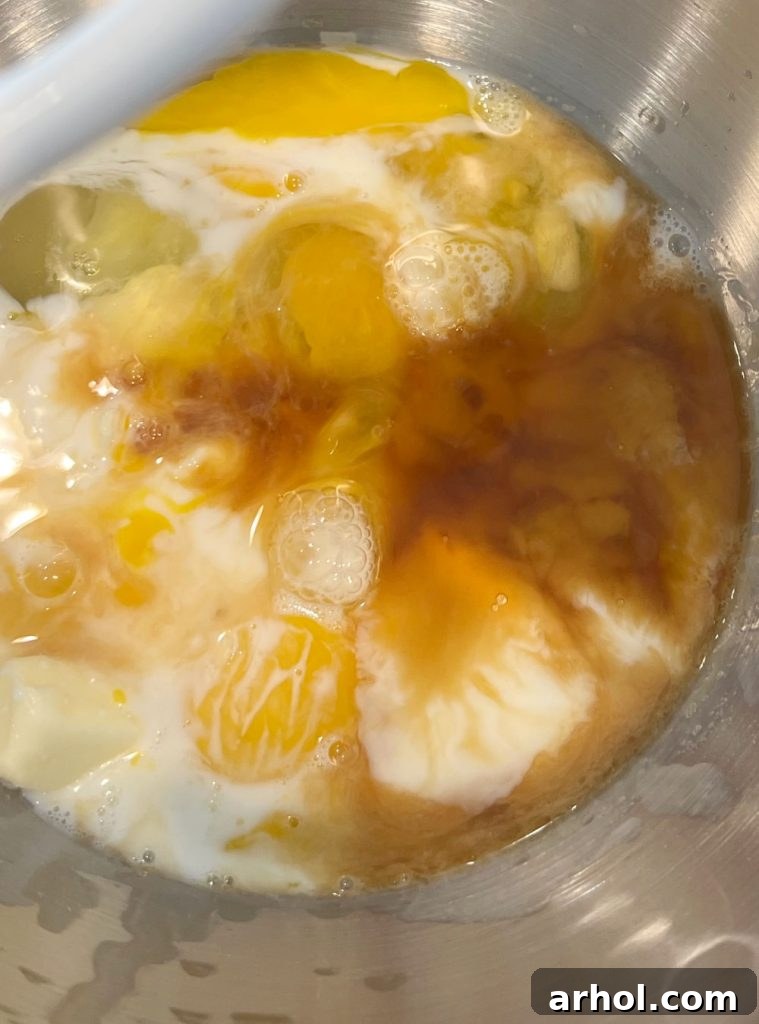
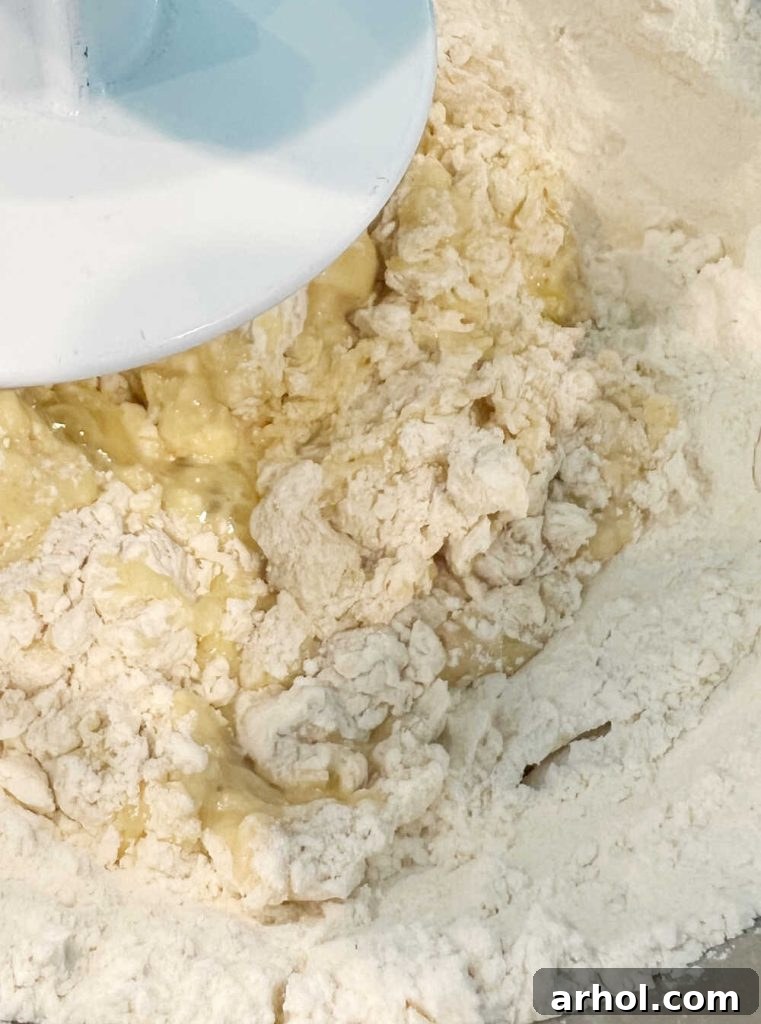
While your yeast is blooming, prepare the wet ingredients. In the spacious bowl of a stand mixer, combine the softened butter, large eggs, vanilla extract, and the remaining half cup of milk. Gently stir these ingredients until they are just incorporated. Once the yeast mixture is foamy, pour it into the stand mixer bowl. Add 2 cups of all-purpose flour and the salt. Using the dough hook attachment, begin mixing on low speed until the ingredients start to come together.
Continue gradually adding an additional 3 cups of flour, allowing the mixer to knead the dough thoroughly. Depending on environmental factors like humidity, you may need to add an extra 1/2 cup to 1 cup of flour, for a total of 6 cups. The kneading process, using the dough hook, typically takes about 5-7 minutes. The dough should transform into a smooth, elastic ball that is slightly sticky to the touch but no longer adheres stubbornly to your fingers or the sides of the bowl. Remember to scrape down the sides of the bowl a couple of times to ensure all ingredients are evenly incorporated.
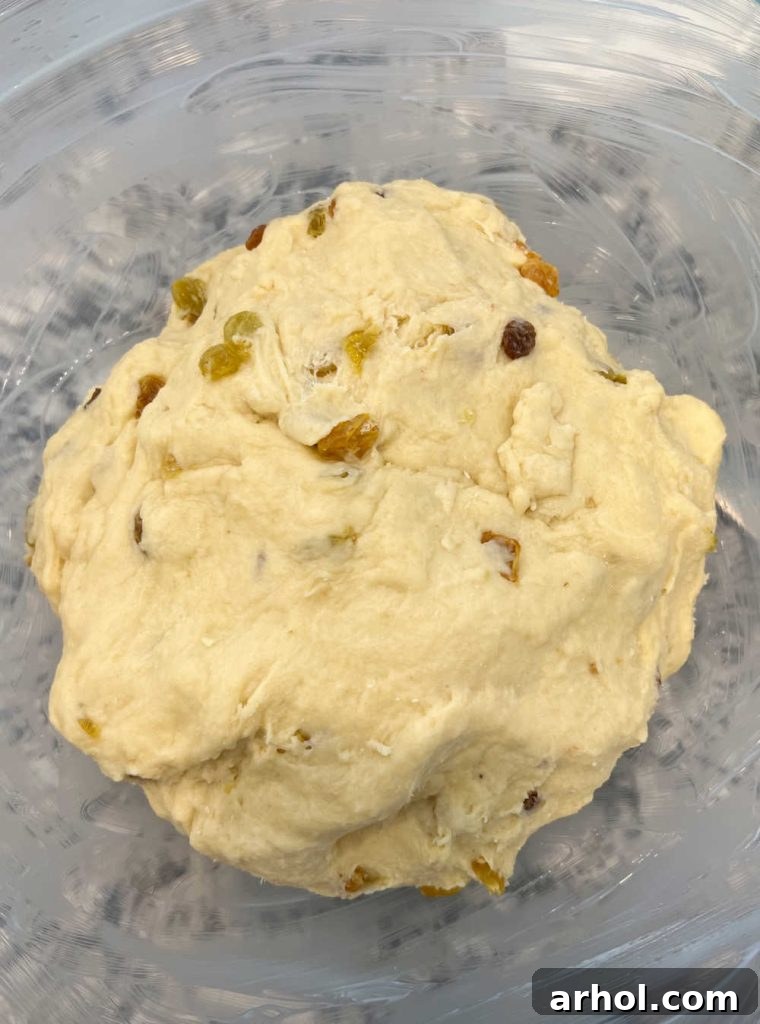
Finally, gently mix in the golden raisins. You can do this with the stand mixer on low speed for a short period, or if you prefer a more tactile approach, fold them in by hand. Once the raisins are evenly distributed, form the dough into a smooth ball. Lightly grease a clean, large mixing bowl with butter or cooking spray, then place the dough ball inside, turning it once to ensure the top is also lightly coated. This prevents it from drying out during the rise. Cover the bowl loosely with aluminum foil, a clean kitchen towel, or plastic wrap.
Phase 2: The First Rise and Shaping
Place the covered dough in a warm spot to rise for approximately 1 to 1.5 hours, or until it has visibly doubled in size. A pro tip for finding a warm spot: turn your oven on for about 30 seconds, then immediately turn it off. This creates a slightly warm, draft-free environment perfect for rising. If using this method, **do not use plastic wrap** as it might melt; opt for foil or a kitchen towel instead.
After the first rise, gently punch the dough down to release the air. Turn the dough out onto a lightly floured surface. Now, it’s time to create the traditional cross decoration. Carefully separate a piece of dough, slightly less than 1/4 of the total amount. Divide this smaller piece into three equal portions. Using your fingers, roll each portion into a long, uniform rope. Press the ends of these three ropes together firmly at one end, then beautifully braid them into a single, long rope. This braid will form the symbolic cross on top of your Paska.

Take the larger piece of dough and place it into a greased 9-inch cake pan. Gently smooth it out, ensuring it forms an even thickness and fills the pan. Next, using a sharp knife or dough cutter, cut your braided rope in half. Carefully place one piece of the braid horizontally across the center of the larger dough, and then place the second piece vertically over it, creating a perfect cross shape. Neatly tuck the ends of the cross braids under the inside edge of the pan for a clean finish.

Phase 3: Second Rise and Egg Wash
To prepare for the beautiful golden crust, create an egg wash by whisking 1 large egg with 1 tablespoon of water in a small bowl until well combined. Using a pastry brush or silicone brush, lightly and evenly coat the entire top surface of the Paska dough with this mixture. This egg wash will give your bread that coveted glossy, golden finish. Now, place the pan with the decorated dough back into a warm place for its second rise. This final rise typically takes about 30-45 minutes. The dough should rise significantly, nearing the top edge of the cake pan, indicating it’s ready for baking.
Baking Your Beautiful Paska Bread
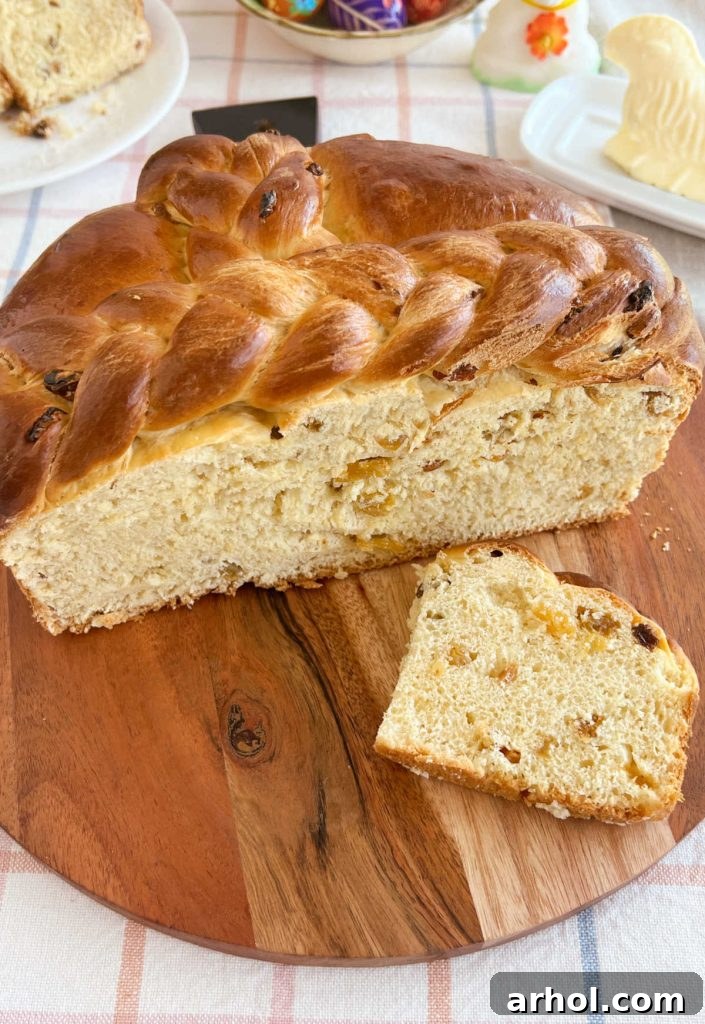
Preheat your oven to 350°F (175°C) to ensure it reaches the correct temperature before the Paska goes in. Carefully place the Paska into the preheated oven, ideally on the middle rack, allowing for even heat distribution. Bake for approximately 40 to 45 minutes. The true indicators of doneness are a beautiful golden brown crust and a hollow sound when you gently tap the top of the bread. For absolute certainty, an instant-read thermometer inserted into the center of the loaf should register an internal temperature of 200°F (93°C). If the bread is browning too quickly, you can loosely tent it with aluminum foil during the last 10-15 minutes of baking to prevent over-browning while ensuring the interior cooks thoroughly. Once baked, remove the Paska from the oven and allow it to cool in the pan for about 10-15 minutes, making it easier to handle. Then, gently remove the bread from the cake pan and transfer it to a wire rack to cool completely. This crucial step prevents the bottom from becoming soggy and ensures a perfect texture throughout.
Storing Paska: Keeping Your Easter Bread Fresh
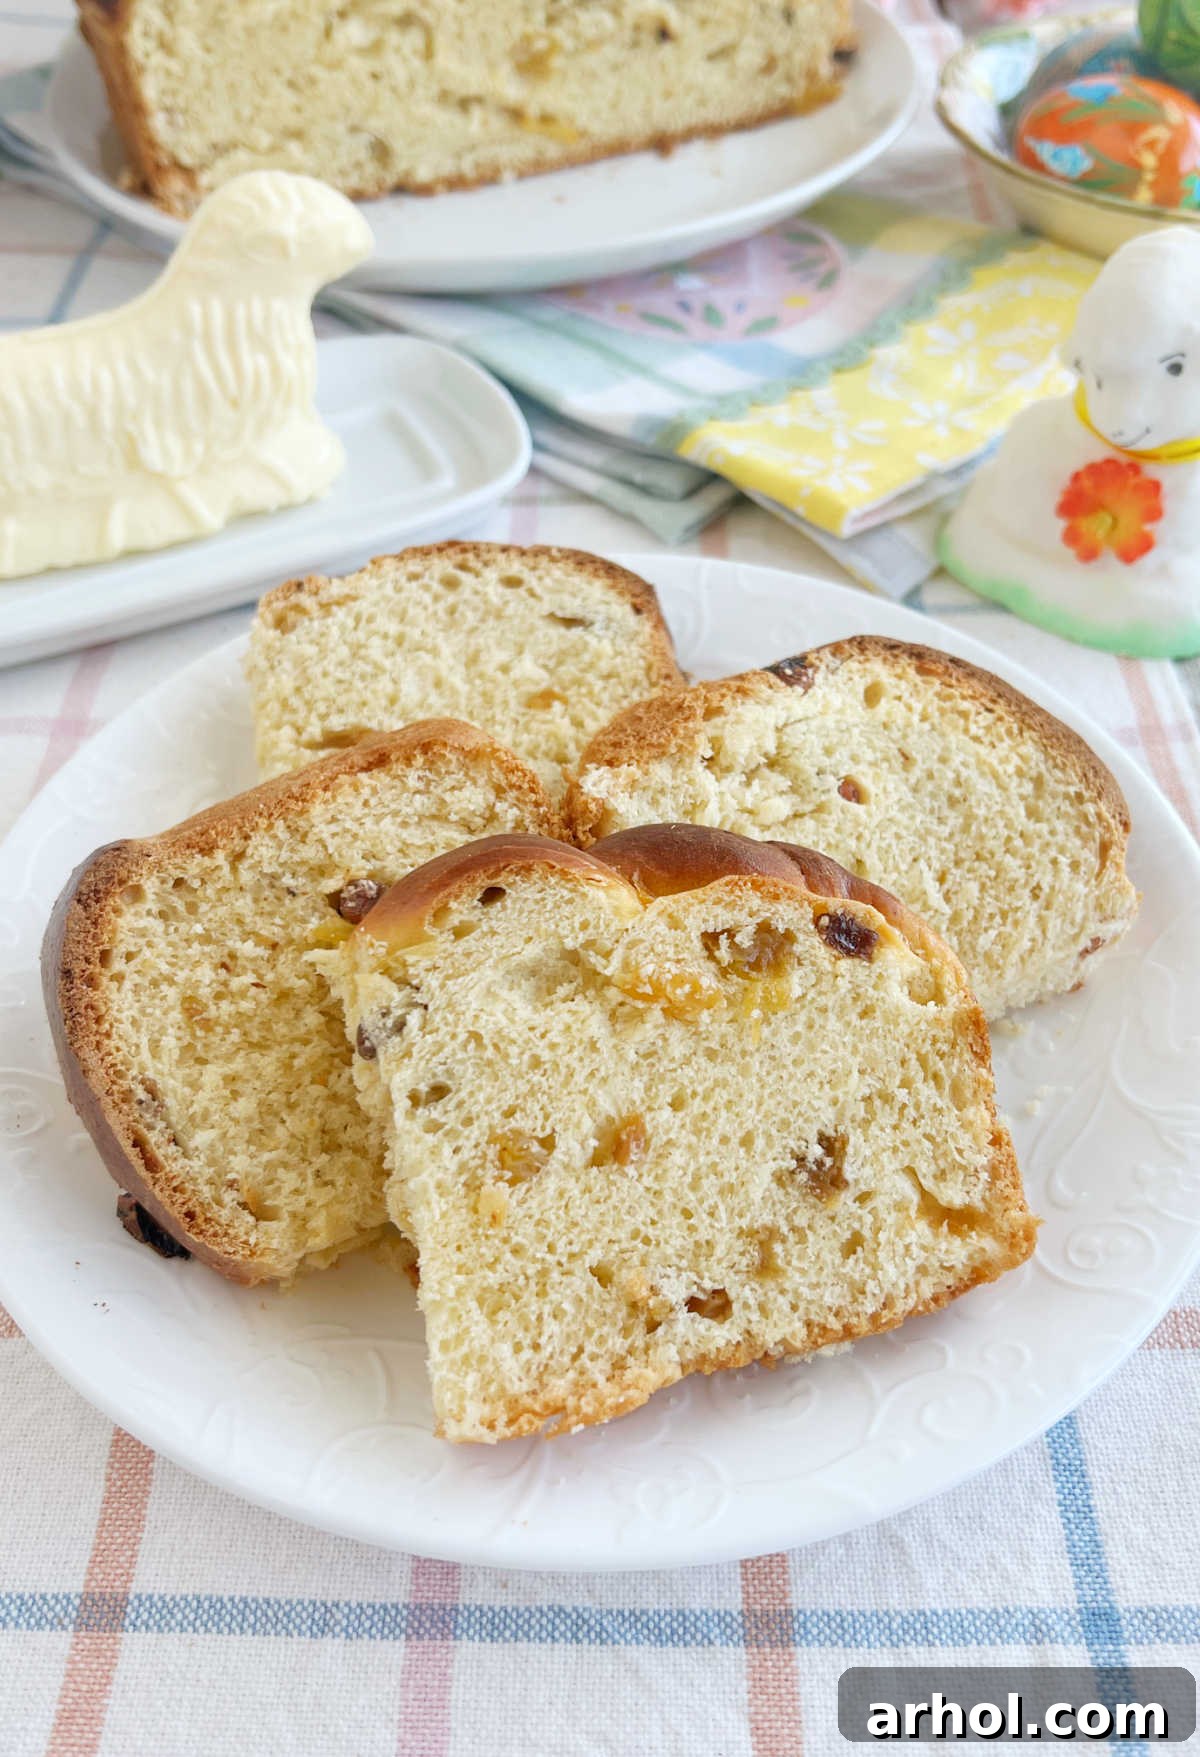
Homemade Paska bread is a treat best enjoyed at its peak freshness, ideally within 3 days of baking. To maintain its delightful texture and flavor, store the cooled loaf in a cool, dry place within an airtight container. This will protect it from drying out and keep it soft. If you prefer to pre-slice your Paska, individual slices can also be stored in an airtight container for up to 2 days.
For longer preservation, Paska freezes exceptionally well for up to 3 months. To freeze, ensure the loaf is completely cool. First, wrap it tightly in a layer of plastic wrap, pressing out as much air as possible. Then, add a second protective layer of heavy-duty aluminum foil. This double wrapping helps prevent freezer burn and preserves its quality. When you’re ready to enjoy, simply thaw the Paska at room temperature overnight, or gently warm slices in the oven or microwave.
Paska Recipe Variations: Customize Your Loaf
While the classic Paska recipe is a beloved tradition, there’s always room for personal touches and creative variations to make it uniquely yours. The golden raisins, for instance, are a staple in my family’s recipe, adding a delightful sweetness. However, feel free to use dark raisins or a mix of both. Some enthusiasts even recommend soaking the raisins in warm water, rum, or vodka beforehand to plump them up and add an extra layer of flavor; in my experience, the difference is subtle but can be a fun experiment!
Beyond raisins, consider incorporating other candied fruits like diced citron, orange peel, or dried cranberries for a different kind of sweetness and texture. For an invigorating citrus note, add the zest of one lemon or orange to the dough. This simple addition brightens the entire flavor profile of the bread. Spices like a pinch of nutmeg or cardamom can also introduce a warm, aromatic complexity.
Traditionally, Easter bread is adorned with various religious symbols to celebrate the resurrection of Christ. While a large braided cross is common, you can explore other shapes. Consider forming delicate leaves, charming birds, or smaller, intricate crosses from extra dough. You could also wrap a single braid elegantly around the perimeter of the loaf, or simply leave the top plain for a minimalist approach. For those with a sweet tooth, a simple powdered sugar glaze, often flavored with lemon juice or vanilla, can be drizzled over the cooled Paska for an extra touch of sweetness and a beautiful presentation, making it more akin to Babka.
Expert Tips for Paska Baking Success
Achieving a perfectly baked Paska is easier with a few insider tricks. Here’s what I’ve learned over the years to ensure your bread turns out beautifully every time:
- Mise en Place: Always measure and prep all your ingredients before you begin mixing. This “mise en place” approach makes the baking process much smoother and prevents you from scrambling for an ingredient mid-recipe.
- Room Temperature Matters: Ensure your butter is genuinely softened at room temperature. Cold butter won’t incorporate properly, affecting the dough’s texture. Similarly, eggs at room temperature emulsify better into the dough.
- Yeast is Key: Stick to active dry yeast for this recipe, as it has been specifically tested with this type. I cannot guarantee results with instant yeast or rapid-rise yeast. Furthermore, always check the expiration date on your yeast and perform the blooming step first. If your yeast doesn’t get foamy, it’s likely inactive, and you’ll need new yeast.
- Flour Fluctuations: The amount of flour needed can be influenced by external factors, particularly the weather. On humid days, the dough may absorb more moisture, requiring a little extra flour. Conversely, if the air is very dry, you might need slightly less. The goal is a dough that is slightly sticky but manageable and doesn’t cling excessively to your hands. Adjust by adding flour one tablespoon at a time until you reach the desired consistency.
- Monitor Baking: Keep an eye on your bread during the baking cycle. If the top begins to brown too quickly, loosely tent it with a piece of aluminum foil. If you notice it browning excessively early on, you can even reduce the oven temperature slightly, perhaps to 325°F (160°C), to allow the interior to cook through without scorching the crust.
- Hand-Kneading is an Option: While a stand mixer simplifies the kneading process, don’t let its absence deter you. Our Babas certainly made bread by hand, and you can too! It will simply require more time and elbow grease to develop the gluten properly. Knead until the dough is smooth, elastic, and passes the windowpane test (a small piece of dough can be stretched thin enough to see light through it without tearing).
- Don’t Overwork the Dough: After the initial kneading, avoid excessive handling, especially once the raisins are incorporated. Overworking can lead to a tough bread.
- Patience with Rising: Rushing the rising process can result in a dense loaf. Allow the dough ample time to double in size for both rises. A warm, draft-free environment is essential for optimal yeast activity.
Frequently Asked Questions About Paska Bread
Paska is a traditional Easter bread with deep roots across various Eastern European countries. It is a significant part of the culinary heritage of Ukraine, Slovakia, Carpatho-Rusyn communities, and Poland, with regional variations in recipes and decorations. It shares many similarities with the Russian Easter bread known as Kulich, highlighting a shared cultural practice among Orthodox and Byzantine Catholic traditions.
Paska and Babka are indeed very similar sweet yeast breads, often enjoyed during Easter. The primary distinction often lies in their sweetness and toppings. Paska is typically a slightly less sweet bread, often adorned with a simple dough cross or other symbolic shapes and usually served plain. Babka, on the other hand, tends to be sweeter, sometimes richer, and is more frequently topped with a generous amount of powdered sugar glaze or streusel, and may include different fillings like chocolate or nuts.
The word “Paska” (or “Pascha”) literally means “Easter” in several Eastern European languages, including Ukrainian and Slovak. It directly refers to the Christian Pascha (Passover) celebration of Christ’s resurrection, making this bread a central and symbolic element of the Easter feast.
Yes, you can prepare the Paska dough in advance. After the first rise, punch down the dough, then cover it tightly and refrigerate for up to 24 hours. When you’re ready to bake, remove the dough from the refrigerator and let it come to room temperature for about 1-2 hours before shaping and proceeding with the second rise and baking instructions.
Paska is incredibly versatile and pairs wonderfully with a variety of Easter dishes. It’s often enjoyed simply with butter, jam, or honey for breakfast or brunch. As part of a larger Easter spread, it complements savory items like ham, kielbasa (sausage), deviled eggs, potato salad, and horseradish. It’s also delicious with coffee or tea, making it a comforting treat any time of day during the Easter season.

Paska Bread (Easter Bread Recipe)
Dee
20
45
1
30
2
35
10
Equipment
-
1 Stand mixer (or large mixing bowl for hand kneading)
-
9-inch cake pan or springform pan
-
Large mixing bowl (for rising)
-
Pastry brush or silicone brush
-
Wire cooling rack
Ingredients
Yeast Mixture
-
½
cup
warm milk
(105-115°F or 40-46°C) -
2
¼-oz
packets active dry yeast
(1/2 ounce total) -
2
tsp
granulated sugar
For the Dough
-
3
large
eggs -
½
cup
granulated sugar -
¼
cup
butter
(softened at room temperature) -
½
cup
milk
(room temperature) -
1
tbsp
vanilla extract -
1
tsp
salt -
5-6
cups
all-purpose flour
(divided) -
1
cup
golden raisins
Egg Wash
-
1
large
egg -
1
tbsp
water
Instructions
-
In a small bowl, add 2 teaspoons sugar and the active dry yeast to the ½ cup warm milk. Stir gently and set aside for 5-10 minutes until the mixture becomes foamy. This confirms your yeast is active.
-
In the bowl of a stand mixer (or a large mixing bowl), combine the 3 large eggs, ½ cup granulated sugar, softened butter, ½ cup room temperature milk, and vanilla extract. Mix on low speed until just combined.
-
Pour the foamy yeast mixture into the wet ingredients. Add the salt and 2 cups of the all-purpose flour. Attach the dough hook and mix on low speed until a shaggy dough forms.
-
Gradually add 3 more cups of flour, one cup at a time, allowing the dough hook to knead the dough. Continue kneading for about 5-7 minutes. The dough should be smooth and elastic, slightly sticky but not adhering to your hands. Add an additional ½ to 1 cup of flour, if necessary, until the dough reaches the correct consistency. Scrape down the sides of the bowl as needed.
-
Stir in the 1 cup of golden raisins until they are evenly distributed throughout the dough. You can use the mixer on low or incorporate them by hand.
-
Form the dough into a ball and place it into a large mixing bowl that has been lightly greased with butter or cooking spray. Turn the dough once to coat the top. Cover the bowl loosely with aluminum foil or a clean kitchen towel. Place in a warm, draft-free spot to rise for 1 to 1.5 hours, or until the dough has doubled in size.
-
Once risen, gently punch the dough down to release the air. Turn the dough out onto a lightly floured surface. Cut off a piece of dough, slightly less than ¼ of the total, to use for the cross decoration.
-
Divide the small piece of dough into 3 equal portions. Using your fingers, roll each portion into a long, thin rope.
-
Pinch the ends of the three ropes together at one end, then braid them into one long braided rope. Cut this braided rope in half.
-
Place the larger piece of dough into a buttered 9-inch cake pan. Gently smooth it out with your hands so it evenly covers the bottom of the pan.
-
Arrange the two halves of the braided dough on top of the Paska to form a cross shape. Tuck the ends of the cross neatly under the inside edge of the pan.
-
In a small bowl, whisk together 1 large egg and 1 tablespoon of water to create an egg wash. Gently brush this mixture over the entire surface of the Paska dough in the pan.
-
Place the pan with the dough back into a warm place for its second rise, for about 30 to 45 minutes. The dough should rise until it is close to the top of the cake pan.
-
While the dough is performing its second rise, preheat your oven to 350°F (175°C).
-
Place the Paska dough into the preheated oven on the middle rack. Bake for 40-50 minutes, or until the top is golden brown and the bread sounds hollow when gently tapped. For accuracy, an instant-read thermometer inserted into the center should read 200°F (93°C). If the top browns too quickly, loosely tent with aluminum foil.
-
Remove the bread from the oven and allow it to cool in the pan for about 10-15 minutes. Then, gently remove the Paska from the cake pan and transfer it to a wire baking rack to cool completely before slicing and serving.
Notes
Monitor your Paska closely during the baking process. If you observe the top browning too rapidly, loosely cover the bread with aluminum foil to prevent scorching. If needed, you can also reduce the oven temperature slightly to 325°F (160°C) to allow for more even cooking.
Store your baked Paska bread in an airtight container at room temperature for up to 3 days to maintain its freshness and soft texture. For longer storage, Paska freezes beautifully for up to 3 months when properly wrapped.
Nutrition
Calories:
394
kcal
,
Carbohydrates:
71
g
,
Protein:
10
g
,
Fat:
8
g
,
Saturated Fat:
4
g
,
Polyunsaturated Fat:
1
g
,
Monounsaturated Fat:
2
g
,
Trans Fat:
0.2
g
,
Cholesterol:
88
mg
,
Sodium:
305
mg
,
Potassium:
226
mg
,
Fiber:
2
g
,
Sugar:
20
g
,
Vitamin A:
270
IU
,
Vitamin C:
0.5
mg
,
Calcium:
45
mg
,
Iron:
4
mg
Nutrition information is automatically calculated, so should only be used as an approximation.
Additional Info
Bread
Slovak, Ukrainian, Eastern European
Love this recipe? Share your thoughts below!
Paska bread is truly a magnificent centerpiece for any Easter meal, steeped in history and flavor. Whether you are searching for an authentic Ukrainian Easter bread, a traditional Slovak Paska bread, or a hearty Polish Easter bread, I sincerely hope you will embrace the joy of baking and sharing this sweet yeast bread. If you decide to make this cherished Easter bread recipe, please consider leaving a star rating and a comment below to share your experience!
For more delightful family recipes and traditional holiday dishes perfect for Easter, be sure to sign up for our weekly newsletter and follow us on social media. Join our community of home bakers and discover new favorites for every occasion.