
Craving the ultimate comfort food that’s both hearty and incredibly simple to make? Look no further than this Instant Pot Chili Mac. It’s a fantastic solution for busy weeknights, game day gatherings, or any time you desire a satisfying, flavorful meal with minimal effort. This recipe combines savory lean ground beef, tender elbow macaroni, a rich chili sauce, and plenty of gooey cheese, creating a dish that truly defines easy comfort.
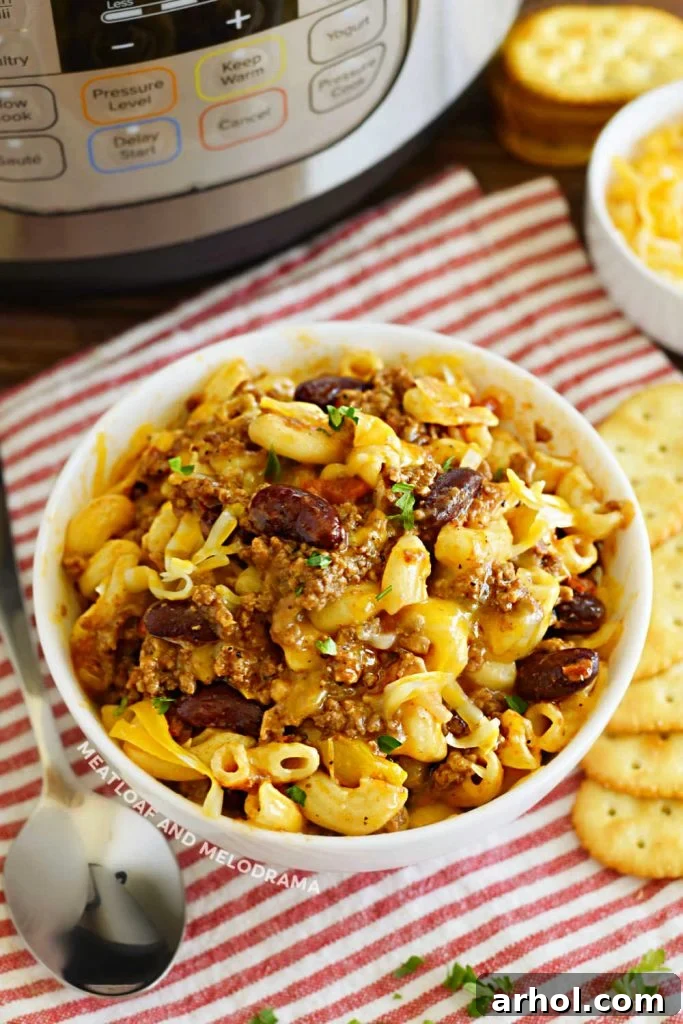
Table of Contents
- Why Instant Pot Chili Mac is a Game Changer
- Simple Ingredients for the Best Chili Mac
- How to Make Easy Instant Pot Chili Mac and Cheese
- Mastering the Instant Pot Cooking Time
- Tips for the Perfect Instant Pot Chili Mac
- Creative Variations to Try
- How to Store and Reheat Leftovers
- Serving Suggestions
- Instant Pot Chili Mac Recipe Card
If you’re anything like us, easy Instant Pot recipes are a lifeline during hectic schedules. This Instant Pot chili mac recipe consistently earns rave reviews from everyone who tries it. It holds a special place in our rotation alongside other quick and satisfying meals like Instant Pot Creamy Shells and Beef, Instant Pot Spaghetti and Meat Sauce, Cheeseburger Macaroni, and Ground Beef Stroganoff. What makes this chili mac stand out is its delightful fusion of flavors. We essentially took our incredibly popular and mild pressure cooker chili recipe and elevated it by adding elbow pasta and a generous amount of shredded cheese. The result? A mouthwatering, hearty dish that’s reminiscent of a gourmet homemade Hamburger Helper, but infinitely superior in taste and quality.
Why Instant Pot Chili Mac is a Game Changer
The Instant Pot isn’t just a kitchen gadget; it’s a culinary revolution, especially when it comes to dishes like chili mac. Here’s why this pressure cooker rendition of a classic comfort food is an absolute must-try:
- Unbeatable Speed: Imagine browning meat, cooking pasta, and simmering a rich chili sauce all in one pot, ready to serve in under 30 minutes. The Instant Pot drastically cuts down cooking time, making it ideal for those nights when time is of the essence.
- One-Pot Wonder: Forget the pile of pots and pans. Everything, from sautéing the beef to pressure cooking the pasta and melting the cheese, happens in the Instant Pot. This means less cleanup and more time enjoying your meal.
- Deep, Developed Flavors: Pressure cooking infuses the flavors of the chili, spices, and beef broth deeply into every ingredient. The result is a richer, more cohesive taste that tastes like it’s been simmering for hours.
- Consistently Perfect Pasta: The Instant Pot cooks macaroni to al dente perfection every time, absorbing the delicious chili flavors without becoming mushy.
- Family-Friendly Appeal: This dish is a universal crowd-pleaser. Its mild chili flavor, combined with the creamy, cheesy pasta, makes it a hit with kids and adults alike, ensuring no complaints at the dinner table.
This creamy, cheesy chili mac isn’t just easy; it’s a smart way to deliver a nutritious and delicious meal to your family without sacrificing precious evening hours.
Simple Ingredients for the Best Chili Mac
One of the beauties of homemade chili mac is that it relies on a handful of straightforward, accessible ingredients. Most are likely staples in your pantry or refrigerator, making spontaneous dinner decisions a breeze. Here’s what you’ll need to create this savory delight:
- Lean Ground Beef: We recommend lean ground beef (85-90%) for a healthier option and to minimize the need for draining excess fat. It provides a hearty base for the chili.
- Elbow Macaroni: The classic choice for chili mac, these small, curved pasta pieces are perfect for soaking up the rich sauce and blending seamlessly with the other ingredients. Any small pasta shape will work if elbow macaroni isn’t available.
- Kidney Beans: These add texture, fiber, and a traditional chili element. Ensure they are drained and rinsed thoroughly before adding.
- Shredded Cheese: The key to ultimate creaminess! Sharp cheddar, mild cheddar, Colby Jack, or a cheddar blend all work wonderfully. Colby Jack is particularly excellent for its melt-factor and mild, creamy flavor, making it feel more like a true mac and cheese hybrid. Pepper Jack can be used for a spicier kick.
- Bell Peppers: I often use yellow bell peppers for their mild sweetness and vibrant color, but orange or green peppers are also excellent choices and will add a fresh crispness to the dish.
- Onion: Diced yellow or white onion forms an aromatic foundation for the chili, adding depth of flavor.
- Diced Tomatoes: A pantry essential, diced tomatoes provide a tangy base and chunky texture to the chili.
- Tomato Sauce: Contributes to the smooth, rich consistency of the chili base.
- Beef Broth or Water: Essential for pressure cooking the pasta and creating the saucy consistency. Beef broth enhances the overall flavor profile.
- Olive Oil: Used for sautéing the ground beef and aromatic vegetables.
- Spices: A blend of sea salt, black pepper, chili powder, and garlic powder provides the classic chili flavor without being overly spicy, making it kid-friendly. Feel free to adjust to your family’s preferred heat level.
How to Make Easy Instant Pot Chili Mac and Cheese
Making this incredible Instant Pot Chili Mac is surprisingly straightforward. Follow these steps for a perfect, one-pot meal:
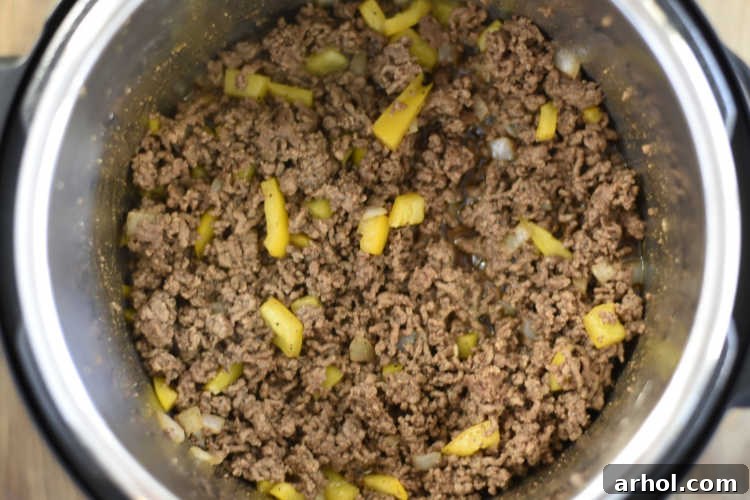
- Brown the Beef: Begin by adding a teaspoon of olive oil to the bottom of your Instant Pot. Select the “Saute” mode and allow the pot to heat until it reads “Hot.” Add your lean ground beef and use a spatula to break it apart as it browns.
- Season and Cook Beef: While the beef is browning, stir in your sea salt, black pepper, garlic powder, and chili powder. Continue to cook, stirring occasionally, until the beef is no longer pink and has completely crumbled. If you’re using lean ground beef, you likely won’t need to drain any fat. However, if there’s excess grease, carefully drain it before proceeding. Remember to season the meat after draining if you do so.
- Add Aromatics: Next, stir in your chopped onions and bell peppers. We prefer adding them at this stage rather than sautéing them first, as it allows them to soften just enough during pressure cooking without becoming too mushy.
- Deglaze the Pot: Turn off the “Saute” function by pressing “Cancel.” It’s crucial to ensure there are no brown bits stuck to the bottom of the pot. These bits can cause the dreaded “Burn” notice on your Instant Pot. To deglaze, add a small amount of beef broth (or water) and use a wooden spoon or spatula to scrape up any fond from the bottom. This step is vital for a successful pressure cook.
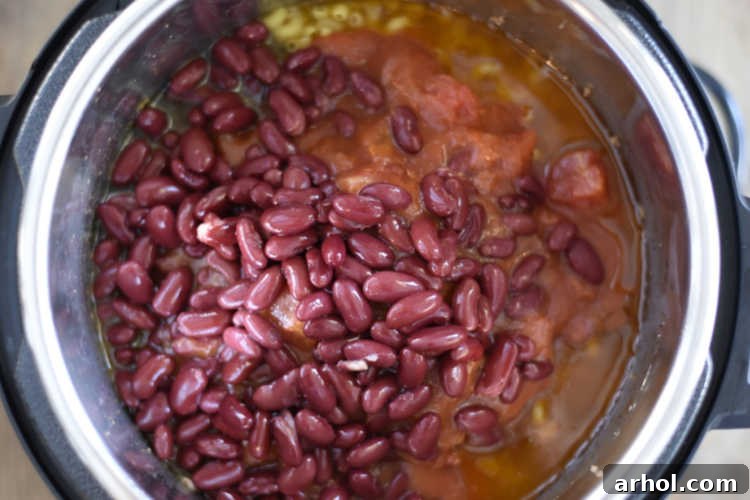
- Layer Remaining Ingredients (No Stirring!): Now, carefully add the uncooked elbow macaroni over the meat and vegetable mixture. Then, layer the beef broth, diced tomatoes, tomato sauce, and drained and rinsed kidney beans on top of the macaroni. Important: Do NOT stir the ingredients at this stage. Layering prevents the pasta and tomato products from sinking to the bottom and potentially causing a “Burn” notice.
Mastering the Instant Pot Cooking Time
Getting the cooking time right in your Instant Pot is crucial for perfectly cooked pasta and a creamy chili mac. Here’s what you need to know:
- Set to Pressure Cook: Secure the lid on your Instant Pot, ensuring the sealing ring is properly in place. Rotate the steam release valve to the “Sealing” position. Select the “Pressure Cook” (or “Manual”) function and set the cooking time to 4 minutes on high pressure.
- Pressure Building: Your electric pressure cooker will take a few minutes to build pressure before the actual cooking countdown begins. This time can vary depending on the model of your Instant Pot and the temperature of the ingredients, typically ranging from 5 to 10 minutes.
- Quick Release: Once the 4-minute cooking cycle is complete and the Instant Pot beeps, it’s time to perform a quick release. Carefully turn the steam release valve to the “Venting” position to rapidly release the pressure. A gradual quick release is recommended for saucy dishes like chili mac to prevent liquid from spraying out. To do this, turn the valve to venting for a few seconds, then back to sealing, repeating in short bursts until all pressure is released. You can use a wooden spoon or a long-handled utensil to safely turn the valve.
- Stir in Cheese: Once the float valve drops, indicating all pressure has been released, carefully remove the lid. Give the chili mac a good stir to thoroughly combine all the ingredients. Then, gradually add your shredded cheese, about 1 cup at a time, stirring until it’s fully melted and incorporated.
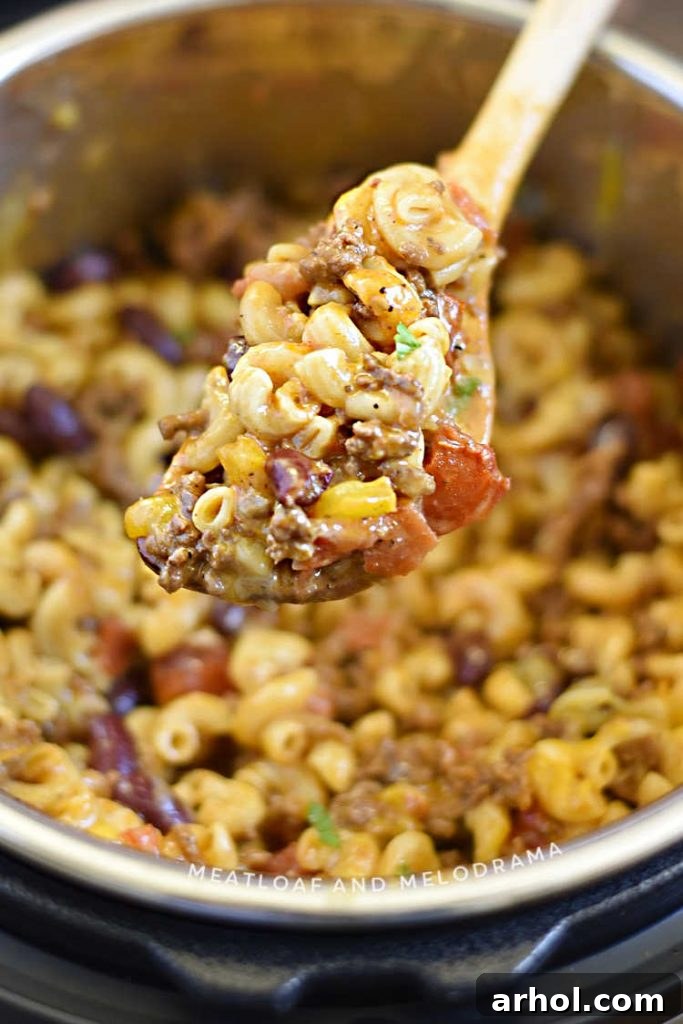
As the chili mac cools, it will naturally thicken further, resulting in that perfect, rich consistency. Serve immediately and enjoy your homemade masterpiece!
Tips for the Perfect Instant Pot Chili Mac
Achieving the perfect Instant Pot Chili Mac is easy with a few key considerations:
- Don’t Skip Deglazing: As mentioned, ensuring no food bits are stuck to the bottom of the pot after sautéing is crucial. A little beef broth and a sturdy spatula are your best friends here.
- Layer, Don’t Stir: This is a golden rule for many Instant Pot pasta dishes. Layering the ingredients ensures that the pasta doesn’t settle at the bottom and stick, which could trigger a burn notice.
- Cheese Choice Matters: While any shredded cheese works, Colby Jack provides exceptional creaminess. For a sharper flavor, a good quality sharp cheddar is excellent. Don’t be afraid to mix and match!
- Adjust Liquid for Consistency: The recipe uses 3 cups of broth for 2 cups of macaroni, yielding a saucy chili mac. If you prefer a thicker, less liquidy dish, you can slightly reduce the broth to 2.5 cups or increase the macaroni to a full 16-ounce box (approximately 4 cups uncooked) while keeping the liquid at 3.5 cups.
- Let it Rest: Like many pasta dishes, chili mac thickens considerably as it cools. If it seems a little soupy right after cooking, give it a few minutes to rest before serving.
Creative Variations to Try
While the classic Instant Pot Chili Mac is outstanding, this recipe is incredibly versatile and can be customized to suit your tastes or whatever you have on hand:
- Mexican Fiesta Chili Mac: For a zesty twist, swap out some of the traditional chili powder for taco seasoning. Add a can of black beans instead of kidney beans, and consider a can of Rotel (diced tomatoes with green chiles) for extra flavor. Top with a dollop of sour cream, chopped cilantro, and a squeeze of lime.
- Spicier Kick: If you love heat, incorporate cayenne pepper, red chili flakes, or a few sliced jalapeño peppers (fresh or pickled) into the beef mixture. A can of mild green chiles also adds a nice layer of subtle spice.
- Pasta Alternatives: Don’t have elbow macaroni? No problem! Any short pasta shape will work beautifully. Try shells, ditalini, penne, or rotini for a different texture.
- Healthier Options: To lighten the dish, use ground turkey or ground chicken in place of ground beef. You can also add more vegetables, such as diced zucchini, corn, or spinach, during the final stirring stage.
- Bean Varieties: Experiment with different beans like pinto beans, black beans, or even a mix of several types for added texture and nutrition.
- Smoky Flavor: A dash of smoked paprika or a teaspoon of liquid smoke can add a wonderful depth and smoky aroma to your chili mac.
How to Store and Reheat Leftovers
This Instant Pot Chili Mac makes a generous amount, perfect for feeding a crowd or enjoying delicious leftovers throughout the week. Proper storage and reheating will ensure your chili mac stays tasty:
- Refrigeration: Store any leftover chili mac in an airtight container in your refrigerator. It will keep well for 3 to 4 days.
- Freezing for Longer Storage: For extended storage, transfer cooled chili mac into a freezer-safe container or heavy-duty freezer bags. It can be frozen for up to 2-3 months. Thaw overnight in the refrigerator before reheating.
- Reheating on the Stovetop: For best results, reheat chili mac on the stovetop over medium-low heat. You may need to add a splash of beef broth or water to loosen it up, as the pasta tends to absorb liquid and thicken upon cooling. Stir occasionally until heated through.
- Reheating in the Microwave: Portion individual servings into microwave-safe bowls. Add a tablespoon or two of water or broth, cover, and microwave in 1-2 minute intervals, stirring in between, until hot.
- Casserole Transformation: Leftovers can also be transformed into a delicious baked casserole. Simply spoon the chili mac into a baking dish, top with extra shredded cheese, and bake at 350°F (175°C) for 15-20 minutes, or until hot and bubbly and the cheese is melted and golden.
Serving Suggestions
While Instant Pot Chili Mac is undeniably a complete one-pot meal on its own, pairing it with a simple side can elevate your dining experience. Here are some easy suggestions:
- Crusty Bread or Dinner Rolls: Perfect for soaking up every last bit of that flavorful sauce. Garlic bread is also an excellent choice.
- Simple Green Salad: A light, crisp green salad with a vinaigrette dressing offers a refreshing contrast to the richness of the chili mac.
- Cornbread: A classic pairing with chili, cornbread adds a lovely texture and slightly sweet counterpoint.
- Fresh Toppings: Offer a selection of toppings at the table: sour cream, extra shredded cheese, chopped green onions, a sprinkle of fresh cilantro, or even some crushed tortilla chips for added crunch.


⭐⭐⭐⭐⭐
Instant Pot Chili Mac
Equipment
-
Instant Pot Pressure Cooker (6-quart or 8-quart)
Ingredients
- 1 teaspoon olive oil
- 1½ pounds lean ground beef
- 1½ teaspoons sea salt
- 1 teaspoon ground black pepper
- 1 teaspoon garlic powder
- 2 teaspoons Chili Powder
- 1 large bell pepper seeded and chopped (yellow, orange, or green)
- ½ yellow onion diced
- 2 cups macaroni noodles uncooked elbow macaroni
- 3 cups beef broth or water
- 1 14.5-ounce can diced tomatoes
- 1 8-ounce can tomato sauce
- 1 16-ounce can kidney beans drained and rinsed
- 2½ cups Colby Jack cheese shredded (or sharp cheddar, mild cheddar, cheddar blend)
Instructions
-
Hit SAUTE on the Instant Pot. Once it reads “Hot,” add olive oil and ground beef, then crumble and brown with a spatula.
-
Add sea salt, pepper, garlic powder, and chili powder. Cook until the beef is no longer pink. Drain excess fat if necessary.
-
Stir in the diced onion and bell pepper. Ensure no brown bits are stuck to the bottom of the pot (deglaze with a little beef broth if needed). Then, hit CANCEL to turn the pot off.
-
Pour the macaroni over the meat mixture. Layer the beef broth, diced tomatoes, tomato sauce, and drained kidney beans over the macaroni. Do NOT stir at this point.
-
Place the lid on the pot, ensure the vent is in the “Sealing” position, then hit PRESSURE COOK (or Manual) for 4 minutes on high pressure.
-
The pot will take a few minutes to reach pressure, then begin cooking. Once the pot beeps, perform a gradual quick release of pressure. When the float valve drops, remove the lid.
-
Stir all ingredients together until well combined. Then, stir in the shredded cheese, 1 cup at a time, until fully melted and creamy.
-
Serve hot. The chili mac will continue to thicken as it cools.
Notes
Chili mac will naturally thicken as it cools. Expect some liquid, as it is a chili with macaroni. If you prefer a very thick consistency, you can use a full 16-ounce box of pasta (approx. 4 cups uncooked) and increase beef broth to 3.5-4 cups.
Feel free to add more cheese at the end for an extra creamy and cheesy experience.
Nutrition
Carbohydrates: 19g,
Protein: 26g,
Fat: 15g,
Saturated Fat: 8g,
Cholesterol: 74mg,
Sodium: 774mg,
Potassium: 440mg,
Fiber: 2g,
Sugar: 2g,
Vitamin A: 1316IU,
Vitamin C: 21mg,
Calcium: 249mg,
Iron: 3mg
Nutrition information is automatically calculated, so should only be used as an approximation.
Additional Info
Like this? Leave a comment below!
We truly believe this is one of the BEST chili mac recipes you’ll ever make. If you enjoy it as much as our family does, please consider sharing this easy recipe with your friends and family on your favorite social media sites, or Pin it to your recipe board to save for later!
For more easy dinner recipes and other straightforward meal ideas, be sure to sign up for our weekly newsletter to get delicious inspiration delivered straight to your inbox.
Recipe first published in 2019 and updated in 2021.