
Crafting the World: A Guide to Making Salt Dough Maps with Kids
Hello fellow creators and educators!
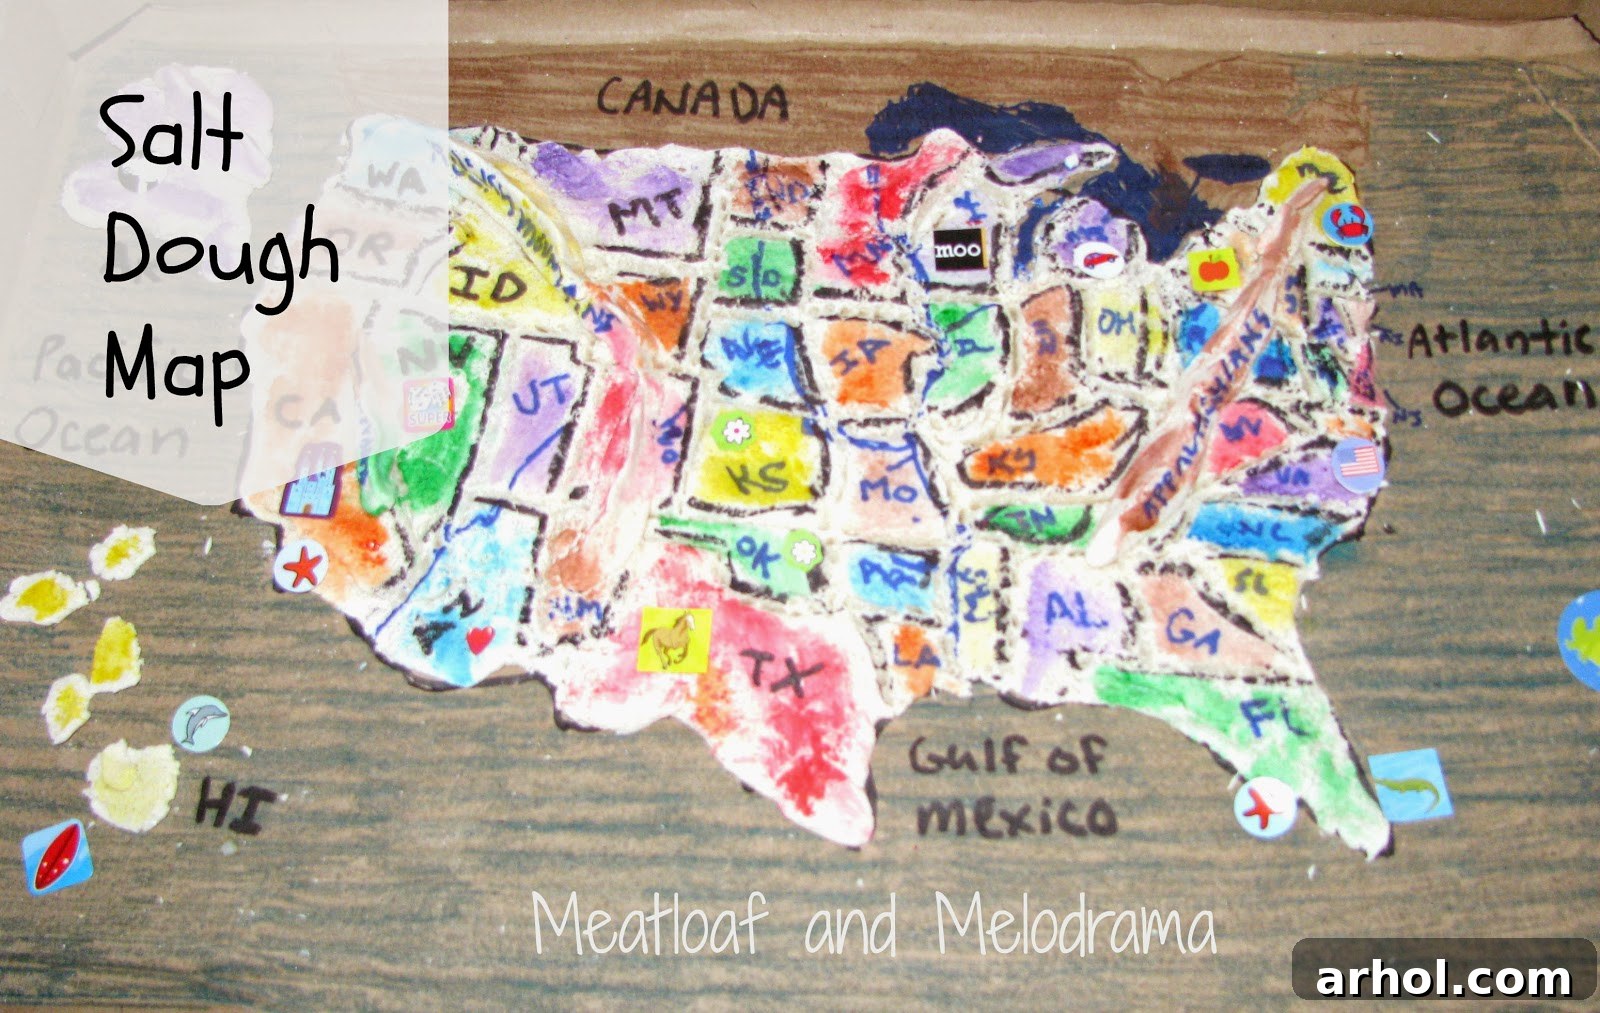
There’s something truly magical about salt dough. It’s a simple, versatile medium that consistently sparks joy and creativity, especially with children. As a go-to activity during those long summer days when boredom threatens to set in, salt dough has saved us countless times. While traditional ornaments and simple shapes are always fun, last year we embarked on a more ambitious and incredibly rewarding project: creating vibrant, tactile salt dough maps. These handmade maps transformed our craft time into an engaging geography lesson, bringing continents, countries, and landscapes to life right on our kitchen table.
I must admit, the original photos for this project were taken before I started blogging, so they might not be professional quality. However, even with a little editing, they capture the genuine enthusiasm and hands-on learning that made this project so special. They serve as a testament to the fun we had, and I hope they inspire you to embark on your own geographical adventure!
Why Salt Dough Maps Are a Must-Try Educational Craft
While making salt dough maps is certainly a time-consuming endeavor that requires a good deal of adult assistance, the educational payoff is immense. This isn’t just another craft; it’s a multi-sensory learning experience that deeply imprints geographical concepts. For homeschooling families, in particular, this project is a goldmine, offering an interactive way to teach complex topics. But even if you’re not homeschooling, it’s an excellent way to keep young minds active and engaged during school breaks, fostering a love for learning that goes beyond textbooks.
Beyond basic geography, this activity naturally introduces elements of geology, history, and culture. As children shape mountains, trace rivers, and place landmarks, they gain a tangible understanding of the world’s physical and human landscapes. It’s a fantastic way to develop fine motor skills, spatial reasoning, and creative problem-solving. Plus, the tactile nature of working with dough provides a wonderful sensory experience that enhances memory and engagement.
Gathering Your Essential Materials
Before diving into the creative process, gathering all your supplies ensures a smooth and enjoyable crafting session. Here’s what you’ll need to create your very own topographical masterpiece:
- Salt Dough: You can use your favorite salt dough recipe, or a simple combination of 2 cups all-purpose flour, 1 cup salt, and 1 cup water (adjust water as needed for consistency). This forms the foundational landscape of your map.
- Sturdy Cardboard: A robust base is crucial for your map’s longevity. We found that the bottom of a case of water bottles or a large flattened box works perfectly. Ensure it’s large enough for your desired map size.
- Permanent Markers (Sharpie): Essential for tracing outlines and defining borders after the dough has dried. Black is ideal for initial outlines, but colored markers add vibrancy.
- Reference Map: A clear, detailed U.S. map (or whichever region you choose) is vital. Print one out, use an atlas, or even project one onto the cardboard for easier tracing.
- Dull Knife or Modeling Tool: For carefully carving state or country borders and shaping topographical features. A butter knife or a plastic modeling tool designed for clay is perfect for safety.
- Coloring Mediums: Crayons, watercolors, or acrylic markers can all be used to bring your map to life with color. Watercolors offer a lovely translucent finish, while markers provide bold, vibrant hues.
- Assorted Stickers & Embellishments: These are for personalizing your map and adding fun, memorable landmarks. Think small flags, animal stickers for wildlife, or tiny drawings for famous sites.
Step-by-Step Guide: Crafting Your Topographical Masterpiece
Phase 1: Laying the Foundation
The first step is to prepare your canvas and the main material. Begin by selecting the specific map you wish to create. For our initial project, we focused on the United States, but you could choose a continent, a country, or even a local region. Print out a large, clear image of your chosen map.
Carefully trace the outline of the United States (or your chosen area) onto your cardboard base using a Sharpie. We found it helpful to cut out the printed map first, allowing the kids to easily trace around its perimeter. This ensures an accurate and defined boundary for your salt dough application. Once your outline is complete, it’s time to prepare your salt dough. Mix and knead the dough thoroughly until it’s smooth, pliable, and consistent, much like playdough.
Now, take generous portions of your salt dough and carefully place them within the traced outline on your cardboard. Begin “smushing” and spreading the dough, pressing it down firmly to adhere it to the cardboard base. Aim to create an even layer that fills the entire shape of your map. Don’t worry about perfection at this stage; the goal is to establish the basic landmass.
Phase 2: Defining Features and Drying
With the basic landmass formed, the next crucial step is to define the internal borders and key geographical features. Using a dull knife or a modeling tool, carefully outline the borders of each state or country. Refer frequently to your printed reference map to ensure accuracy. This is a great opportunity to discuss political boundaries and how they divide different regions.
Next, it’s time to bring geology into the picture! We also sculpted the major mountain chains, building up the dough slightly in those areas to create a raised, three-dimensional effect. This natural led to fascinating discussions about how mountains are formed through tectonic plate movements, erosion, and seismic activity. You can also lightly indent areas for major rivers and bodies of water, which will be painted blue later.
Once you’ve finished shaping and detailing your map, it’s time for the all-important drying process. We live in Arizona, where the abundant sunshine dries things remarkably fast! Placing your map in a sunny, warm spot will significantly speed up the drying time. If sun drying isn’t an option, you can gently bake your salt dough map in an oven at a very low temperature (around 170-200°F or 80-95°C) for several hours, or even overnight, until it is completely hardened. Be patient; thorough drying prevents cracks and ensures your map lasts longer.
Phase 3: Bringing the Map to Life with Color and Detail
Once your salt dough map is completely dry and hard, the real artistic fun begins! The kids took turns with the next steps, making it a truly collaborative effort. First, using a Sharpie, they carefully went over the borders they had previously carved, making them crisp and defined. This step reinforces the geographical divisions.
Then came the splash of color. Using watercolors, crayons, or markers, the children began painting or coloring each state. This is an excellent opportunity to discuss different regions, climates, or even major industries within each state. The kids loved seeing their map transform from a bland dough shape into a vibrant representation of the country. After the paint dried, they meticulously labeled each state, further solidifying their geographical knowledge.
We continued to build on the physical features, painting the sculpted mountain ranges and bodies of water. This expanded into discussions about elevation, ecosystems, and the importance of rivers and oceans. Finally, the children added stickers and small drawings to represent different areas. For instance, Southern California proudly received a Disneyland castle sticker, while other states might get an agricultural symbol, a famous landmark, or an animal native to that region. These personal touches make the map truly unique and memorable.
Embracing Creativity and Imperfections
It’s important to remember that these are children’s creations, and perfection isn’t the goal. Our map, for example, wasn’t the most geographically accurate, partly due to space constraints and partly due to charming artistic liberties. One of the kids even filled in the area for Canada with dough, while another decided that coloring everything south of the map blue “just looked better that way!” These spontaneous creative decisions are part of the joy and learning process, sparking further conversations and imaginative play.
Despite the considerable amount of work involved, the kids had an absolute blast with this project. The engagement and learning were palpable, making every minute worthwhile. The success was so evident that the very next day, we were inspired to create another one – a map of Europe!
Tips for Success and Longevity
A salt dough map is truly a fun and effective way to teach geography, geology, and even history, transforming these subjects into interesting and interactive experiences for children. To ensure your map stands the test of time (or at least a good long while!), consider these additional tips:
- Work in Sections: For very large or intricate maps, consider working on smaller sections of the dough at a time to prevent it from drying out prematurely.
- Adult Supervision: Always ensure adult supervision, especially when using sharp tools for carving or if you choose to oven-bake the map.
- Prevent Cracks: If your dough starts to crack while drying, it might be drying too quickly. Try covering it loosely with a cloth or moving it to a less intense drying spot. A small amount of white glue can also repair minor cracks once dry.
- Sealing for Durability: To protect your finished masterpiece and give it a lasting finish, apply a few coats of Mod Podge or a clear acrylic sealant (spray or brush-on) once all painting and decorating are complete and fully dry. This will prevent it from getting brittle and breaking easily, preserving your children’s hard work for years to come.
- Storage: Store your finished maps in a dry place to prevent moisture absorption, which can soften the dough over time.
Our initial maps lasted for quite a long time, becoming cherished educational display pieces. Eventually, they did become brittle and broke, but the memories and the learning endured. If I can convince the kids to make another map in the future, I’ll definitely update these pictures with even better quality!
Thank you for visiting and exploring this exciting educational craft idea. I hope you and your children have a wonderful time discovering the world, one salt dough map at a time!
Happy crafting and learning!
Dee 🙂