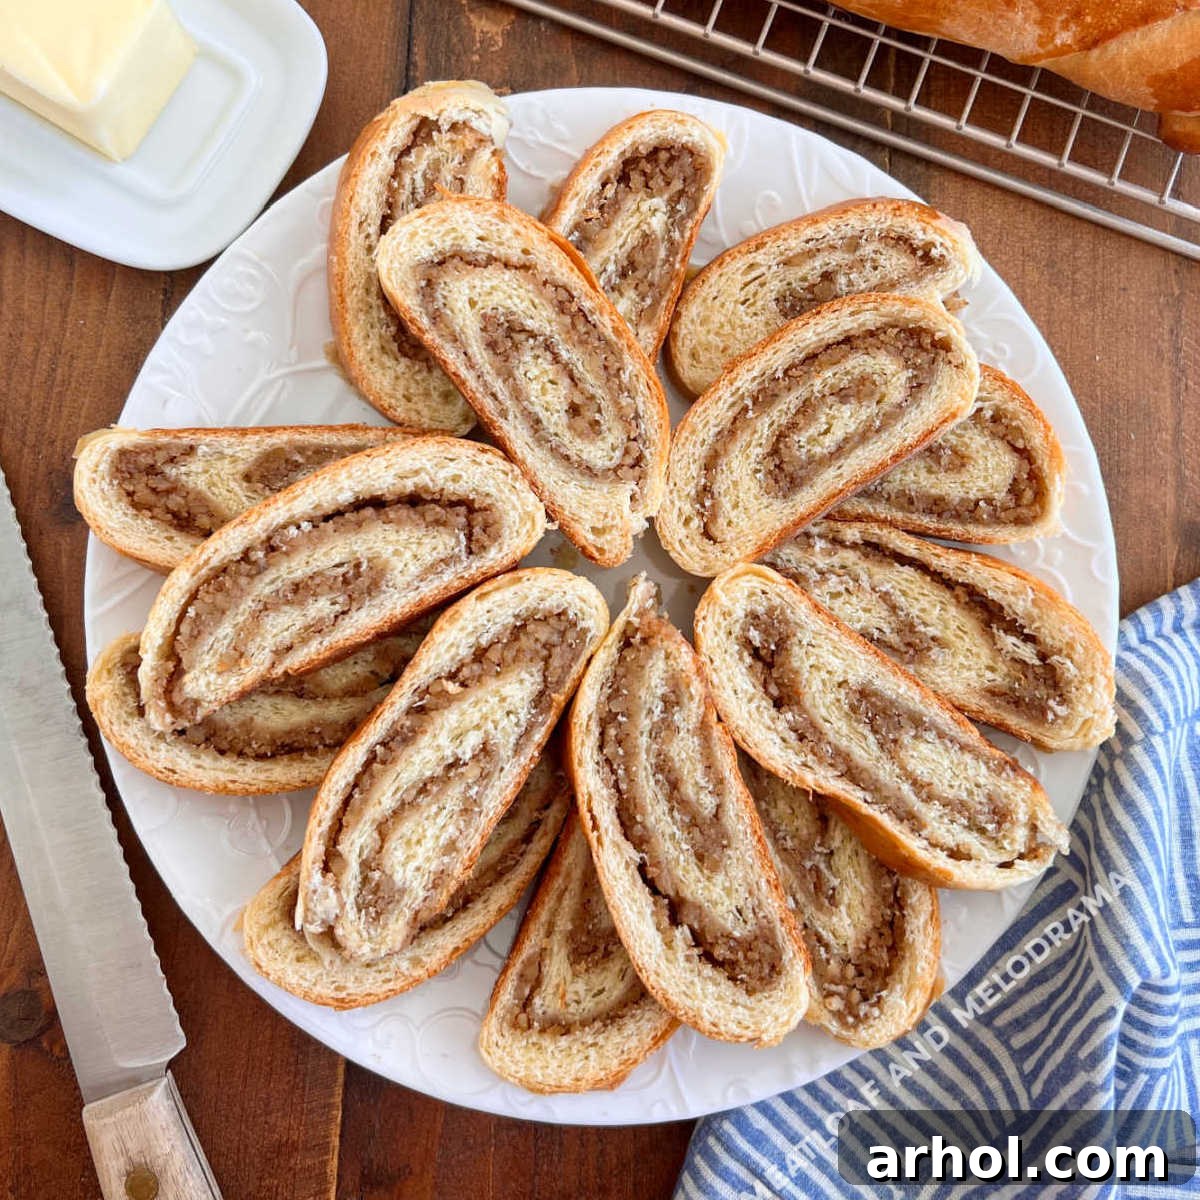
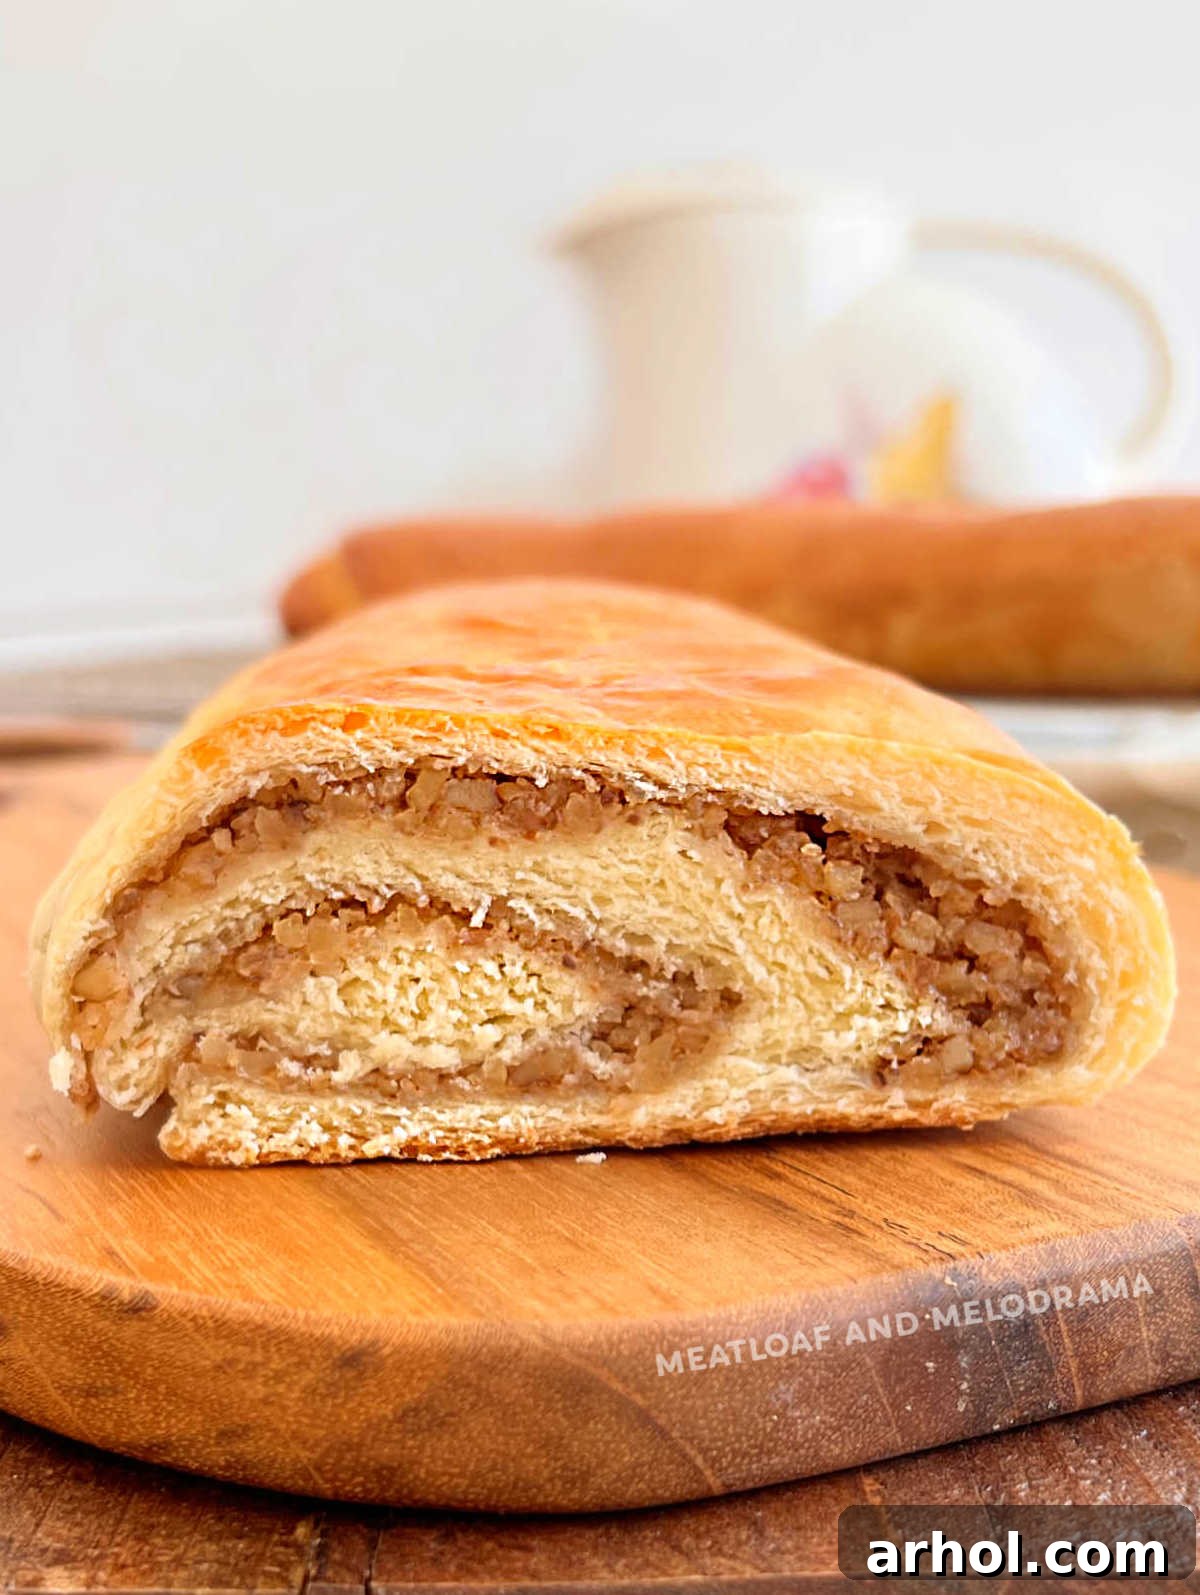
There’s nothing quite like the aroma of freshly baked sweet bread filling your home, especially during the holidays. Our beloved Grandma’s Nut Roll Recipe offers just that – a truly delicious, tender sweet bread generously filled with rich, ground walnuts. These homemade Slovak nut rolls are more than just a treat; they’re a cornerstone of holiday traditions, gracing tables for both Christmas and Easter celebrations with their comforting presence and irresistible flavor. This cherished recipe has been passed down through generations, ensuring every bite carries the warmth of family history.
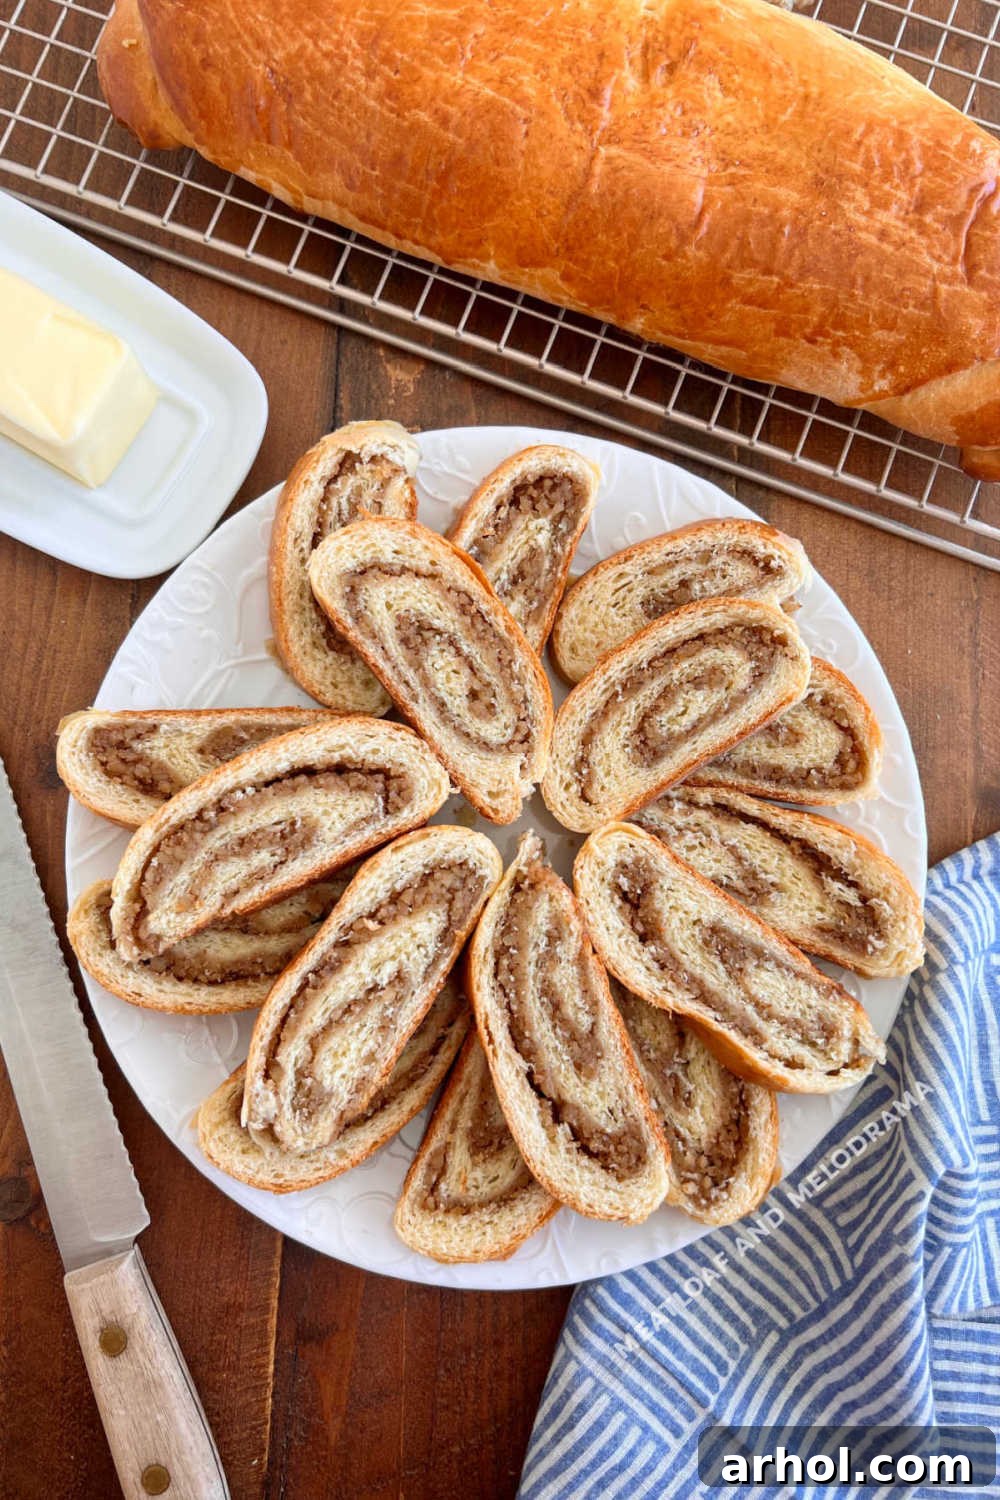
Table of Contents
- A Taste of Tradition: The Story Behind the Slovak Nut Roll
- Why Grandma’s Nut Roll Recipe Stands Out
- Essential Ingredients for Your Nut Rolls
- Step-by-Step Guide to Making Perfect Nut Rolls
- Preparing the Dough
- The First Rise and Making the Filling
- Forming and Filling the Rolls
- The Second Rise and Baking
- Optimal Baking Time for Golden Perfection
- Storing Your Homemade Nut Rolls
- Creative Variations to Customize Your Nut Rolls
- Troubleshooting Common Nut Roll Challenges
- Grandma’s Nut Roll Recipe Card
- Serving and Savoring Your Nut Rolls
My grandma, affectionately known as Baba, was a culinary genius from Pittsburgh whose kitchen was a hub of incredible Eastern European delights. Every year, without fail, her homemade nut rolls were the star of our Christmas and Easter feasts. Beyond these sweet walnut swirls, she was famous for the best pierogi, hearty cabbage rolls (halupki), comforting haluski, and even her simple but satisfying fried bologna sandwiches! This Slovak nut roll recipe, deeply rooted in our family’s heritage, carries the essence of her loving spirit and culinary wisdom.
A Taste of Tradition: The Story Behind the Slovak Nut Roll
While we lovingly call this a Slovak nut roll recipe, it’s a delightful truth that similar sweet breads filled with ground nuts can be found across Eastern Europe. Whether you know it as a Polish nut roll (often called Makowiec, though usually with poppy seeds), a Ukrainian nut roll, a Russian nut roll, or a Hungarian nut roll, the fundamental concept remains the same: a rich, tender dough encasing a sweet, nutty filling. This widespread popularity speaks to the comforting appeal of such a pastry, deeply woven into the fabric of many cultures.
In regions with significant Eastern European diaspora, like Pittsburgh or Pennsylvania, these traditional recipes have found new homes and evolved slightly over time, often earning local names like “Pittsburgh nut roll” or “Pennsylvania nut roll.” This recipe, while deeply traditional, has also undergone subtle modernizations over the years, mainly to incorporate readily available ingredients and simpler techniques. For instance, my family now relies on a trusty stand mixer, which significantly streamlines the kneading process while still yielding the perfectly soft dough Baba always achieved.
If you’re new to baking homemade nut bread, don’t be discouraged if your first attempt isn’t absolutely flawless. Making nut rolls is an art that blends practice, patience, and a whole lot of love. But here’s the good news: this recipe is remarkably forgiving. The dough, in particular, is consistently perfect, providing a wonderful foundation for your baking journey. Embrace the process, and you’ll soon be creating beautiful, delicious nut rolls that will impress your family and friends!
Why Grandma’s Nut Roll Recipe Stands Out
What makes Grandma’s recipe so special? It’s more than just a list of ingredients; it’s a legacy. This isn’t just a recipe; it’s a piece of family history, carefully preserved and lovingly shared. The combination of simple, wholesome ingredients and time-tested techniques results in a nut roll that boasts incredible tenderness and a deeply satisfying flavor. The secret lies in the thoughtful balance of the dough and the rich, aromatic walnut filling. Every step is designed to maximize flavor and texture, from the sour cream that ensures an exceptionally soft dough to the generous, spiced walnut filling that creates those beautiful, irresistible swirls.
Moreover, this recipe has been refined to be accessible. While it honors traditional methods, it adapts to the modern kitchen, making the process enjoyable rather than daunting. Whether you’re continuing a family tradition or starting a new one, this recipe provides a foolproof guide to creating a truly memorable holiday treat. The joy of baking these nut rolls and the delight of sharing them with loved ones is truly what makes this recipe a cherished standout.
Essential Ingredients for Your Nut Rolls
Creating these delightful nut rolls requires just a few basic ingredients, readily available at your local grocery store or online. Each plays a crucial role in achieving the perfect texture and flavor:
- Milk: I typically use 2 percent milk, which adds moisture and richness to the dough, helping to activate the yeast effectively.
- Active Dry Yeast: Essential for giving our sweet bread its characteristic airy and tender crumb. Be sure to use active dry yeast, not instant yeast, as the activation process is key here.
- Sugar: Granulated sugar provides the necessary sweetness to both the dough and the walnut filling, balancing the richness of the nuts.
- Salt: A pinch of salt is vital for enhancing all the flavors in the dough and controlling the yeast’s activity.
- Butter: Softened butter is incorporated into the dough for richness and tenderness, while melted butter for the filling adds a smooth consistency and deep flavor.
- Sour Cream: This is a secret weapon for an incredibly soft, moist, and flavorful dough. Its acidity also helps tenderize the gluten.
- Large Eggs: Slightly beaten, eggs add richness, structure, and a beautiful golden hue to the dough.
- All-Purpose Flour: The foundation of our dough, providing structure. You might need a little extra for dusting surfaces.
- Walnuts: Ground walnuts are the heart of our filling, providing a distinctive earthy and sweet flavor.
- Ground Cinnamon: This spice beautifully complements the walnuts, adding warmth and depth to the filling.
Step-by-Step Guide to Making Perfect Nut Rolls
Baking these homemade nut rolls is a rewarding process that, while requiring a bit of patience, is surprisingly straightforward. Follow these steps carefully to achieve that perfect, tender sweet bread with its luscious walnut swirl.
Preparing the Dough
- Activate the Yeast: Begin by gently warming the milk in a small bowl until it reaches a temperature between 100°F and 110°F. This specific temperature range is crucial for activating the yeast without killing it. Stir in the active dry yeast along with 1 teaspoon of granulated sugar. Let this mixture sit for 5-10 minutes until it becomes foamy, indicating the yeast is active and ready.
- Combine Wet Ingredients: Pour the activated yeast mixture into the bowl of your stand mixer. Attach the dough hook. If you don’t have a stand mixer, a large mixing bowl and a sturdy spoon (or your hands!) will work perfectly fine for kneading.
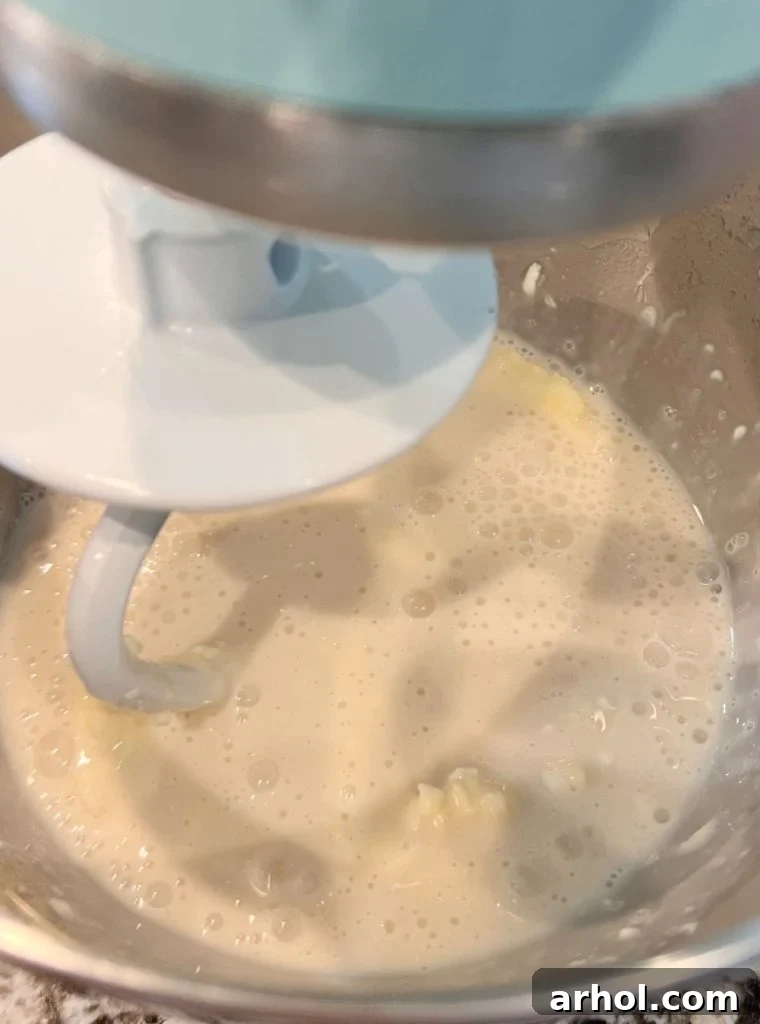
- Begin Mixing the Dough: Add the slightly beaten eggs, softened butter, sour cream, and the remaining sugar and salt to the mixer bowl. Add 1 cup of all-purpose flour. Turn the mixer on medium speed and allow the ingredients to combine thoroughly.
- Gradually Add Flour: Continue mixing on medium speed, gradually adding 2 more cups of flour, one cup at a time. The dough will begin to come together. You may notice the dough clinging to the dough hook or the sides of the bowl; use a spatula or fork to scrape it down occasionally to ensure even mixing.
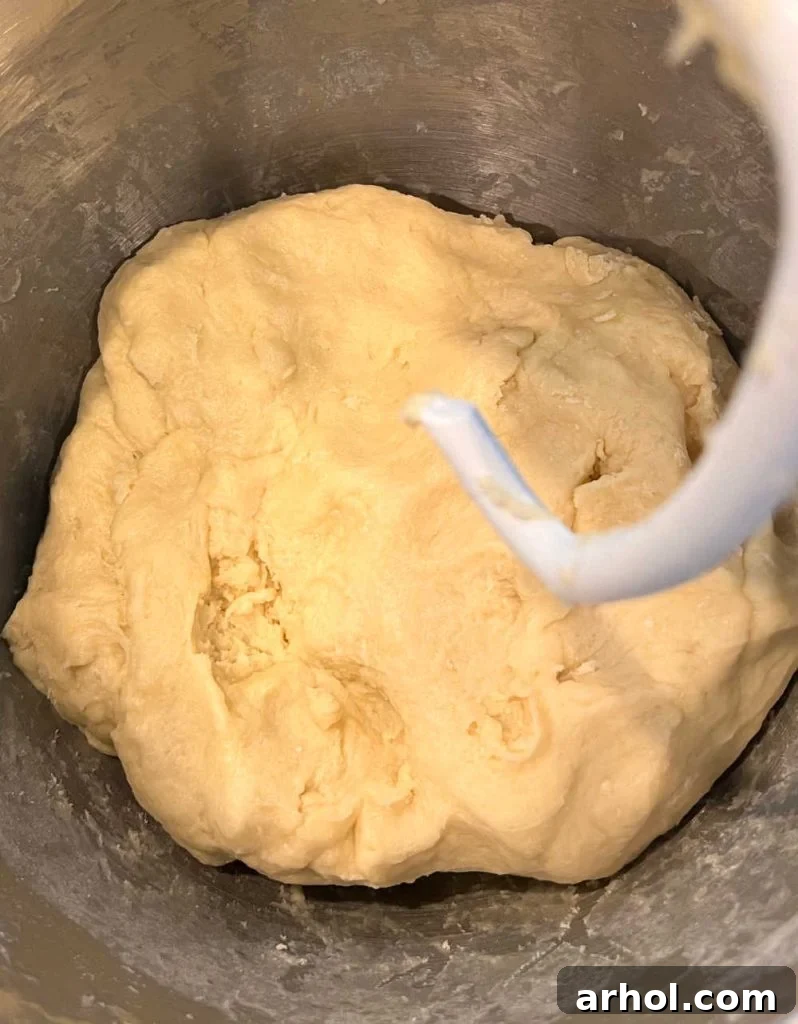
- Achieve the Right Consistency: Add 2 additional cups of flour, bringing the total to 5 cups. Continue to mix until the dough starts to pull away from the sides of the bowl. The goal is for the dough to be slightly sticky but manageable. If it feels overly wet and very sticky, add a little more flour, a tablespoon at a time, until it forms a smooth ball that is still soft to the touch. Avoid adding too much flour, as this can result in dry, tough nut rolls.
The First Rise and Making the Filling
- First Rise: Once your dough is properly mixed and formed into a smooth ball, place it into a generously greased large mixing bowl. You can use the stand mixer bowl itself, or a separate large bowl or Dutch oven. Lightly grease a piece of aluminum foil with butter and loosely cover the bowl. Place the dough in a warm place to rise. A pro tip: if your oven has a “proof” setting, use it! Otherwise, you can briefly warm your oven to a low temperature (around 150°F), turn it off, and then place the covered dough inside. Let the dough rise for approximately 1 hour, or until it has visibly doubled in bulk.
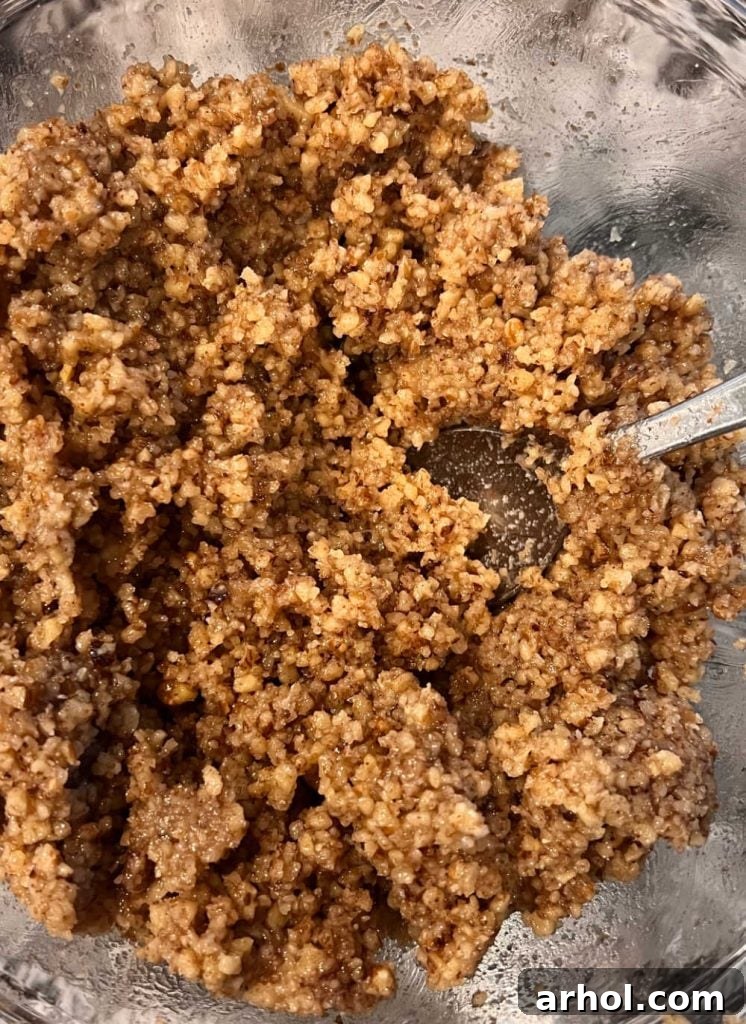
- Prepare the Walnut Filling: While the dough is undergoing its first rise, prepare your irresistible walnut filling. Begin by finely grinding the walnuts. A food processor works wonderfully for this, or you can place them in a zip-top bag and use a mallet or rolling pin. The goal is a finely ground texture, but a few small pieces are fine. Transfer the ground nuts to a mixing bowl, then stir in the sugar, ground cinnamon, melted butter, and milk until all ingredients are well combined and form a thick, spreadable paste.
Forming and Filling the Rolls
- Punch Down and Divide: After the dough has doubled in size, gently punch it down with your fist to release the air. This step helps create a finer crumb. Then, divide the dough into 4 equal portions. A pastry or dough cutter can make this task easier and more precise.
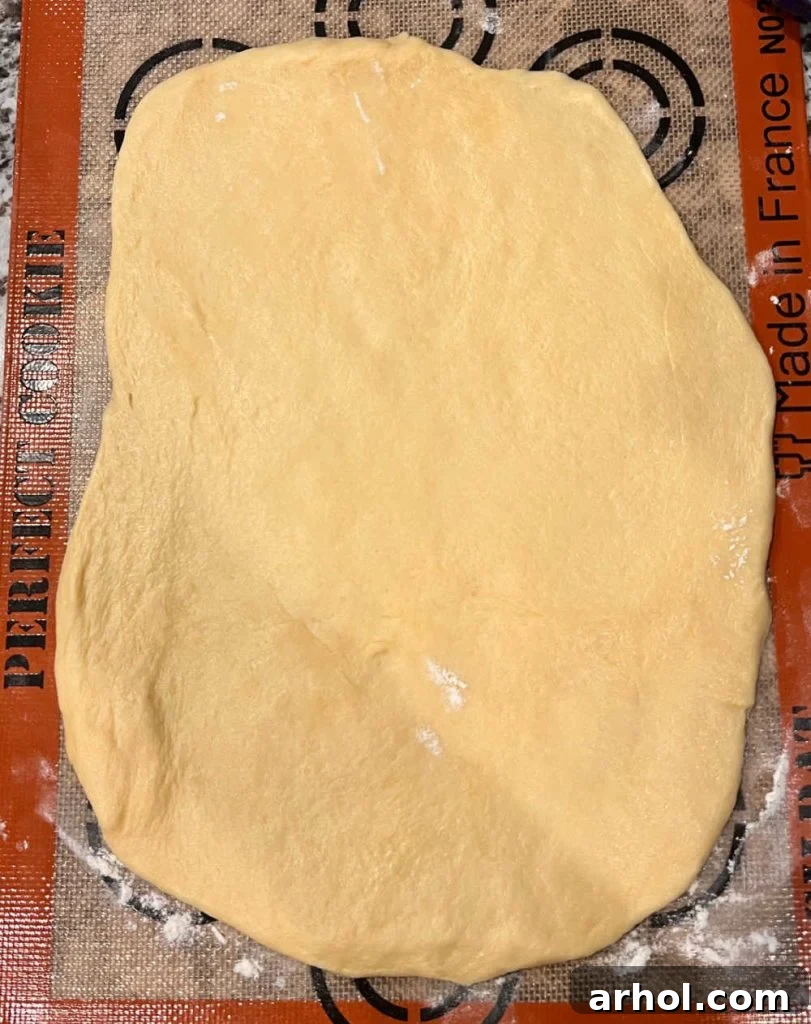
- Roll Out the Dough: Lightly flour a clean work surface. Silicone mats are excellent for this, but a cutting board or your countertop works perfectly. Take one portion of the dough and place it on the floured surface. Cover the remaining dough portions in the bowl to prevent them from drying out. Using a rolling pin, roll the dough out into a rectangle, approximately 12 inches by 10 inches, aiming for about 1/4 inch thickness.
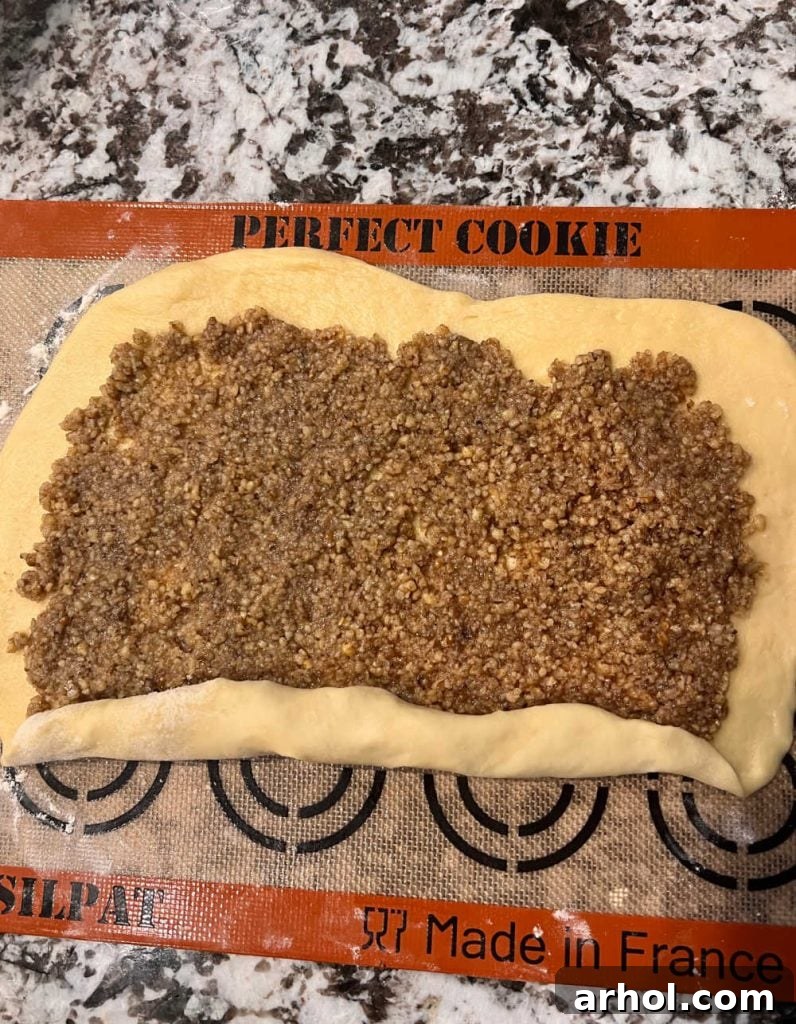
- Spread the Filling: Take about 1 cup of the prepared nut filling and spread it evenly over the rolled-out dough. Be sure to leave a border of approximately 1/2 inch around all the edges. I find it easiest to gently press the nut filling with your fingertips to ensure it’s evenly distributed without tearing the delicate dough. Avoid using a spatula or knife for this step.
- Roll the Nut Rolls: Orient the dough so that the long side is facing you. Carefully lift the edge closest to you and begin to roll it tightly up and over the filling, starting from the center and working your way outwards to the ends. Continue rolling until you reach the opposite edge. This technique, often called “jelly roll style” by Grandma, ensures a beautiful spiral. Once rolled, make sure the seam side is down.
- Seal the Rolls: Gently pinch the edges of the roll together along the seam to seal them securely. Then, tuck the ends underneath the roll, pressing firmly to seal them as well. This prevents the filling from escaping during baking.
- Prepare for Second Rise: Place the formed nut roll onto a baking sheet that has been lined with parchment paper or aluminum foil. Repeat steps 9-12 for the remaining three dough portions. You can typically bake two rolls on a large baking sheet. For the second rise, lightly grease both the prepared baking sheets and the foil you will use to cover the rolls with butter. Cover the rolls loosely with the greased foil and allow them to rise for another 30 minutes in a warm place. During this time, preheat your oven to 350°F (175°C).
- Optional Egg Wash: For an extra golden-brown, shiny crust, you can prepare an egg wash. Simply whisk one large egg with 1 teaspoon of water and gently brush it over the tops of the nut rolls just before baking. This step is optional but highly recommended for that classic bakery finish.
The Second Rise and Baking
The second rise allows the rolls to become light and airy before baking. As your oven preheats, the rolls will continue to puff up slightly, setting them up for a perfect bake.
Optimal Baking Time for Golden Perfection
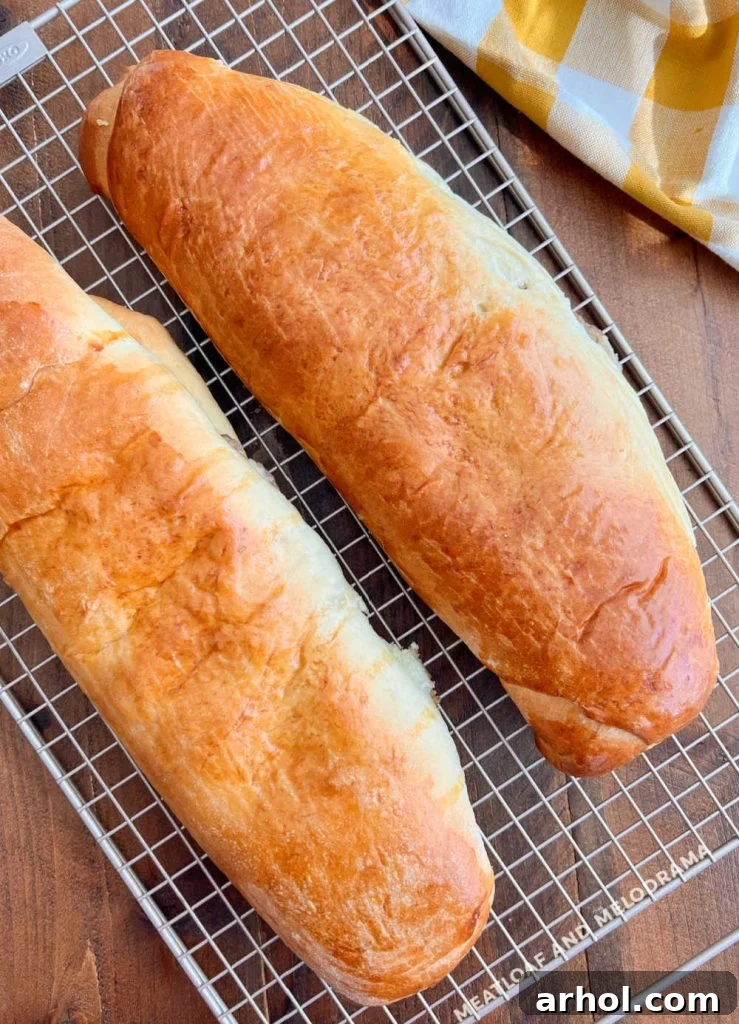
Baking nut rolls requires a keen eye, as oven temperatures can vary significantly. Once your oven is preheated to 350°F (175°C), place the uncovered nut rolls into the oven. Bake them for approximately 30 to 35 minutes. You’re looking for a beautiful golden-brown color on the top and sides.
To confirm doneness, gently tap the top of a roll; if it sounds hollow, it’s typically baked through. For an extra layer of assurance, an instant-read thermometer inserted into the center of the roll (avoiding the filling if possible) should register at least 160°F (71°C). Once baked, remove the rolls from the oven and transfer them to a wire rack to cool completely. This cooling step is crucial for the internal structure to set, preventing a gummy texture when sliced.
Storing Your Homemade Nut Rolls
Proper storage is key to enjoying your homemade nut rolls for as long as possible. Ensure the rolls are completely cooled before storing them to prevent sogginess.
- Room Temperature: If your home is cool and you plan to consume the bread within 3 days, whole, uncut nut rolls can be wrapped tightly in aluminum foil and left at room temperature. Sliced nut bread is best stored on a plate covered tightly with plastic wrap to prevent it from drying out.
- Freezer Storage: For longer enjoyment, nut rolls freeze beautifully. Wrap whole, cooled loaves first in plastic wrap, then again in aluminum foil. This double layer of protection guards against freezer burn. Stored this way, they will maintain their quality for up to 3 months. To thaw, simply unwrap and let them come to room temperature, or gently warm them in a low oven for a few minutes.
- Important Note: I do not recommend freezing the raw dough. The texture and rise quality will not be the same after thawing, and you’ll get a superior result by baking the rolls fresh.
Creative Variations to Customize Your Nut Rolls
While the classic walnut filling is undeniably delicious, this versatile dough lends itself wonderfully to various creative modifications. Don’t hesitate to experiment and personalize your nut rolls:
- Alternative Nut Fillings: Instead of walnuts, try other finely ground nuts like pecans, almonds, or a mixture for a different flavor profile. Each nut brings its unique richness to the sweet bread.
- Fruit Fillings: Incorporate finely chopped dried fruits into your filling. Apricots, prunes (lekvar), or even a touch of applesauce can add a delightful tang and moisture.
- Spice it Up: Enhance the classic walnut filling by adding a pinch of nutmeg, cardamom, or even a touch of orange zest for a brighter, citrusy note.
- Poppy Seed Rolls (Makowiec): This dough is perfect for making traditional makowiec, a Polish pastry roll filled with a rich, sweet poppy seed paste. The process is identical, simply swap the walnut filling for a poppy seed one.
- Sweet Glaze: For an extra touch of sweetness, drizzle a simple powdered sugar glaze over the cooled nut rolls. A light apple glaze is a popular choice and complements the nutty flavor beautifully.
Troubleshooting Common Nut Roll Challenges
Even experienced bakers encounter a hiccup now and then. Here are some common issues and how to address them:
- Dough is too sticky: The weather can significantly impact yeast doughs. High humidity often means the dough needs a little more flour than specified. Add flour a tablespoon at a time until the dough is manageable but still soft and slightly tacky.
- Dough is too dry: Conversely, in cold or dry conditions, you might need less flour. Always add flour gradually. If your dough feels stiff and crumbly, it might have too much flour. A little extra milk (a teaspoon at a time) can help rehydrate it.
- Dough cracks or splits during baking: If your nut rolls split open while baking, several factors could be at play. It might be that there was too much filling, causing pressure as the dough expanded. Alternatively, the dough might have been too dry, or it didn’t rise adequately during the proofing stages. While not ideal aesthetically, rest assured that even split nut rolls will still taste wonderful!
- Nut Rolls don’t rise: This is almost always due to inactive yeast. Ensure your milk is the correct temperature (100-110°F) when activating the yeast. If your yeast doesn’t foam after 5-10 minutes, it’s best to start over with fresh yeast.
Grandma’s Nut Roll Recipe Card
By: Dee
Grandma’s Nut Roll Recipe makes a delicious sweet bread filled with ground walnuts. Homemade Slovak nut rolls are perfect for the holidays and traditional for both Christmas and Easter.
Prep Time: 15 minutes
Cook Time: 30 minutes
Rising Time: 1 hour 30 minutes
Total Time: 2 hours 15 minutes
Servings: 30 pieces (4 nut rolls)
Equipment
- Stand mixer (optional, can be done by hand)
- Large mixing bowls
- Rolling pin
- Baking sheets
- Parchment paper or aluminum foil
- Food processor (for grinding walnuts, optional)
Ingredients
Dough
- ½ cup milk (2 percent recommended)
- 2 packets active dry yeast (¼ ounces each)
- ½ cup granulated sugar
- 1 teaspoon salt
- 1 cup butter, softened, at room temperature
- 1 cup sour cream
- 3 large eggs, lightly beaten
- 5½ cups all-purpose flour, plus more for rolling out
Filling
- 1 pound walnuts, ground (about 4 cups)
- ¼ cup milk
- 2 tablespoons butter, melted
- 1 cup granulated sugar
- 1 teaspoon ground cinnamon
Instructions
Dough Preparation
- In a small bowl, heat the milk to 100° to 110° F. Dissolve yeast in the warm milk, along with 1 teaspoon of sugar. Let sit for 5-10 minutes until foamy.
- Pour the yeast mixture into the bowl of a stand mixer. Add the remaining sugar, salt, softened butter, beaten eggs, sour cream, and 1 cup of all-purpose flour.
- Mix with the dough hook on medium speed. Gradually add 2 more cups of flour, mixing until incorporated.
- Add 2 more cups of flour (for a total of 5 cups). Continue mixing until the dough begins to separate from the sides of the bowl. Scrape the dough off the hook and flour from the sides of the bowl as needed during mixing.
- The dough should be slightly sticky but not wet. If necessary, add an additional ½ to 1 cup of flour, one tablespoon at a time, until it forms a smooth, pliable ball.
- Form the dough into a ball with your hands. Place it in a generously buttered mixing bowl and cover loosely with buttered aluminum foil. Allow to rise in a warm place for 1 hour, or until doubled in size.
Filling Preparation
- While the dough is rising, prepare the filling. In a mixing bowl, combine the ground walnuts, 1 cup sugar, ¼ cup milk, 2 tablespoons melted butter, and 1 teaspoon ground cinnamon.
- Mix until the walnuts form a thick, spreadable paste.
Assembling and Baking
- After the dough has risen, punch it down gently with your fist to release air. Cut the dough into 4 equal pieces.
- Place one piece of dough on a lightly floured surface. Gently roll it out into a rectangle, approximately 12 inches by 10 inches and about ¼ inch thick. Keep the remaining dough covered.
- Sprinkle about 1 cup of the walnut filling evenly over the dough, leaving a border of about ½ inch on all sides. Gently press the filling into the dough with your fingertips to adhere.
- With the long side facing you, begin to tightly roll the edge of the dough up and over the filling, starting from the center and working towards the sides. Roll completely until you reach the opposite edge, ensuring the seam side is down. Pinch the edges together and tuck the ends underneath to seal.
- Place the formed nut roll on a prepared baking sheet (lined with parchment paper or foil). Repeat this process for the remaining three dough pieces.
- Cover the nut rolls loosely with greased foil and allow them to rise for another 30 minutes in a warm place.
- Preheat your oven to 350°F (175°C).
- Bake the nut rolls, uncovered, for 30 to 35 minutes, or until the top is golden brown and sounds hollow when tapped. An internal temperature of 160°F (71°C) or above indicates doneness.
- Allow the nut rolls to cool completely on a wire rack before slicing (about 1 inch thick) and serving.
Notes
Makes 4 nut rolls.
You may need up to 6 cups of flour depending on humidity and other factors, but always start with 5 cups and add gradually as needed. The dough should be slightly sticky but not wet.
For an even golden-brown crust, whisk 1 egg with 1 teaspoon of water and brush over the tops of the rolls before baking (optional).
Nutrition
Serving: 2 pieces, Calories: 292kcal, Carbohydrates: 30g, Protein: 6g, Fat: 18g, Saturated Fat: 6g, Polyunsaturated Fat: 8g, Monounsaturated Fat: 3g, Trans Fat: 1g, Cholesterol: 37mg, Sodium: 149mg, Potassium: 110mg, Fiber: 2g, Sugar: 11g, Vitamin A: 249IU, Vitamin C: 1mg, Calcium: 31mg, Iron: 2mg
Nutrition information is automatically calculated, so should only be used as an approximation.
Additional Info
Course: Bread
Cuisine: European American, Polish, Russian, Slovak, Ukrainian
These tasty walnut rolls are not just a delicious treat; they are a cherished family tradition. My own children eagerly participate in making them every Christmas, continuing the legacy of Baba’s kitchen. It fills me with immense joy to finally share Grandma’s original nut roll recipe, a testament to a well-loved, well-worn piece of paper that holds so many sweet memories.
Serving and Savoring Your Nut Rolls
Once your beautiful nut rolls have cooled completely, it’s time for the best part: enjoying them! For the best presentation and eating experience, slice the rolls about 1 inch thick. The swirling layers of sweet dough and rich walnut filling will be beautifully displayed.
Nut rolls are incredibly versatile. They make a fantastic addition to any holiday breakfast or brunch spread, especially delicious with a hot cup of coffee or tea. They’re also perfect as a light dessert after a festive meal, or simply as an indulgent snack any time of day. The tender crumb and sweet, nutty flavor make them a comforting treat that’s hard to resist. Sharing these homemade delights with family and friends is truly what makes the baking effort so worthwhile.
For more festive recipes perfect for Christmas morning or to fill your holiday cookie platter, be sure to subscribe to our newsletter and join our community of home bakers! Happy baking, and may your kitchen be filled with the wonderful aromas of tradition.