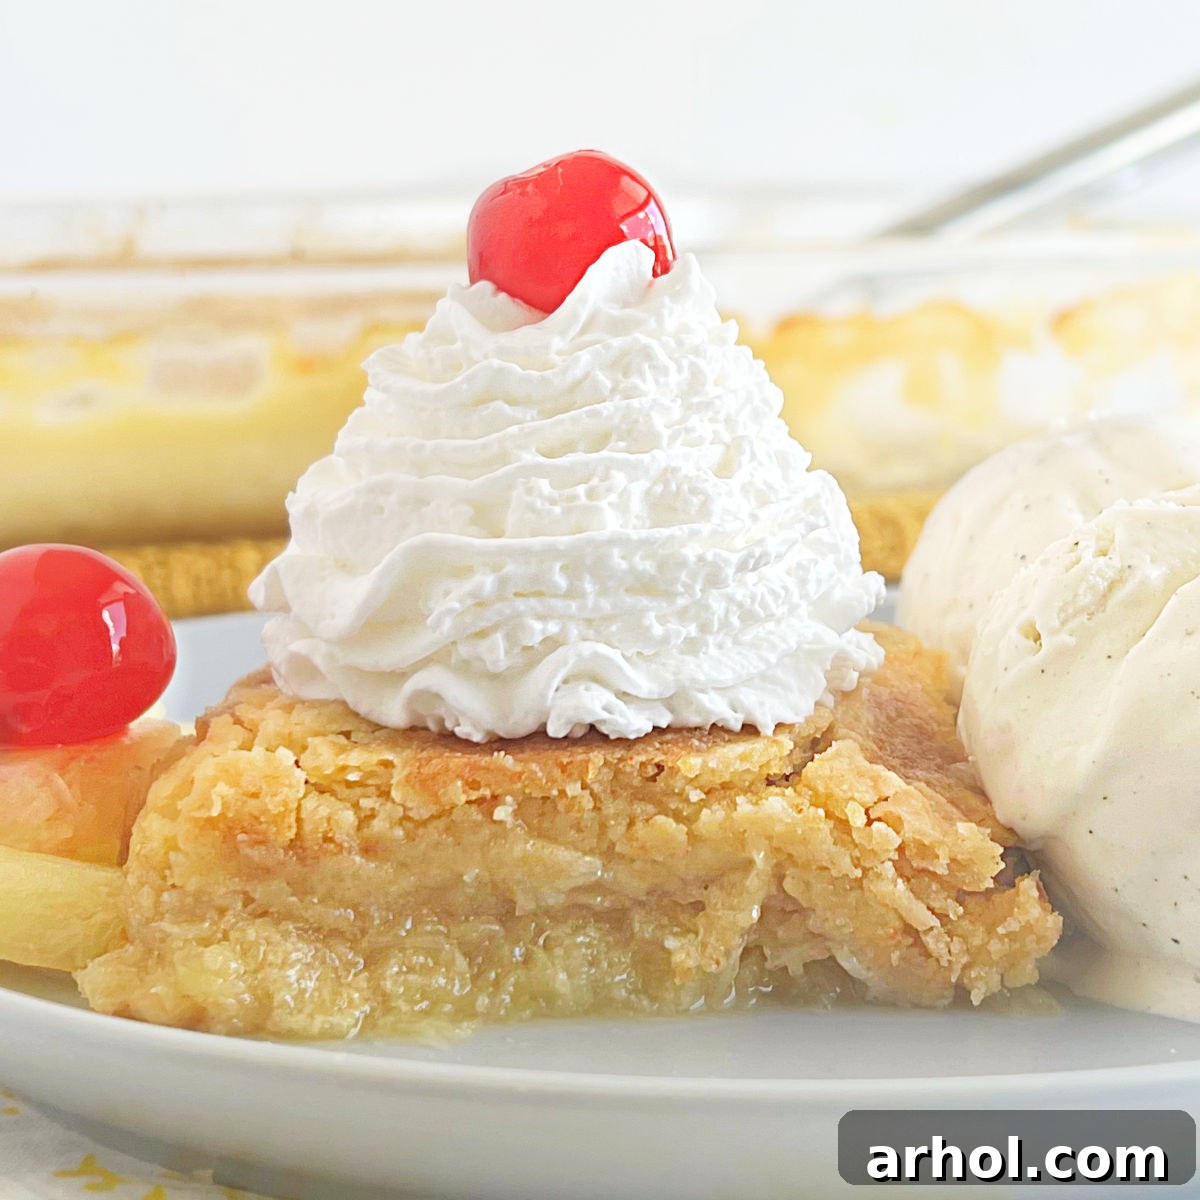
Welcome to the world of effortless baking, where deliciousness meets simplicity! Imagine a warm, golden-brown dessert, bursting with the sweet, tangy flavor of tropical pineapple, all made with just four basic ingredients. This is the magic of our Pineapple Dump Cake recipe – a truly irresistible treat that promises to become a cherished family favorite. Forget complicated instructions and lengthy ingredient lists; this dessert is all about maximum flavor with minimal fuss, making it perfect for busy weeknights, last-minute gatherings, or whenever a craving for something sweet strikes. Plus, it’s incredibly budget-friendly, proving that you don’t need to spend a fortune to create an unforgettable dessert experience.
If you’re constantly on the lookout for easy cake recipes or a simple dessert recipe that delivers on taste every single time, then your search ends here. This easy pineapple dump cake is a revelation, combining a standard box cake mix with luscious crushed pineapple and rich butter to create a dessert that bakes itself into pure perfection. The “dump cake” name says it all – you simply dump the ingredients into a baking dish, and the oven does the rest, transforming humble components into a wonderfully moist, tender, and incredibly flavorful cake. Prepare to fall in love with its golden, bubbly top and a gooey, caramelized pineapple layer underneath.
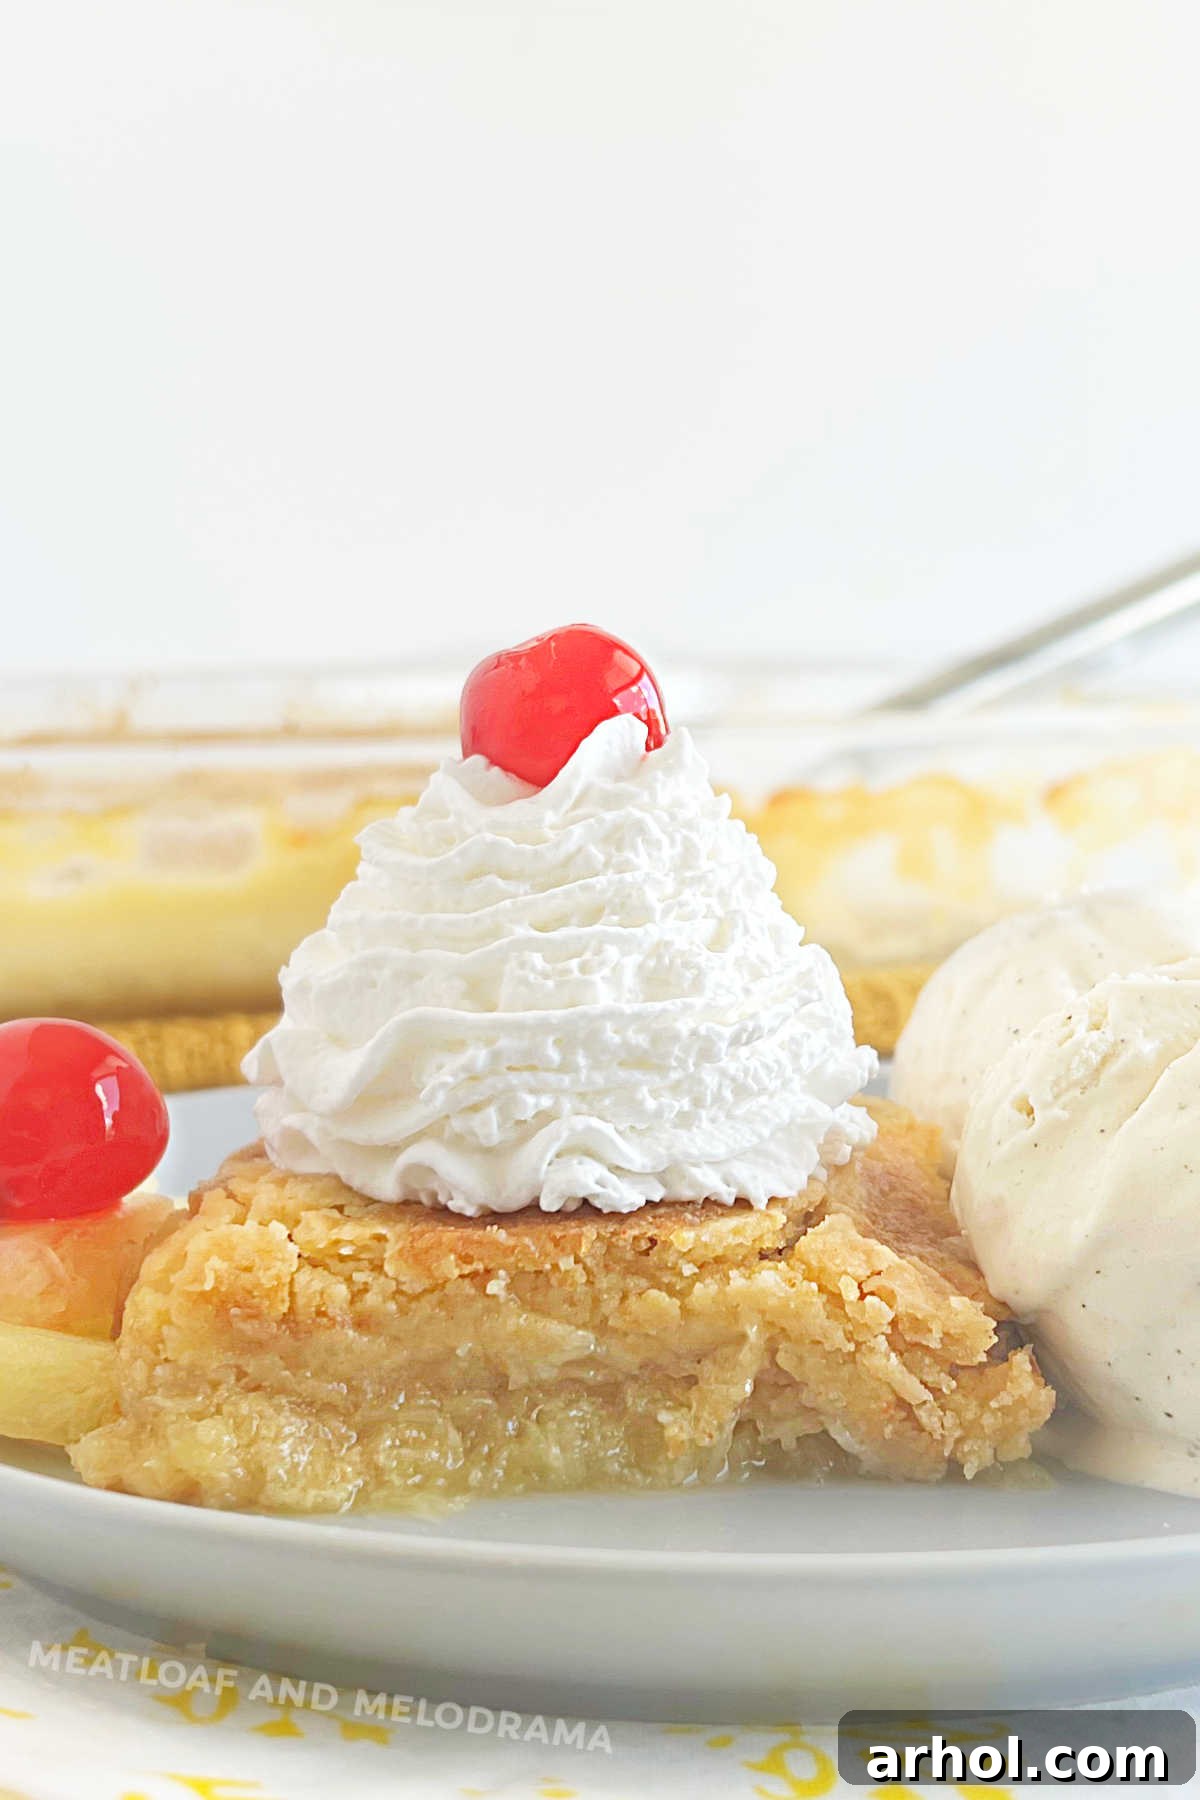
The beauty of dump cakes lies in their adaptability and sheer convenience. They are celebrated for their ability to deliver homemade taste without the extensive effort typically associated with baking. While this pineapple dessert holds a special place in our hearts, the dump cake universe is vast and exciting. You can explore a delightful array of variations, from the comforting embrace of peach dump cake, the autumnal delight of apple pie dump cake, and the seasonal charm of pumpkin dump cake, to the vibrant sweetness of cherry dump cake and strawberry dump cake. The possibilities are truly endless, allowing you to tailor this versatile dessert to any season or occasion.
Beyond traditional oven baking, dump cakes are so incredibly forgiving that they can even be adapted for other cooking methods. Craving a warm, comforting dessert but don’t want to heat up your kitchen? Try making slow cooker dump cakes for a hands-off approach. Or, if you need a speedy dessert, dump cakes in the Instant Pot offer a quick and efficient solution. This flexibility further cements the dump cake’s status as a culinary hero in any home cook’s repertoire, making it accessible to everyone, regardless of their baking skill level or available time.
What Makes This Pineapple Dump Cake So Special?
At its core, the Pineapple Dump Cake is a testament to the fact that extraordinary flavor doesn’t require extraordinary effort. Its unique appeal stems from several key factors that set it apart from other desserts:
- Unbeatable Ease: With only four ingredients and a simple layering process, this recipe is virtually foolproof. There’s no mixing, no special equipment, and no complicated techniques involved. Simply “dump” and bake!
- Budget-Friendly Goodness: Utilizing common pantry staples like a box cake mix and canned fruit means this dessert is incredibly economical. It’s perfect for feeding a crowd without breaking the bank, offering a lavish taste at a fraction of the cost.
- Deliciously Unique Texture: Unlike traditional cakes, a dump cake boasts a wonderfully moist, almost pudding-like fruit layer at the bottom, topped with a buttery, crisp, and cakey crust. The combination of textures is simply divine.
- Versatile & Adaptable: While pineapple is a star here, the basic dump cake formula allows for endless creativity. Swap fruits, experiment with different cake mix flavors, or add spices and nuts to make it your own.
- Crowd-Pleasing Flavor: The sweet and tangy notes of pineapple, caramelized with brown sugar and infused into a rich cake, create a flavor profile that appeals to nearly everyone. It’s a comforting, nostalgic dessert that brings smiles to faces.
- Minimal Cleanup: Because everything goes into one baking dish, cleanup is an absolute breeze, leaving you more time to enjoy your delicious creation.
This dessert truly embodies the spirit of home baking – comforting, accessible, and utterly delicious. It’s an invitation to enjoy a sweet treat without the stress, proving that sometimes, the simplest recipes yield the most satisfying results.
Essential Ingredients for Your Perfect Pineapple Dump Cake
The magic of this easy pineapple dump cake lies in its minimal ingredient list. You only need a handful of pantry staples, readily available at any grocery store, to bring this delightful dessert to life. Each ingredient plays a crucial role in creating the cake’s signature taste and texture:
- Crushed Pineapple (2 cans, 20 oz each, undrained): This is the star of our dump cake! Using crushed pineapple ensures a consistent, moist, and flavorful fruit layer at the bottom of your cake. It’s vital to use it undrained, as the pineapple juice is essential for moistening the cake mix during baking. The natural acidity and sweetness of the pineapple perfectly balance the richness of the butter and the cake mix. While you might be tempted to drain it, resist! The liquid is key to the “dump cake” phenomenon.
- Brown Sugar (½ cup): Brown sugar adds an extra layer of sweetness and depth to the pineapple. As it bakes, it caramelizes with the pineapple juice, creating a wonderfully rich, gooey, and slightly sticky bottom layer that is incredibly addictive. Its molasses content also contributes a subtle, warm flavor that complements the pineapple beautifully. You can adjust the amount to your preference, but ½ cup strikes a perfect balance.
- Box Cake Mix (1 box, 15.25 oz, yellow or white): The ultimate convenience ingredient! A standard box of yellow or white cake mix forms the body of our cake. You’ll sprinkle it dry over the fruit layer, and it will absorb the pineapple juice and melted butter as it bakes, creating a soft, tender cake topping. Yellow cake mix tends to lend a slightly richer, more buttery flavor, while white cake mix offers a lighter, more vanilla-forward profile. Both work wonderfully, so choose your preference. There’s no need to add any eggs, oil, or water typically called for on the cake mix box – just the dry mix itself!
- Butter (1 ½ sticks, thinly sliced): Butter is what brings everything together, creating that golden-brown, crispy top crust and ensuring the cake mix fully bakes into a tender texture. Thinly sliced butter placed evenly over the dry cake mix allows it to melt slowly and seep into the cake mix, forming a rich, golden, and moist crust. The butter also contributes significantly to the overall flavor, making the cake incredibly decadent. For best results, use unsalted butter to control the overall saltiness of the dessert.
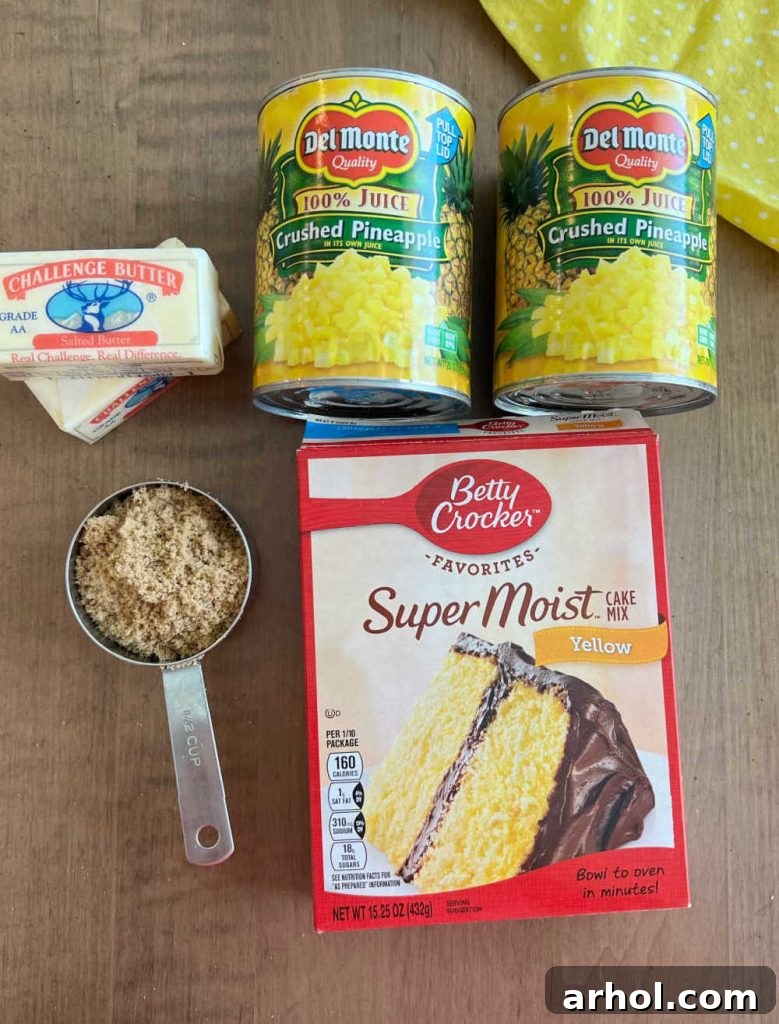
These four simple ingredients, when combined and baked, create a harmonious blend of flavors and textures that belies the minimal effort involved. It’s a testament to the beauty of uncomplicated cooking!
Step-by-Step Guide: How to Bake the Best Pineapple Dump Cake
Making this Pineapple Dump Cake is so straightforward, you might wonder if you’re missing a step! But rest assured, its simplicity is part of its charm. Follow these easy steps for a perfectly delicious dessert every time:
1. Preheat Your Oven and Prepare Your Baking Dish
First things first, preheat your oven to 350 degrees Fahrenheit (175 degrees Celsius). This ensures your cake bakes evenly from the moment it enters the oven. While the oven heats, take a 9×13 inch baking dish – a standard size that perfectly accommodates this recipe – and grease it thoroughly. You can use non-stick cooking spray, butter, or shortening to prevent the cake from sticking. A well-greased pan ensures easy serving and cleanup.
2. Create the Juicy Pineapple Foundation
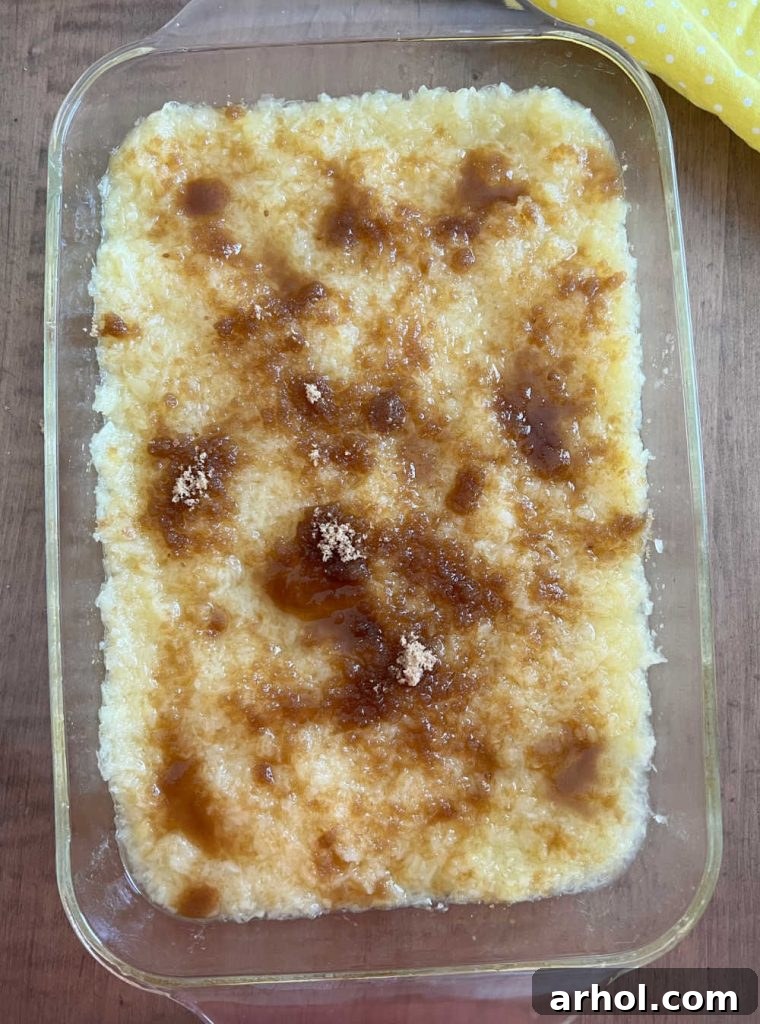
Next, open your cans of crushed pineapple. Remember, we use them undrained! Pour both cans of crushed pineapple, along with all their natural juices, directly into the prepared baking dish. Use a spatula or the back of a spoon to spread the crushed pineapple so that it forms an even layer across the entire bottom of the dish. This consistent base is crucial for the cake’s moisture and flavor distribution.
3. Sweetening with Brown Sugar
Once your pineapple layer is perfectly spread, it’s time for the brown sugar. Evenly sprinkle the ½ cup of brown sugar directly over the crushed pineapple. You can gently smooth it out with your hand or a spoon to ensure an even distribution. As the cake bakes, this brown sugar will melt and caramelize with the pineapple juices, creating a wonderfully sweet, gooey, and irresistible bottom layer that will be a delightful surprise with every bite.
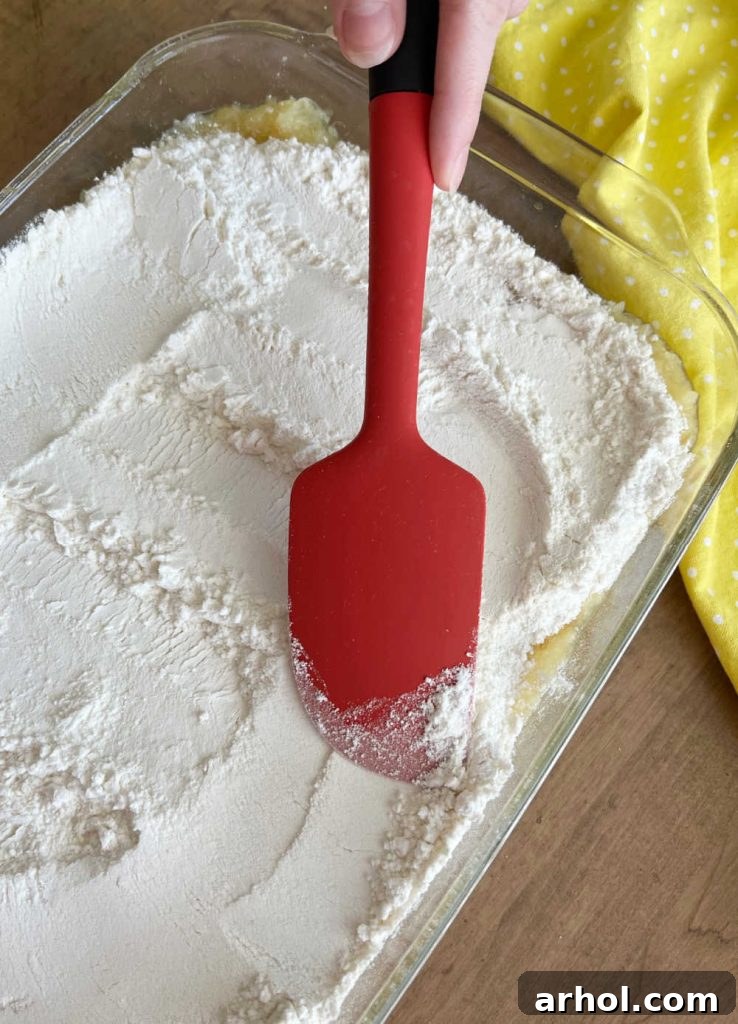
4. The Dry Cake Mix Secret
Now for the key “dump cake” technique! Take your box of dry yellow or white cake mix and evenly sprinkle it directly over the pineapple and brown sugar layer. The most important rule here is: DO NOT MIX IT IN! The cake mix should remain dry at this stage. Think of it as a magical powdery blanket covering your fruit. Use a spatula or the back of a wooden spoon to gently spread the dry cake mix so it forms an even, consistent layer. You can even lightly press some of the dry mix into any visible pineapple juice if you want. This helps ensure that the cake mix absorbs moisture evenly and prevents any dry pockets in the final baked product.
5. Butter for Golden Perfection
The final layer is butter, which is essential for creating that signature golden-brown, slightly crispy top crust. Thinly slice your 1 ½ sticks of butter and arrange the pats in even rows over the entire surface of the dry cake mix. The goal is to cover as much of the cake mix as possible with butter. We found that 7 rows of butter worked well, with smaller slices filling in any gaps. If you feel you need more butter to ensure full coverage, don’t hesitate to cut a few extra slices. As the cake bakes, this butter will melt, seep into the dry cake mix, and transform it into a moist, rich, and delicious cake layer.
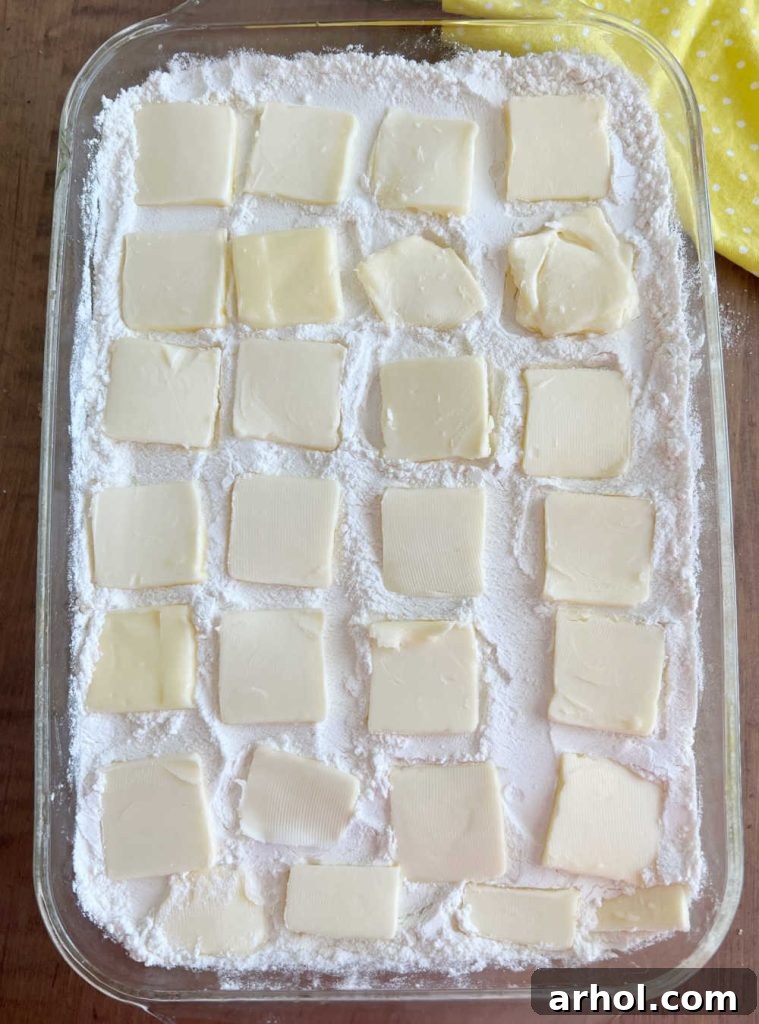
And that’s it! Your Pineapple Dump Cake is now ready for the oven. The layers are set, and the magic is about to happen.
Baking to Golden Perfection: Tips for a Flawless Finish
Baking a pineapple dump cake is incredibly straightforward, but a few key pointers will ensure your dessert turns out perfectly golden, bubbly, and delicious every time.
Ideal Baking Time and Temperature
Place your uncovered baking dish into the preheated 350°F (175°C) oven. The standard baking time for this pineapple dump cake is typically between 45 to 50 minutes. However, it’s important to remember that all ovens vary, so consider this a guideline rather than a strict rule. Some ovens might bake faster, while others might require a little more time.
Visual Cues for Doneness
How do you know when your pineapple dump cake is perfectly baked? Look for these clear indicators:
- Golden Brown Top: The top layer of the cake mix should be beautifully golden brown. This indicates that the butter has melted, absorbed into the cake mix, and created a lovely, slightly crisp crust.
- Bubbly Pineapple Layer: Peer into the edges of the baking dish. You should see the pineapple layer beneath actively bubbling, indicating it’s hot and thoroughly cooked through.
- No Dry Spots: The cake mix layer should appear fully moistened and baked, with no visibly dry or powdery patches.
If, after 50 minutes, your cake doesn’t quite meet these criteria, don’t hesitate to continue baking it for an additional 5-10 minutes, checking frequently. It can safely bake for up to 1 hour if needed to achieve that perfect golden finish.
Troubleshooting: Dry Spots or Uneven Browning
During the baking process, keep an eye on your cake. If you notice any dry spots on the cake mix layer, or if certain areas appear to be browning unevenly, you have a couple of easy fixes:
- Add More Butter: For particularly dry spots, you can quickly add a small pat of butter directly on top of the dry area. This extra fat will melt and help moisten the cake mix.
- Gently Press Cake Mix: Another trick is to gently press any dry cake mix into the bubbling pineapple liquid using the back of a spoon. This helps the dry areas absorb moisture.
Cooling and Resting for Best Texture
Once your pineapple dump cake emerges from the oven, golden and fragrant, it’s tempting to dig right in. However, for the best texture and flavor, it’s crucial to allow it to cool slightly and rest for about 10 to 15 minutes before serving. This resting period allows the molten pineapple filling to set slightly, preventing it from being overly runny, and allows the flavors to meld beautifully. The cake is best served warm, offering a comforting contrast between its rich top and sweet, gooey bottom.
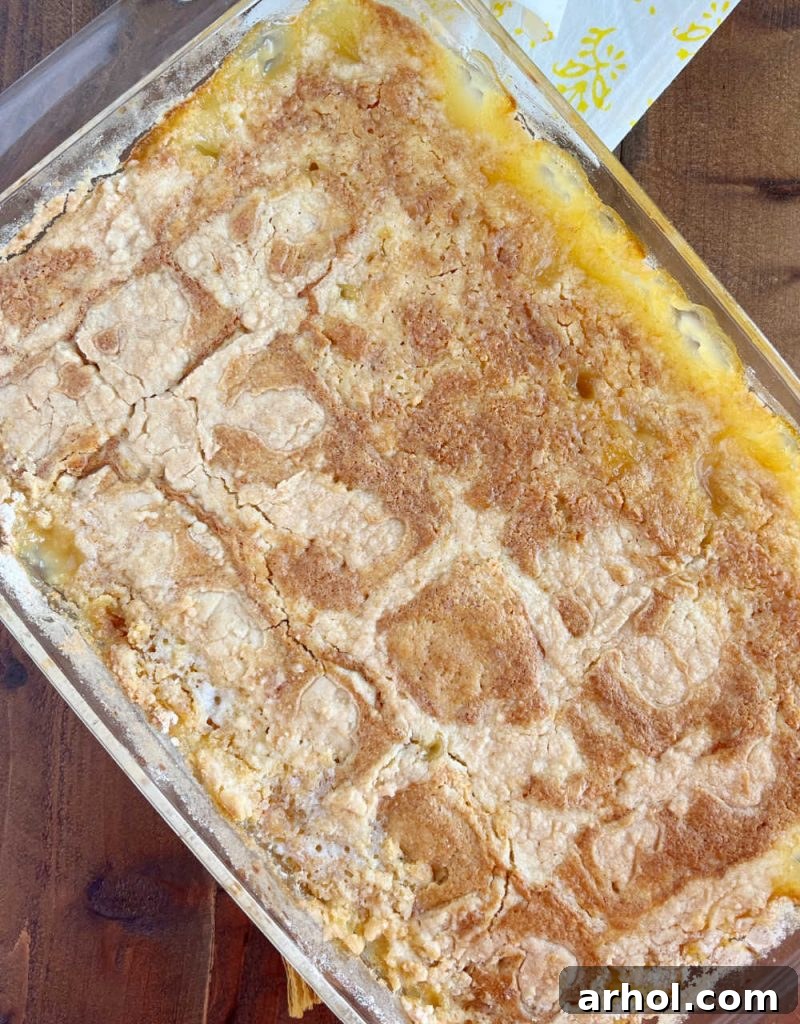
With these simple tips, you’ll master the art of baking a perfect pineapple dump cake every single time, creating a dessert that’s sure to impress with its irresistible flavor and delightful texture.
Serving Suggestions: Elevate Your Simple Dessert
While this delicious pineapple dump cake is utterly fantastic on its own, serving it with a few thoughtful accompaniments can elevate it from a simple treat to an impressive dessert presentation. The warm, sweet, and tangy flavors of the cake pair beautifully with a variety of toppings, allowing you to customize each slice to perfection.
Classic Pairings for Ultimate Indulgence:
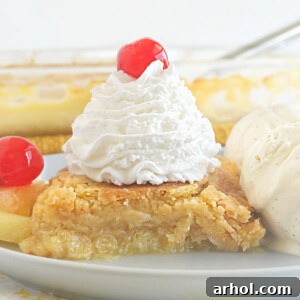
- Vanilla Ice Cream: A generous scoop of creamy vanilla ice cream is perhaps the most iconic pairing for any warm fruit dessert. The cold, melting ice cream creates a delightful contrast with the warm cake, and its classic vanilla flavor complements the pineapple without overpowering it.
- Whipped Cream: Light and airy, a dollop of fresh whipped cream adds a luxurious touch and a cloud-like texture. You can make your own sweetened whipped cream for an extra special touch, or use a store-bought version for convenience.
- Maraschino Cherries: For a pop of vibrant color and a hint of classic soda shop charm, garnish your slice with a bright red maraschino cherry. It’s a small detail that adds visual appeal and a burst of fruity sweetness.
Creative Toppings to Explore:
- Toasted Coconut Flakes: A sprinkle of toasted coconut flakes brings a wonderful tropical aroma and a delightful chewiness that perfectly complements the pineapple.
- Chopped Nuts: For added crunch and a nutty depth of flavor, consider sprinkling some chopped pecans, walnuts, or macadamia nuts over your cake before or after baking.
- Caramel or Butterscotch Drizzle: A swirl of warm caramel sauce or butterscotch topping adds an extra layer of sweetness and a rich, buttery note that pairs wonderfully with the caramelized pineapple.
- Cream Cheese Glaze: For a more decadent touch, a simple cream cheese glaze drizzled over the warm cake can turn it into an even more indulgent experience.
- Other Fresh Berries: A scattering of fresh raspberries or blueberries alongside your slice can add a tart counterpoint and a beautiful burst of color.
- Powdered Sugar: For a simple yet elegant finish, a light dusting of powdered sugar adds a touch of sweetness and a refined look.
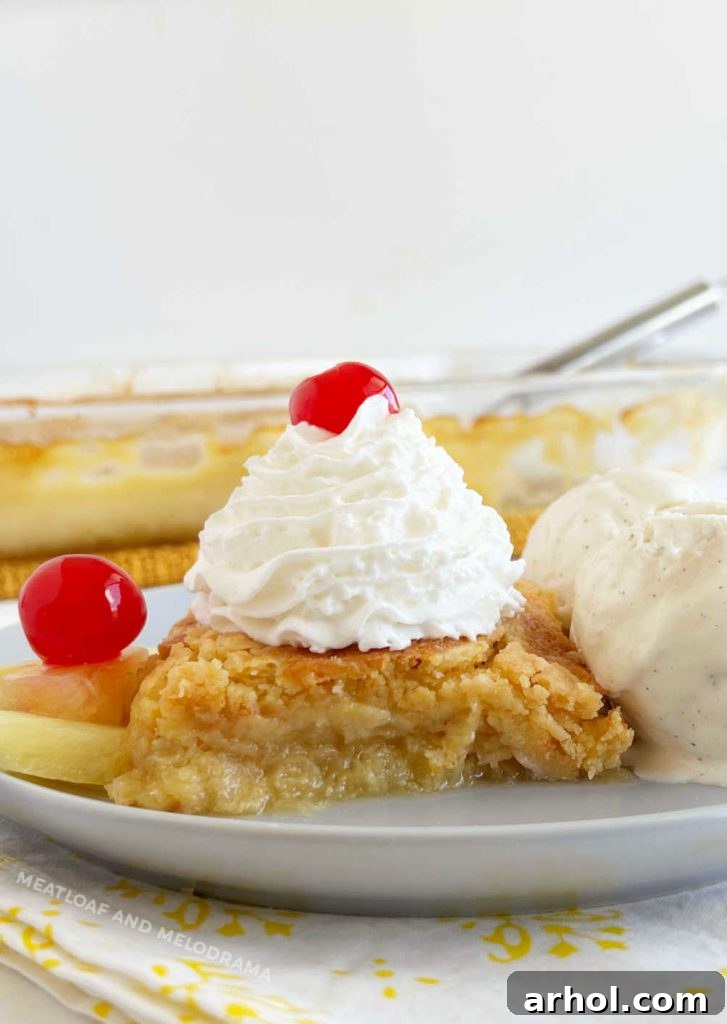
No matter how you choose to serve it, this pineapple dump cake, even as the easiest cake recipe, has the power to transform into an impressively delicious and satisfying dessert that everyone will adore!
Storing Your Delicious Pineapple Dump Cake
One of the many advantages of this delightful pineapple dump cake is how well it stores, allowing you to enjoy leftovers for days or even prepare it in advance. Proper storage ensures your cake remains fresh, moist, and delicious.
At Room Temperature:
If your kitchen is relatively cool (below 70°F or 21°C) and you plan to consume the cake within a day or two, you can generally store it at room temperature. Simply cover the baking pan tightly with plastic wrap or aluminum foil. Alternatively, transfer individual slices to an airtight container. This method often keeps the cake’s texture soft and gooey, especially if you prefer it slightly warmed before eating.
In the Refrigerator:
For longer storage, or if your kitchen is warm, refrigeration is the best option. Store the pineapple dump cake in an airtight container or keep it in its original baking pan, tightly covered with plastic wrap or aluminum foil. When refrigerated, the cake will stay fresh for up to 3-4 days. The texture might become a little firmer when cold, but it will soften beautifully upon reheating.
Freezing for Extended Enjoyment:
Yes, you can freeze pineapple dump cake! This is a fantastic option if you’ve made a large batch or want to save some for a future treat. To freeze, ensure the cake is completely cooled. You can freeze the entire cake in the baking dish, tightly wrapped first in plastic wrap and then in aluminum foil. Alternatively, cut the cake into individual portions, wrap each piece separately in plastic wrap, and then place them in a freezer-safe bag or container. Frozen dump cake can last for up to 2-3 months.
When you’re ready to enjoy a frozen slice, transfer it to the refrigerator overnight to thaw, or reheat it directly from frozen using the microwave or oven (though baking from frozen will take longer).
Reheating Methods:
- Microwave: For individual portions, the microwave is your quickest friend. Place a slice on a microwave-safe plate and heat on low to medium power for about 30 seconds to 1 minute, or until warmed through. Be careful not to overheat, as this can dry out the cake.
- Oven: To reheat a larger portion or the entire cake (if not frozen), cover the baking dish loosely with foil and warm it in a preheated oven at 300°F (150°C) for 15-20 minutes, or until heated through. This method helps maintain a crispier topping.
No matter how you store or reheat it, this pineapple dump cake promises to be a delightful indulgence whenever you desire a taste of its sweet, tropical goodness.
Endless Possibilities: Creative Pineapple Dump Cake Variations
The beauty of the dump cake concept lies in its incredible versatility. While the classic pineapple version is a masterpiece on its own, it also serves as a fantastic canvas for culinary creativity. Don’t be afraid to experiment and customize this delightful dessert to suit your taste preferences or whatever ingredients you have on hand.
Ingredient Swaps & Enhancements:
- Melted Butter Magic: Instead of thinly slicing and arranging pats of butter, you can pour melted butter evenly over the dry cake mix before baking. This method creates an equally rich and golden crust, often resulting in a slightly more uniform distribution of butter, which some prefer. Experiment to see which texture you like best!
- Beyond Brown Sugar: While brown sugar provides a lovely caramel note, you can substitute it with granulated white sugar if preferred, though it will result in a less deep, gooey bottom layer. For an extra hint of warmth, try mixing in a teaspoon of cinnamon or a pinch of nutmeg with the brown sugar.
- Cake Mix Flavors: Don’t limit yourself to yellow or white cake mix. A butter pecan cake mix would add a nutty depth, a spice cake mix would introduce warm autumnal notes, or even a lemon cake mix could offer a bright, citrusy counterpoint to the sweet pineapple.
Fruity Combinations:
- Cherry-Pineapple Delight: A classic combination! Substitute one 20 oz can of crushed pineapple with one can of cherry pie filling. The sweet-tart cherries mingle beautifully with the pineapple, creating a vibrant and fruity dump cake with a stunning visual appeal.
- Tropical Blueberry-Pineapple Fusion: Blueberries and pineapple are a match made in heaven. You can either top the pineapple layer with a cup of fresh blueberries before adding the cake mix, or substitute one can of crushed pineapple with a can of blueberry pie filling for an even richer berry flavor.
- Peach or Apple Infusion: For a taste of the orchard, replace one can of crushed pineapple with a can of sliced peaches (drained) or apple pie filling. These fruit combinations work wonderfully with a yellow or spice cake mix.
- Mixed Berry Medley: Combine crushed pineapple with a cup of mixed frozen berries (no need to thaw) for a burst of varied fruity flavors and antioxidants.
Texture & Flavor Additions:
- Coconut Lover’s Dream: Sprinkle ½ cup of shredded coconut (sweetened or unsweetened) over the pineapple layer before adding the cake mix, or scatter it over the butter during the last 10 minutes of baking for a toasted finish. This adds a fantastic tropical dimension.
- Nutty Crunch: For an added layer of texture, sprinkle ½ to 1 cup of chopped pecans, walnuts, or almonds over the pineapple layer before adding the cake mix. They will toast slightly during baking, adding a delightful crunch.
- Chocolate Chip Surprise: While not traditional, a handful of white chocolate chips or mini semi-sweet chocolate chips sprinkled over the cake mix (under the butter) can add a playful, unexpected twist.
With these variations, you can constantly reinvent your pineapple dump cake, ensuring it never gets boring and always fits the occasion or your current craving. Embrace the simplicity and let your creativity shine!
Frequently Asked Questions (FAQ) About Pineapple Dump Cake
Here are some common questions about making and enjoying this easy pineapple dump cake, along with helpful answers to ensure your baking success.
Q: Can I use fresh pineapple instead of canned crushed pineapple?
A: While technically possible, it’s generally not recommended for dump cakes. Canned crushed pineapple, especially undrained, provides the necessary moisture and acidity that the dry cake mix absorbs during baking. Fresh pineapple contains enzymes that can sometimes interfere with the cake mix’s texture, and it typically doesn’t release enough juice during baking to fully moisten the dry mix, potentially resulting in a drier cake. Stick to canned for best results!
Q: Why is it called a “dump cake”?
A: The name “dump cake” comes from its incredibly simple preparation method: you literally “dump” all the ingredients into a baking dish without mixing them together. The layers combine and bake into a delicious cake with minimal effort, making it a favorite no-fuss dessert.
Q: Do I really not mix the cake mix with the other ingredients?
A: That’s correct! The beauty of a dump cake is that you do NOT mix the dry cake mix with the pineapple or butter. The dry cake mix is sprinkled directly over the fruit layer, and as the cake bakes, the butter melts and the pineapple juices bubble up, moistening the cake mix to form a soft, cakey topping. Mixing it would change the texture and defeat the purpose of a dump cake.
Q: Can I use a sugar-free cake mix or sugar substitute?
A: You can experiment with sugar-free cake mixes, but be aware that the texture and overall sweetness might differ. For the brown sugar layer, you could try a brown sugar substitute, but ensure it measures cup-for-cup like regular brown sugar. Taste and texture may vary, so start with small adjustments.
Q: How do I know when my dump cake is truly done?
A: Your pineapple dump cake is done when the top crust is beautifully golden brown, and you can see the fruit mixture bubbling around the edges of the pan. The top should no longer look powdery or wet, but rather cooked through and slightly crisp. If you notice any dry spots, you can gently press them into the bubbling fruit or add a small pat of butter on top and bake for a few more minutes.
Q: Can I make this in a slow cooker or Instant Pot?
A: Yes, dump cakes are very adaptable to slow cookers and Instant Pots! While the exact timing and liquid amounts might need slight adjustments depending on your specific appliance and recipe, the basic layering principle remains the same. Typically, slow cooker dump cakes will cook for 2-4 hours on high or 4-6 hours on low, and Instant Pot versions often require a pressure cook setting. Look for specific slow cooker or Instant Pot dump cake recipes for precise instructions.
Q: What if I don’t have brown sugar? Can I use white sugar?
A: Yes, you can use granulated white sugar as a substitute if you don’t have brown sugar. However, brown sugar adds a richer, slightly caramel-like flavor and contributes to a gooier, more caramelized bottom layer due to its molasses content. White sugar will still provide sweetness, but the flavor profile will be a little different.
Pineapple Dump Cake Recipe
Pineapple Dump Cake Recipe
Ingredients
- 2 (20 oz) cans crushed pineapple, undrained
- ½ cup brown sugar
- 1 (15.25 oz) box yellow cake mix
- 1 ½ sticks butter, thinly sliced
Instructions
-
Preheat oven to 350°F (175°C), and grease a 13 x 9 inch baking dish with cooking spray or butter.
-
Pour both cans of undrained crushed pineapple into the baking dish, and spread evenly to cover the bottom.
-
Evenly sprinkle the brown sugar over the pineapple layer.
-
Spread the dry cake mix evenly over the pineapple and brown sugar layer. Do not mix.
-
Place the thinly sliced pats of butter in even rows on top of the dry cake mix, ensuring good coverage.
-
Bake for 45 to 50 minutes, or until the top is golden brown and the pineapple layer is hot and bubbling.
-
Allow to cool slightly and rest for 10 to 15 minutes before serving for optimal texture.
Notes
Make the cake mix layer as even as possible. If some places appear dry during baking, you can add more butter or gently press the dry cake mix into the pineapple layer to moisten.
Allow to rest for 10 to 15 minutes before serving. The cake is best served warm.
Nutrition
Nutrition information is automatically calculated, so should only be used as an approximation.
Additional Info
This pineapple dump cake, sometimes lovingly referred to as a pineapple upside down dump cake, truly stands out as a quick dessert that never compromises on quality or flavor. It’s the perfect solution for satisfying a sweet tooth with minimal effort, yielding a dessert that’s rich, moist, and utterly delightful. I sincerely hope you and your family love this recipe as much as mine does!
If this easy dump cake recipe captures your heart and becomes a staple in your kitchen, please consider leaving a comment below and sharing your experience. Your feedback and star ratings are incredibly valuable and help other home bakers discover this wonderful treat!
For more incredibly easy dessert recipes, innovative dessert ideas that won’t consume your precious time, and recipes guaranteed to become all-time favorites, be sure to subscribe to our newsletter and follow us on social media! Let’s continue to explore the joy of simple, delicious cooking together.