
Embark on a vibrant creative journey with one of the most exciting and accessible DIY projects out there: the Sharpie tie-dye T-shirt! This fantastic craft offers a fun-filled escape into the world of color and design, perfectly suited for both children and adults. Say goodbye to the traditional, often messy, tie-dye methods that involve buckets of dye and extensive cleanup. With Sharpie markers and a few household items, you can create stunning, personalized apparel that reflects your unique style, all while keeping your crafting space neat and tidy. It’s the ultimate budget-friendly activity for summer breaks, rainy days, or any time you’re looking to unleash your artistic side.
The allure of tie-dye clothing has captivated generations, but the complexity of traditional dyeing can sometimes be a barrier. That’s where the Sharpie tie-dye technique shines. It simplifies the process dramatically, making it an ideal choice for families, schools, and anyone new to fabric art. Imagine the joy of watching a plain white T-shirt transform into a wearable masterpiece with just a few strokes of a marker and a splash of rubbing alcohol. This method not only offers incredible ease but also ensures a personalized touch that mass-produced items simply can’t match. Get ready to dive into a world where creativity knows no bounds and every shirt tells a story!
Why Choose the Sharpie Tie-Dye Method?
Opting for Sharpie markers over conventional fabric dyes presents a myriad of advantages that make this craft a standout. Firstly, the **minimal mess** factor is a huge draw. Forget about stained hands, splattered countertops, or the need for extensive protective coverings. With Sharpies, you’re primarily dealing with dry markers, and the rubbing alcohol application is much more controlled than dunking fabric in a dye bath. This makes it a perfect indoor activity, regardless of the weather, and significantly reduces cleanup time.
Secondly, **cost-effectiveness** is a major benefit. Most homes already have a stash of permanent markers and rubbing alcohol. The primary purchase might just be a plain white T-shirt, which can often be found on sale at craft stores or even upcycled from existing wardrobes. This affordability makes it accessible to everyone, allowing for experimentation without a significant investment.
Furthermore, the Sharpie method offers unparalleled **precision and control**. Unlike traditional tie-dye where patterns are often dictated by rubber bands and folds, permanent markers allow you to draw specific designs, intricate patterns, or even write text directly onto the fabric. The alcohol then beautifully blurs these lines, creating that iconic tie-dye aesthetic without losing the essence of your original artwork. It’s a fantastic way to introduce younger crafters to fabric design, offering a safer and less intimidating experience.
Finally, the **quick drying time** means instant gratification. Once the alcohol has evaporated, your personalized tie-dye shirt is ready to wear or show off. There’s no waiting for hours or days for dyes to set, making it an ideal project for those with shorter attention spans or when you need a quick, creative boost. It’s truly a game-changer for anyone looking to enjoy the beauty of tie-dye without the usual fuss.
Essential Supplies for Your Sharpie Tie-Dye Masterpiece
Gathering your materials is the first exciting step in bringing your Sharpie tie-dye vision to life. The beauty of this craft lies in its simplicity and the accessibility of its components. Here’s a detailed look at everything you’ll need:
- Plain White T-shirt: This is your canvas! While any light-colored, natural fabric will work, 100% cotton T-shirts yield the best results as they absorb the ink and alcohol most effectively. Ensure your shirt is pre-washed and completely dry before starting. This removes any sizing agents that might interfere with ink absorption, guaranteeing a more vibrant and long-lasting design. Consider different sizes for family members or as gifts!
- Sharpie Markers (or any Permanent Markers): The stars of the show! A diverse range of colors will allow for endless creative possibilities. Fine-tip markers are great for intricate details, while broad-tip markers can cover larger areas quickly. Don’t be afraid to mix and match brands, as long as they are permanent. The interaction between the ink and alcohol is what creates the magical tie-dye effect, so the more colors you have, the more dynamic your design can be.
- Cardboard: An indispensable item! Insert a piece of cardboard inside your T-shirt to prevent the marker ink and rubbing alcohol from bleeding through to the back layer. This simple step ensures a clean, distinct design on each side of the garment. You can also use a plastic placemat or freezer paper for the same purpose.
- Cotton Swabs: These small but mighty tools are crucial for applying the rubbing alcohol precisely. They allow you to control the spread of the ink, creating delicate blurs and feathered effects. You might also consider an eyedropper or a small spray bottle for different diffusion techniques.
- Rubbing Alcohol (Isopropyl Alcohol): This is the secret ingredient that transforms simple marker lines into beautiful tie-dye patterns. Concentrations of 70% or 91% work wonderfully. The alcohol reacts with the permanent ink, causing it to spread and blend, mimicking the look of traditional tie-dye.
Safety First: When working with rubbing alcohol, always ensure you’re in a well-ventilated area. An open window or even working outdoors on a pleasant day is ideal. Remember to keep alcohol away from any open flames or heat sources. A little caution goes a long way in ensuring a safe and enjoyable crafting experience for everyone.
Step-by-Step Guide: Crafting Your Easy Sharpie Tie-Dye T-Shirt
Now that you have all your supplies ready, it’s time to unleash your creativity and bring your unique tie-dye design to life. Follow these simple steps for a smooth and enjoyable crafting process:
Step 1: Prepare Your Workspace and T-Shirt
First, lay your pre-washed and dried white T-shirt flat on a protected surface. Cover your table with old newspapers, a plastic tablecloth, or a craft mat to catch any potential spills. Carefully slide the piece of cardboard inside the T-shirt, ensuring it’s smooth and extends to all the areas you plan to decorate. This critical step prevents the ink and alcohol from bleeding through to the back of the shirt, keeping your design crisp and contained on one side.
Step 2: Unleash Your Inner Artist – Draw Your Design
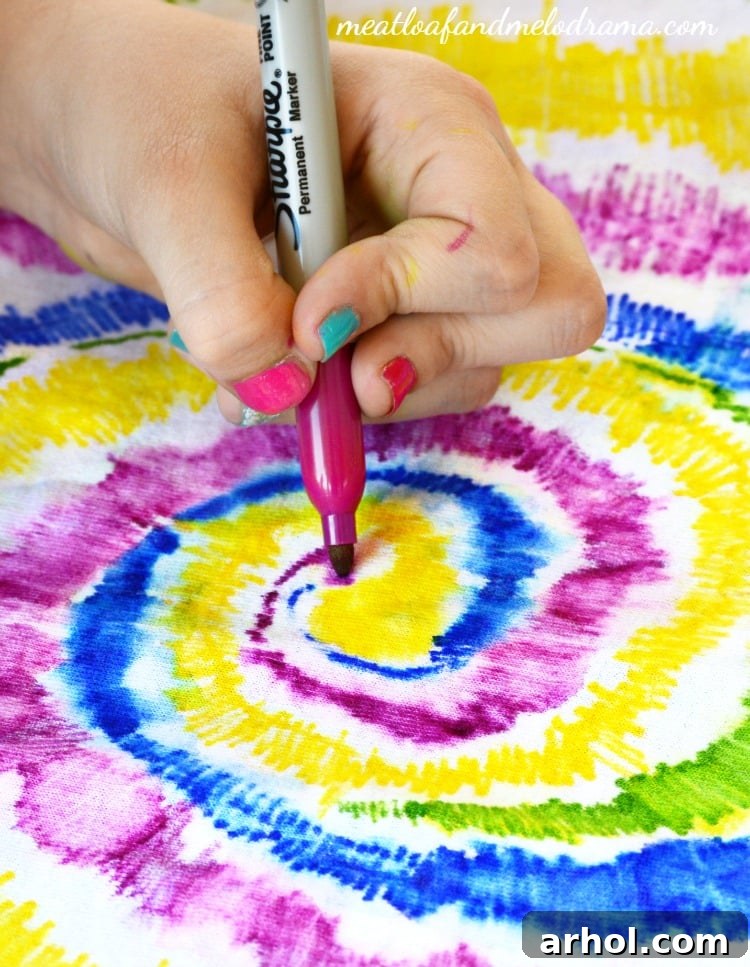
This is where the real fun begins! Grab your Sharpie markers and start drawing directly onto the fabric. There are no strict rules here – let your imagination guide you. You can create intricate patterns, abstract swirls, geometric shapes, or even specific images. My daughter, for instance, wanted her shirt to be as colorful as possible, so she began in the center and worked her way outwards, creating a captivating swirling, circular pattern. Instead of straight lines, she opted for a dynamic zig-zag motion, which later produced a wonderfully organic and blended effect. Experiment with different colors side-by-side to see how they interact, and consider using various marker tip sizes for different textures and details. Remember, the more ink you lay down, the more intense the color spread will be in the next step.
Step 3: The Magic of Alcohol Blending
Once you’re satisfied with your marker design, it’s time for the “tie-dye” transformation. Pour a small amount of rubbing alcohol into a shallow dish or cup. Dip a cotton swab into the alcohol, ensuring it’s saturated but not dripping excessively. Gently dab the alcohol onto your Sharpie design. You’ll immediately notice the ink beginning to spread and bleed, creating beautiful, watercolor-like effects. Start from the center of your design elements and work your way outwards, or dab around the edges for a more controlled spread. Use fresh cotton swabs as needed to avoid muddying colors. For larger areas or more aggressive spreading, you can also use an eyedropper to drip alcohol onto the design or even a fine mist spray bottle (used sparingly). Observe how the colors blend and interact; this step is truly mesmerizing! Don’t over-saturate the fabric, as too much alcohol can cause the colors to spread too far and become faded.
Step 4: Drying and Setting Your Creation
After you’ve achieved your desired blended look, carefully remove the cardboard from inside the shirt. Lay the shirt flat in a well-ventilated area to dry completely. Direct sunlight works wonders for speeding up the drying process, as the heat helps the alcohol evaporate quickly. You can also air dry it indoors, but ensure good airflow. Once the shirt is thoroughly dry (this might take an hour or two depending on the amount of alcohol used), the design is essentially set. For an extra layer of permanence, you can iron the design on a medium heat setting (without steam) for a few minutes, placing a piece of parchment paper between the iron and the fabric to protect both. This helps to further heat-set the ink, increasing its longevity.
My daughter was absolutely thrilled with her custom-made tie-dye shirt! She invested a lot of creative energy into her design, and the results were truly worth it. This project exemplifies how enjoyable and rewarding creative endeavors can be, especially during leisurely summer days. The beauty of the Sharpie tie-dye technique is that it offers boundless artistic freedom; you can choose any pattern, color scheme, or level of detail you desire, making each shirt a unique expression of individuality. It’s a fantastic way to personalize your wardrobe or create thoughtful, handcrafted gifts for loved ones.
Tips for Best Results and Longevity
To ensure your Sharpie tie-dye T-shirt remains vibrant and beautiful for a long time, consider these additional tips:
- Pre-Wash is Key: Always wash your new T-shirt before starting the craft. This removes any manufacturing chemicals or starches that could repel the ink.
- Quality Markers: While any permanent marker works, high-quality Sharpies tend to have more concentrated pigments, leading to more vivid colors and better spreading with alcohol.
- Fabric Choice Matters: 100% cotton fabric is highly recommended as it absorbs and holds the ink and alcohol best. Synthetic blends may not yield the same vibrant results.
- Test First: If you’re unsure about a color combination or the amount of alcohol to use, try a small test swatch on an inconspicuous area of the shirt (like inside a seam) or on a similar scrap fabric.
- Don’t Over-Saturate: When applying alcohol, less is often more. Gradually add alcohol until you achieve the desired spread. Too much can dilute colors and create excessive blurring.
- Washing Instructions: For the first wash, turn the shirt inside out and wash it alone in cold water on a gentle cycle. This helps to set any remaining loose ink and prevents potential bleeding onto other garments. After the initial wash, you can typically wash it with similar colors in cold water. Air drying or tumble drying on low heat will help preserve the vibrancy of the colors over time. Avoid harsh detergents or bleach, which can strip the color.
Beyond T-Shirts: Expanding Your Sharpie Crafting Horizons
While T-shirts are a classic canvas for this technique, the versatility of Sharpie tie-dye extends to many other fabric items. Consider transforming plain white canvas shoes into custom footwear, or adding a burst of color to tote bags, pillowcases, hats, or even fabric wall hangings. The principles remain the same, offering endless opportunities to personalize and enhance everyday items with your unique artistic flair. This craft is not just about making a shirt; it’s about discovering new ways to express yourself through fabric art.
Conclusion: Unleash Your Inner Designer
The easy Sharpie tie-dye T-shirt project is more than just a craft; it’s an invitation to explore creativity, enjoy quality time with family, and create something truly unique. Its simplicity, affordability, and incredibly satisfying results make it a perfect activity for crafters of all ages and skill levels. So, gather your supplies, pick your favorite colors, and prepare to be amazed as you transform a simple white tee into a vibrant, wearable work of art. Happy crafting!
Sharing at Met Monday and TT&J.