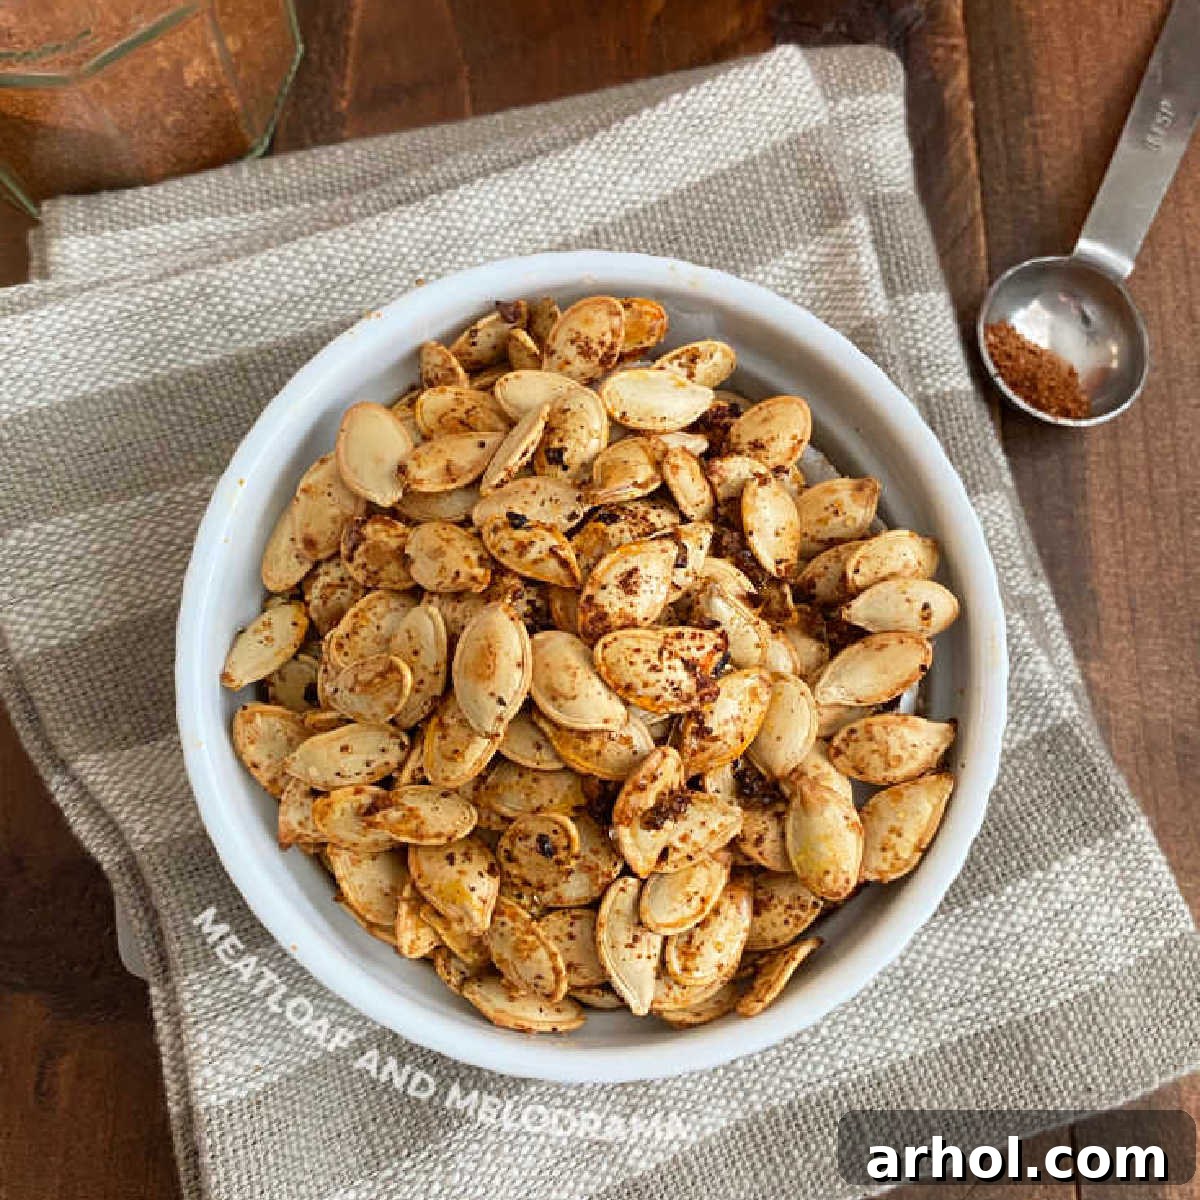
Autumn brings with it the joy of pumpkin carving and delicious pumpkin-themed treats. While many focus on the vibrant orange flesh, the humble pumpkin seeds often get overlooked or discarded. This is a missed opportunity! With this comprehensive guide, you’ll learn how to transform those fresh seeds into an irresistible, crunchy, and healthy snack. Our foolproof roasted pumpkin seeds recipe is designed to be easy, adaptable, and utterly delicious – making it the perfect fall tradition for your kitchen.
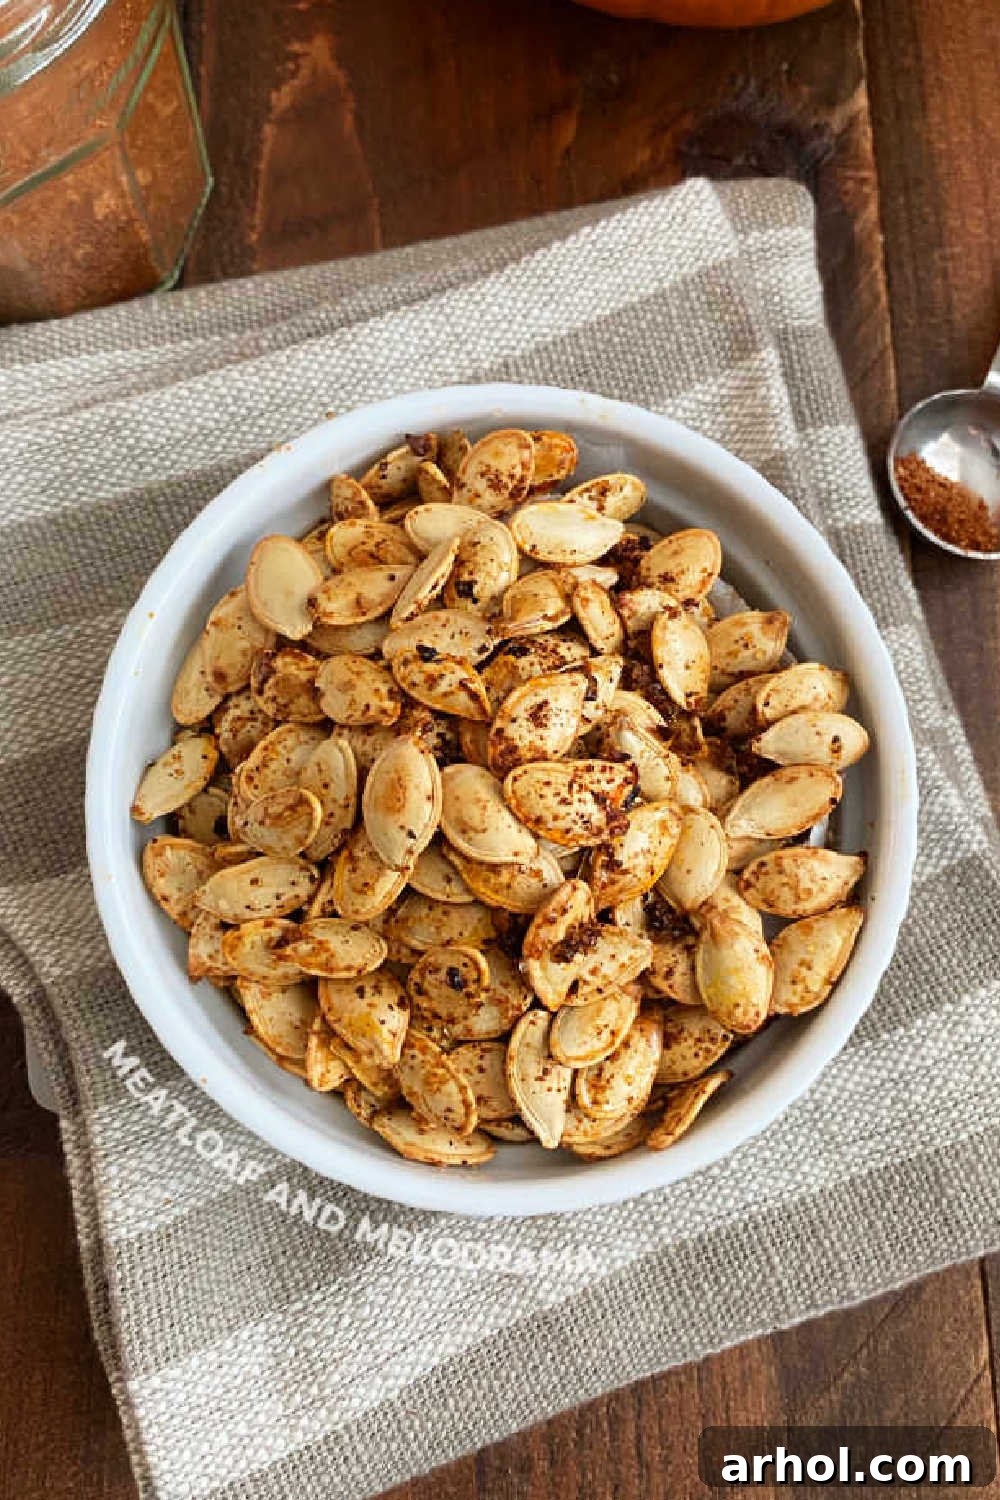
Table of Contents
- Why Roast Pumpkin Seeds?
- Essential Ingredients
- How to Clean Pumpkin Seeds
- The Importance of Drying Your Seeds
- Mastering the Roasting Process
- Creative Seasoning Ideas for Roasted Pumpkin Seeds
- Savory Spice Blends
- Spicy Pumpkin Seeds
- Sweet Pumpkin Seeds
- Optimal Roasting Temperature and Time
- Variations and Serving Suggestions
- Storage Tips for Maximum Freshness
- Frequently Asked Questions (FAQ)
- Roasted Pumpkin Seeds Recipe Card
Why Roast Pumpkin Seeds?
Whether you’re crafting a spooky jack-o’-lantern for Halloween, preparing homemade pumpkin puree from scratch, or simply enjoying the bounty of the harvest season, don’t let those precious raw pumpkin seeds go to waste! Roasting them not only reduces food waste but also creates a wonderfully nutritious and satisfying snack. It’s a cherished autumn tradition in countless homes, offering a unique flavor and texture that store-bought snacks simply can’t replicate. Plus, it’s incredibly rewarding to turn something often discarded into a delicious treat. I’ve personally been roasting pumpkin seeds for decades, perfecting the technique over many Halloweens, and I’m excited to share my go-to method with you.
Essential Ingredients for Perfect Roasted Pumpkin Seeds
Crafting the best roasted pumpkin seeds requires only a handful of simple ingredients, most of which you likely already have in your pantry. The beauty of this recipe lies in its simplicity, allowing the natural nutty flavor of the pumpkin seeds to shine through, enhanced by your chosen seasonings.
- Raw Pumpkin Seeds: These are the star of the show! You can harvest them from any pumpkin – whether it’s a large carving pumpkin (like a Jack o’lantern) or smaller sugar pumpkins, which tend to have smaller, more delicate seeds.
- Cold Water: Essential for the cleaning process, helping to separate the seeds from the stringy pulp.
- Olive Oil (or other neutral oil): A drizzle of olive oil helps the seasonings adhere to the seeds and promotes even browning, resulting in that desirable crispy texture.
- Salt & Pepper: A foundational seasoning. Fine sea salt is often preferred for its even distribution and clean taste, while freshly ground black pepper adds a subtle kick.
- Your Favorite Seasonings: This is where the fun begins! We’ll explore a wide array of options below, from simple garlic powder to complex spice blends.
How to Clean Pumpkin Seeds Effectively
Cleaning pumpkin seeds is the most crucial step in ensuring a delicious and enjoyable snack. While it might seem a bit messy, it’s a straightforward process that sets the stage for perfectly roasted seeds. Follow these steps for the best results:
- Scoop Them Out: Begin by carefully scooping the seeds and the surrounding stringy pulp from the pumpkin cavity. A large metal spoon, an ice cream scoop, or even your hands can work effectively. Don’t worry about getting every last strand of pumpkin flesh off at this stage; we’ll address that next.
- Initial Pulp Removal: Place the scooped-out mixture into a large bowl. Try to remove as much of the thick, fibrous pumpkin pulp as you can with your hands. Some smaller bits of pulp clinging to the seeds are perfectly fine and will dry out and become unnoticeable during roasting.
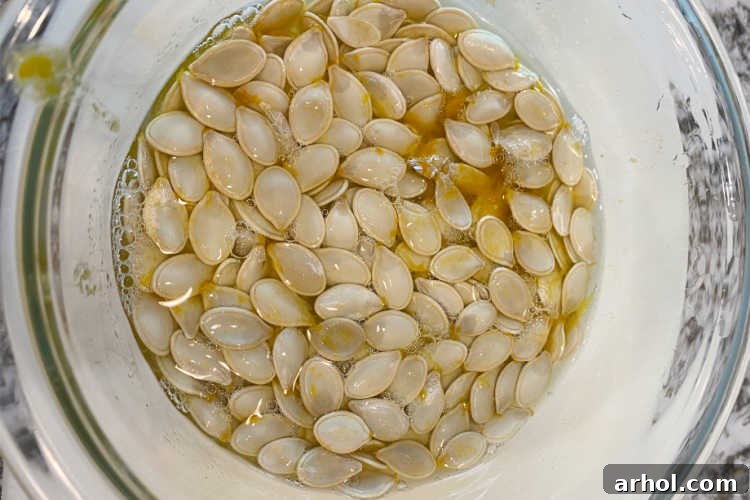
- The Water Bath Technique: Transfer the seeds and any remaining pulp into a large bowl filled with cool water. This is a game-changer for cleaning! The seeds will typically sink, while much of the lighter pumpkin pulp will float to the surface. Gently agitate the water with your hands, stirring and rubbing the seeds between your fingers. This action helps to loosen and separate the stubborn strands of pumpkin flesh.
- To Soak or Not to Soak? While it’s not strictly necessary, soaking the pumpkin seeds, especially if they are heavily coated in pulp, can make cleaning significantly easier. You can even let them soak overnight in the refrigerator if you’re not ready to roast them immediately. In the morning, simply proceed to the rinsing and drying steps. This prolonged soak allows the pulp to soften and detach more readily.
- Rinse Thoroughly: Drain the water from the bowl, and then rinse the seeds under cold running water in a colander. Continue to rub them gently to remove any lingering pulp. You’ll notice the seeds becoming much cleaner and smoother. Again, small fragments of pumpkin are acceptable and will add a subtle, caramelized sweetness when roasted.
The Importance of Drying Your Seeds
After cleaning, the next critical step for achieving truly crispy roasted pumpkin seeds is proper drying. Skipping this step or doing it inadequately will result in steamed, rather than roasted, seeds that lack the desired crunch and golden-brown perfection. Here’s how to do it right:
- Pat Dry with a Kitchen Towel: Spread the rinsed pumpkin seeds in a single layer on a clean, absorbent kitchen towel. Avoid using paper towels, as the seeds might stick to them, and they are not as effective at absorbing moisture. Gently pat the seeds dry with another kitchen towel. You want to remove as much surface moisture as possible.
- Air Dry (Optional, but Recommended): For even crispier results, especially if you have the time, allow the seeds to air dry for an hour or two on the kitchen towel or a baking sheet. This extra drying time ensures that any residual moisture evaporates, preventing steaming in the oven. The drier your seeds are before going into the oven, the crispier they will become.
Mastering the Roasting Process for Ultimate Crunch
With your seeds clean and thoroughly dried, you’re ready for the final, transformative step: roasting! This easy process will turn them into a golden, crunchy delight.
- Prepare Your Baking Sheet: Line a rimmed baking sheet with parchment paper or aluminum foil. This prevents sticking and makes for incredibly easy cleanup, which is always a bonus!
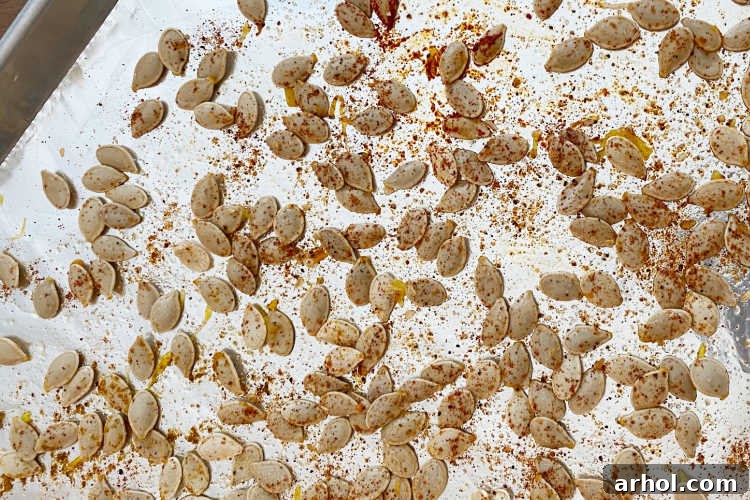
- Oil and Season: Drizzle a tablespoon of olive oil over the dry pumpkin seeds directly on the prepared baking sheet. Toss them well with your hands or a spoon to ensure every seed is lightly coated. This oil layer is crucial for even browning and for the seasonings to adhere properly.
- Spread Evenly: Once coated, spread the seeds out in a single layer across the baking sheet. It’s important that they are not overlapping; crowding the pan will cause the seeds to steam rather than roast, impacting their crispiness. Use two baking sheets if necessary to ensure ample space.
- Add Your Chosen Seasonings: Now is the time to sprinkle on your favorite spices! Whether you’re opting for a simple salt and pepper, a savory blend, or a sweet coating, ensure an even distribution over all the seeds.
Creative Seasoning Ideas for Roasted Pumpkin Seeds
The beauty of roasted pumpkin seeds lies in their versatility. They serve as a perfect canvas for an endless array of flavor profiles, allowing you to customize them to your exact preferences. Here are some popular and creative seasoning ideas to inspire your next batch:
Savory Spice Blends
For those who love a classic, savory snack, these combinations are always a hit. The key is to balance flavors that complement the nutty undertones of the seeds.
- Classic Salt & Pepper: Sometimes, less is more. A generous sprinkle of flaky sea salt and freshly ground black pepper is wonderfully simple and highlights the pumpkin seed’s natural taste.
- Garlic & Onion Powder: For an aromatic kick, combine garlic powder and onion powder with salt and pepper. This creates a deeply savory flavor that’s addictive.
- Herb Infusion: Mix in dried herbs like rosemary, thyme, or sage with your salt, pepper, and olive oil. This is especially fitting for a fall-themed snack, reminiscent of Thanksgiving flavors.
- Everything Bagel Seasoning: A trendy and delicious option! This blend of sesame seeds, poppy seeds, dried garlic, dried onion, and salt adds a fantastic texture and bold flavor.
- Parmesan & Garlic: Toss the seeds with olive oil, garlic powder, and then sprinkle with grated Parmesan cheese during the last 5-10 minutes of roasting to prevent burning the cheese.
Spicy Pumpkin Seeds
If you prefer a snack with a bit of heat, these spicy variations are sure to delight. My personal favorite is making spicy roasted pumpkin seeds with homemade taco seasoning.
- Taco Seasoning: Whether homemade or from a packet, taco seasoning (which often includes chili powder, cumin, paprika, and oregano) provides a vibrant, zesty, and moderately spicy flavor.
- Chili-Lime: Combine chili powder (or ancho chile powder for a smoky depth) with a pinch of cayenne pepper and a squeeze of fresh lime juice (add after roasting for best flavor) or lime zest before roasting.
- Smoked Paprika & Cumin: This duo offers a warm, earthy flavor with a hint of smokiness. Add a touch of cayenne for extra heat if desired.
- Curry Powder: For an exotic twist, curry powder introduces a complex blend of spices that is both aromatic and satisfying.
- Cayenne & Garlic Salt: A simple yet potent combination for serious spice lovers. Be mindful of the salt content in garlic salt.
Sweet Pumpkin Seeds
Transform your pumpkin seeds into a delightful dessert or a sweet-and-savory treat. These options are particularly appealing if you have a sweet tooth.
- Cinnamon Sugar: A classic sweet topping. Mix granulated sugar and ground cinnamon, then toss with seeds and olive oil before roasting.
- Brown Sugar & Pumpkin Pie Spice: For ultimate fall vibes, combine brown sugar with a generous amount of pumpkin pie spice (which includes cinnamon, nutmeg, ginger, and cloves).
- Maple Syrup Drizzle: Drizzle a small amount of maple syrup over the seeds along with a sprinkle of salt before roasting. The maple will caramelize beautifully.
- Honey & Sea Salt: A sweet and savory combination. Lightly coat seeds with honey and a dash of sea salt for a delicious contrast.
No matter which seasoning you choose, remember to coat the seeds thoroughly with oil first to ensure the spices stick well and distribute evenly.
Optimal Roasting Temperature and Time for Crunchy Perfection
Achieving that perfect golden-brown crispness in your roasted pumpkin seeds largely depends on finding the right balance of temperature and duration. Through extensive testing, I’ve found that a specific oven setting yields the most consistent and delightful results.
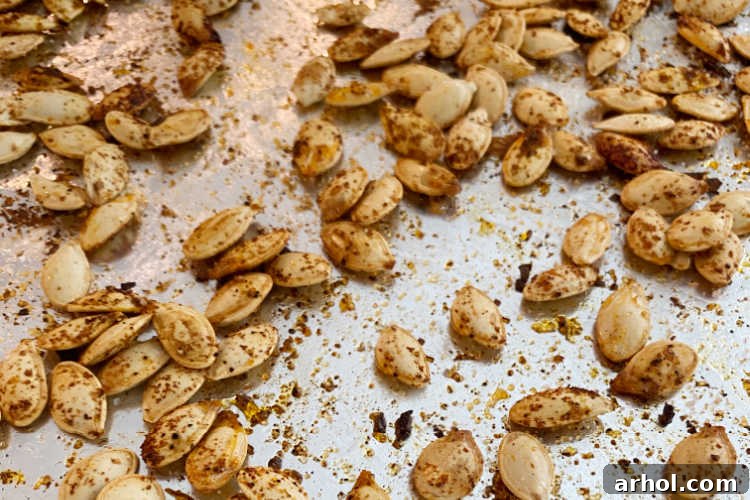
Recommended Temperature: Preheat your oven to 350 degrees Fahrenheit (175 degrees Celsius). This moderate temperature allows the seeds to slowly dry out and roast evenly without burning too quickly.
Recommended Time: Roast the pumpkin seeds for approximately 20 minutes. However, cooking times can vary slightly depending on your oven and the size of your seeds. The key is to stay vigilant.
The Importance of Stirring: To ensure uniform cooking and browning, make sure to stir the seeds at least once, about halfway through the roasting time (around the 10-minute mark). This prevents one side from burning while the other remains pale.
Why 350°F is the Sweet Spot:
- Roasting at 400°F (200°C) or higher often results in seeds that are too crispy, verging on burnt, and can taste bitter. The high heat accelerates the process, making it difficult to achieve a perfect roast.
- Conversely, roasting at 325°F (160°C) or lower tends to take too long, often leading to less crispy results or a longer waiting time than necessary. While they might eventually crisp up, the process can feel tedious.
Signs of Doneness: Your roasted pumpkin seeds are perfectly done when they are:
- Golden Brown: Look for a rich, toasted golden color.
- Crisp to the Touch: They should feel firm and brittle, not flexible.
- Audibly Crunchy: When you remove them from the oven, they should sound dry and crisp.
Always keep an eye on your seeds, especially during the last few minutes, as they can go from perfectly roasted to burnt very quickly. Oven temperatures can fluctuate, so trust your senses – sight, touch, and even sound – to determine when they’re ready.
Variations and Creative Serving Suggestions
This roasted pumpkin seed recipe is incredibly adaptable, allowing for endless customization beyond just the seasonings. Here are some ideas to tailor your pumpkin seeds to your exact preferences and how to best enjoy them:
- Pumpkin Variety Matters: The type of pumpkin you use will influence the seeds. Larger carving pumpkins generally yield larger seeds with a thicker shell, offering a heartier crunch. Smaller “sugar” or pie pumpkins often have smaller, more tender seeds that can be more delicate in texture. Experiment to find your favorite!
- Adjusting Crispiness: If you prefer less crispy seeds (though crisp is generally the goal!), simply reduce the roasting time by a few minutes. Conversely, for an extra-crisp texture, you can add an additional 5 minutes to the roasting time, watching carefully to prevent burning.
- Layering Flavors: For an intense burst of flavor, consider sprinkling a little more seasoning on the seeds immediately after they come out of the oven. The residual heat will help the spices adhere. This works particularly well with flaky sea salt or a bold spice blend.
- Shelled vs. Unshelled: This recipe focuses on roasting pumpkin seeds with their shells on, which provides fiber and a satisfying crunch. If you prefer shelled pumpkin seeds (often called pepitas), you can buy them pre-shelled and roast them with the same methods, but they will cook faster due to their smaller size and lack of a protective shell. Adjust cooking time to about 10-15 minutes at 325°F (160°C).
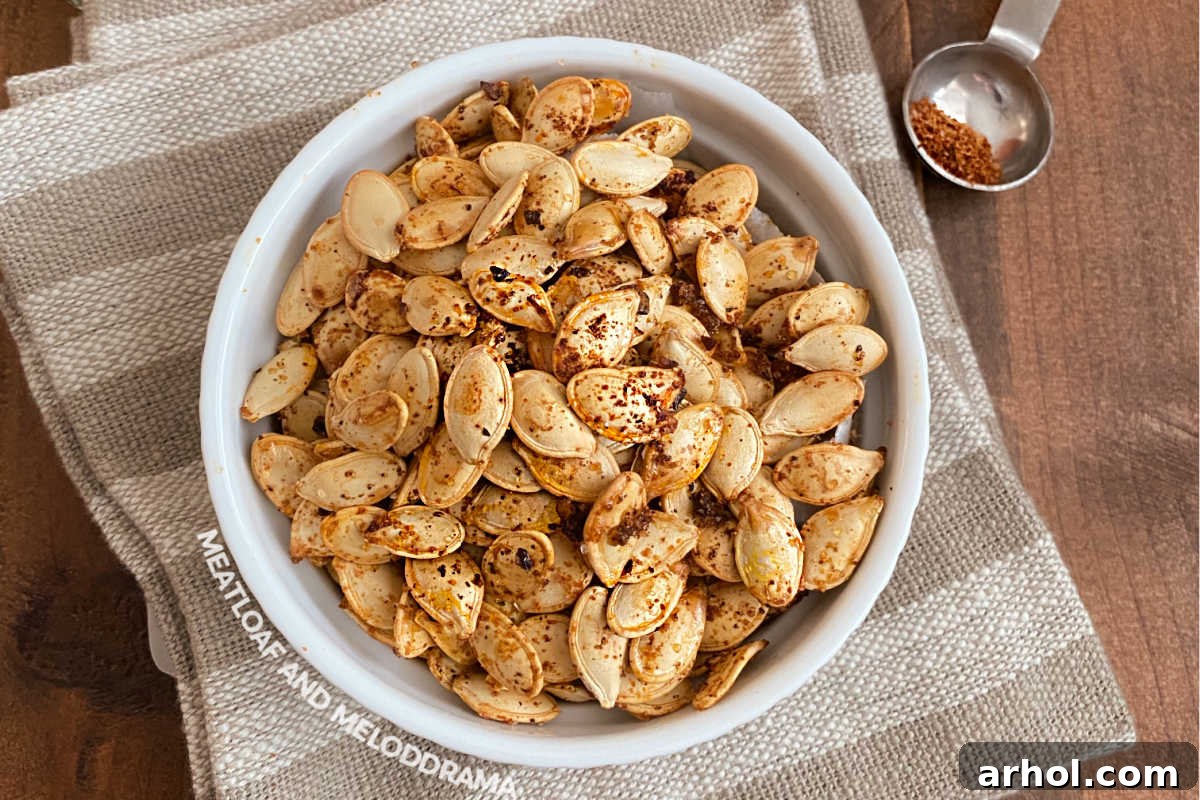
Creative Ways to Enjoy Your Roasted Pumpkin Seeds:
- Snack On Their Own: The most obvious and perhaps best way to enjoy them! They are a perfect grab-and-go snack for any time of day.
- Salad Topping: Add a delightful crunch and a burst of flavor to your favorite salads. Savory or spicy seeds work exceptionally well here.
- Soup Garnish: Sprinkle over creamy pumpkin soup, butternut squash soup, or any other fall-inspired soup for added texture and visual appeal.
- Yogurt or Oatmeal Topping: Sweet pumpkin seeds are fantastic mixed into yogurt, granola, or hot oatmeal for a nutritious breakfast or snack.
- Homemade Trail Mix: Combine with nuts, dried fruit, pretzels, and perhaps some chocolate chips for a customized trail mix.
- Bread & Muffin Add-in: Incorporate them into bread dough, muffin batter, or even cookie dough for an extra layer of flavor and texture.
- Cheese Board Enhancement: Offer a small bowl of savory roasted pumpkin seeds alongside cheeses, crackers, and fruits for a sophisticated touch.
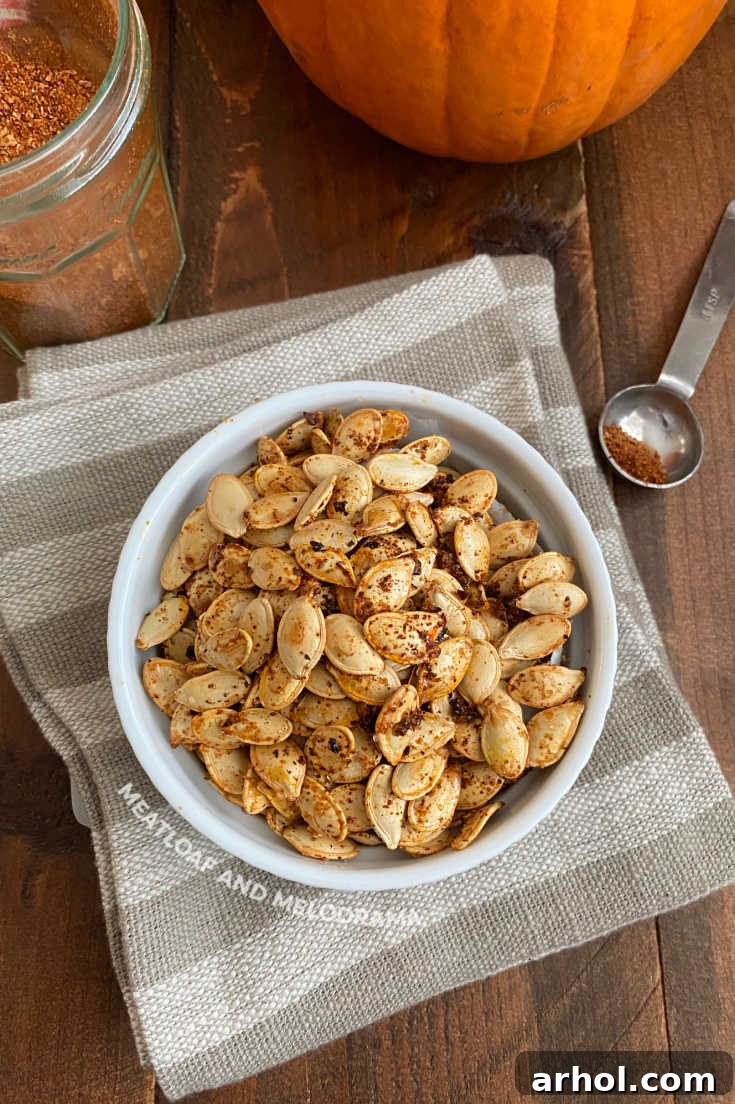
The pumpkin seeds will continue to crisp up as they cool down completely, achieving their ultimate crunchy texture. Aren’t they gorgeous? Now you’re ready to enjoy this versatile and delicious snack!
Storage Tips for Maximum Freshness
Once your roasted pumpkin seeds have cooled completely, proper storage is key to maintaining their delicious crunch and flavor for as long as possible. Fortunately, they are quite easy to store.
- Airtight Container is Essential: Always store roasted pumpkin seeds in an airtight container or a high-quality zip-top bag. Exposure to air is the enemy of crispiness, as it allows moisture to seep in, making the seeds stale and soft.
- Room Temperature Storage: For immediate consumption, perfectly roasted and thoroughly cooled pumpkin seeds can be kept at room temperature in an airtight container for up to one week. Ensure they are stored in a cool, dry place away from direct sunlight.
- Refrigeration for Extended Freshness: If you’ve made a larger batch or want to extend their shelf life, place the dry, roasted seeds in an airtight container in the refrigerator. This can keep them fresh and crispy for up to two weeks.
- Freezing for Long-Term Storage: For even longer storage, you can freeze roasted pumpkin seeds. Once completely cool, spread them in a single layer on a baking sheet and freeze until solid (about 1-2 hours). Then, transfer them to a freezer-safe airtight container or bag. They can be stored in the freezer for up to 3-6 months. Thaw at room temperature or quickly re-crisp in a low oven if desired.
- Moisture Check: Before storing, always ensure the seeds are completely cool and dry. Any residual warmth or moisture can create condensation within the container, leading to sogginess and potentially mold.
Frequently Asked Questions (FAQ)
Yes, washing pumpkin seeds is highly recommended and truly the best way to remove the sticky, stringy pumpkin pulp off the seeds. While you don’t need to remove every single speck, cleaning them thoroughly prevents any unwanted texture or flavor from the raw pumpkin flesh. Any tiny bits of pulp that remain are perfectly fine; they will dry out and even caramelize slightly in the oven, adding a subtle sweetness.
For optimal cleaning, especially if your seeds are particularly fibrous, you can let them soak in cold water. Soaking overnight in the refrigerator is an excellent method, as it helps to loosen even the most stubborn pumpkin strings, making them much easier to rinse off. There’s no need to roast them right away after soaking; just make sure to pat them thoroughly dry before baking.
Absolutely! Roasted pumpkin seeds are a powerhouse of nutrition. They are an excellent source of healthy fats, protein, fiber, and various vitamins and minerals, including magnesium, zinc, and iron. They make a fantastic guilt-free snack that can support heart health, provide sustained energy, and aid in digestion. Just be mindful of your chosen seasonings, especially if adding a lot of sugar or excess salt.
Yes, you can definitely eat the shell of roasted pumpkin seeds! In fact, most people do. The roasting process makes the shell brittle and crunchy, adding a significant amount of fiber to your snack. It’s perfectly safe and contributes to the satisfying texture. If you prefer shelled pumpkin seeds (known as pepitas), you can purchase them already shelled and roast them, but they won’t have the same fibrous crunch.
There are a few common reasons why pumpkin seeds might not turn out crispy: 1) Insufficient drying: Ensure seeds are completely dry before oiling and seasoning. Any moisture will cause them to steam. 2) Crowding the baking sheet: Spreading seeds in a single layer without overlap is crucial for even roasting. 3) Oven temperature too low: While 350°F is ideal, some ovens run cool. Ensure your oven is accurately preheated. 4) Not roasting long enough: Continue roasting until golden brown and audibly crisp, stirring halfway through.
How to Make Roasted Pumpkin Seeds
By: Dee
Learn how to make Roasted Pumpkin Seeds with this foolproof method. This easy pumpkin seeds recipe makes a delicious, crunchy, healthy snack that is perfect for fall!
Ingredients
- 1 cup raw pumpkin seeds, rinsed and dried (amount may vary based on pumpkin size)
- 1 tablespoon olive oil
- 1 teaspoon taco seasoning (or your preferred spice blend)
- Pinch of sea salt and black pepper (adjust to taste)
Instructions
- Preheat oven to 350 degrees Fahrenheit (175°C).
- Line a rimmed baking sheet with parchment paper or aluminum foil for easy cleanup.
- Place the cleaned and thoroughly dried pumpkin seeds on the prepared baking sheet. Drizzle with olive oil and toss to lightly coat all the seeds.
- Sprinkle sea salt, black pepper, and taco seasoning (or your chosen spices) over the seeds. Spread them evenly on the baking sheet in a single layer, ensuring they are not overlapping.
- Bake for 20 minutes, stirring the seeds at least once halfway through (around the 10-minute mark), or until they are golden brown and crisp.
- Remove from the oven and allow the roasted pumpkin seeds to cool completely on the baking sheet before eating. They will continue to crisp as they cool.
Notes
- The exact amount of pumpkin seeds you get will vary depending on the size of your pumpkin.
- Feel free to experiment with any of your favorite spices or seasoning blends.
- Store any leftover roasted pumpkin seeds in an airtight container or zip-top bag at room temperature for up to a week, or in the refrigerator for up to two weeks.
Nutrition (Approximation per serving)
Calories: 48kcal, Carbohydrates: 1g, Protein: 2g, Fat: 5g, Saturated Fat: 1g, Sodium: 1mg, Potassium: 52mg, Fiber: 1g, Sugar: 1g, Vitamin C: 1mg, Calcium: 3mg, Iron: 1mg
Nutrition information is automatically calculated and should only be used as an approximation.
Additional Info
We hope this guide inspires you to embrace the tradition of roasting pumpkin seeds! It’s a simple pleasure that truly embodies the spirit of fall. These crunchy, flavorful bites are not just a snack; they’re a testament to making the most of every harvest bounty. Share your creations and favorite seasoning twists in the comments below – we’d love to hear from you!
Hungry for more pumpkin recipes and other delightful autumn treats? Don’t miss out on these delicious ideas:
- Easy Savory Pumpkin Soup
- Instant Pot Pumpkin Soup
- Easy Pumpkin Dump Cake
- No-Bake Pumpkin Cheesecake Pie
- Best Easy Pumpkin Muffins
- Instant Pot Pumpkin Cheesecake
For more easy recipes for pumpkin season and beyond, be sure to sign up for our weekly newsletter to get the latest culinary inspiration delivered straight to your inbox!